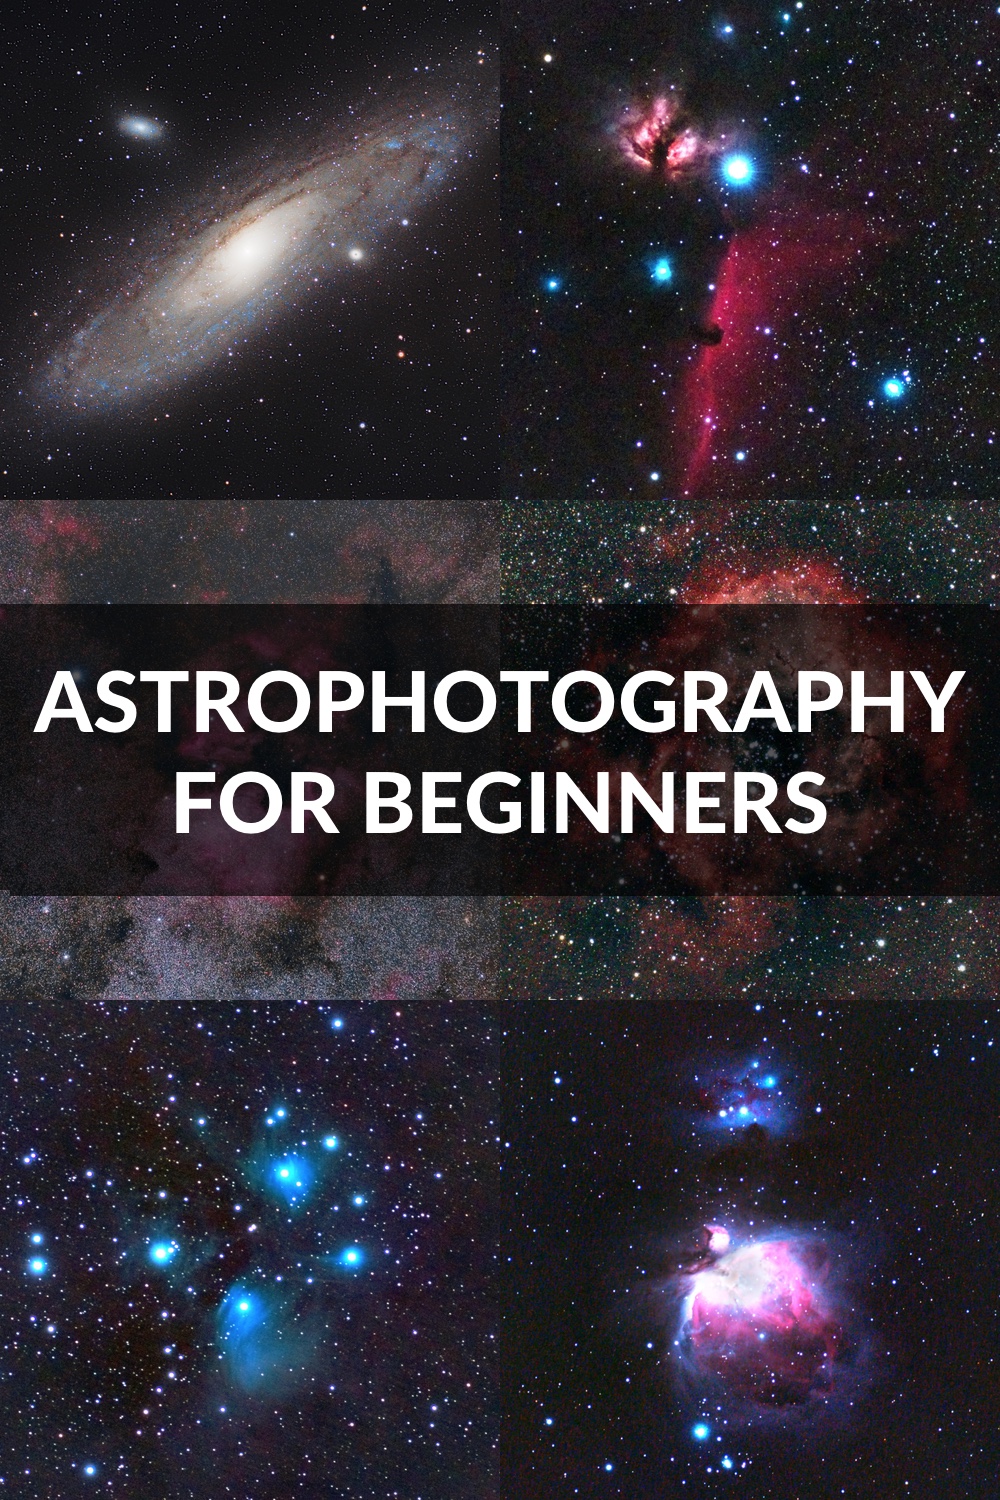
Welcome to "Astrophotography for Beginners" - the ultimate beginner guide to backyard astro-imaging! Have you always wanted to take pictures of nebulae, galaxies, and stars, but you don't know anything or just a bit of the topic? Are you thinking about buying your first astrophotography camera (DSLR or CCS) or a telescope but don't know where to start? Or maybe you have some photography equipment, but you are not sure how to use it for astrophotography? No worries. Make yourself a drink (of your choice), sit, and relax. In this "Astrophotography for Beginners" guide, I will introduce you to the fantastic world of shooting the stars with a DSLR camera.
Jump to:
Astrophotography for Beginners - Basics
Quick Key-Points Summary
- The goal of astrophotography is to photograph astronomical objects - stars, planets, galaxies, nebulae, etc.
- The most basic astrophotography setup:
- interchangeable lens DSLR/mirrorless camera with a manual operating mode
- fast (f/2.8 or less), wide-angle (8-23mm) lens
- tripod
- Photographing from dark places (mountains, villages) is recommended, although it's possible to do astrophotography even from the highly light-polluted centers of huge cities.
- The key to amazing astrophotographs is post-processing. All the source signal is hidden in the raw image, revealing it is a skill you can obtain.
- The easiest and most fun Deep-Sky Objects (DSOs) to photograph are Orion Nebula, Andromeda Galaxy, and the Pleiades Star Cluster.
What Is Astrophotography
Astrophotography is a genre of photography which goal is to capture astronomical objects in the night sky (well, photographing the Sun can be counted as astrophotography too, but here we will focus on the things you can see when skies are dark). So if your images portray nebulae, galaxies, or stars (this is easy!), then you are an astrophotographer!
Who Invented Astrophotography
Astrophotography has many fathers, but the first is the French artist and photographer Louis-Jacques-Mandé Daguerre. He photographed the Moon in 1840 (!) for the first time. You can read more about astrophotography history here.
Types of Astrophotography
Landscape
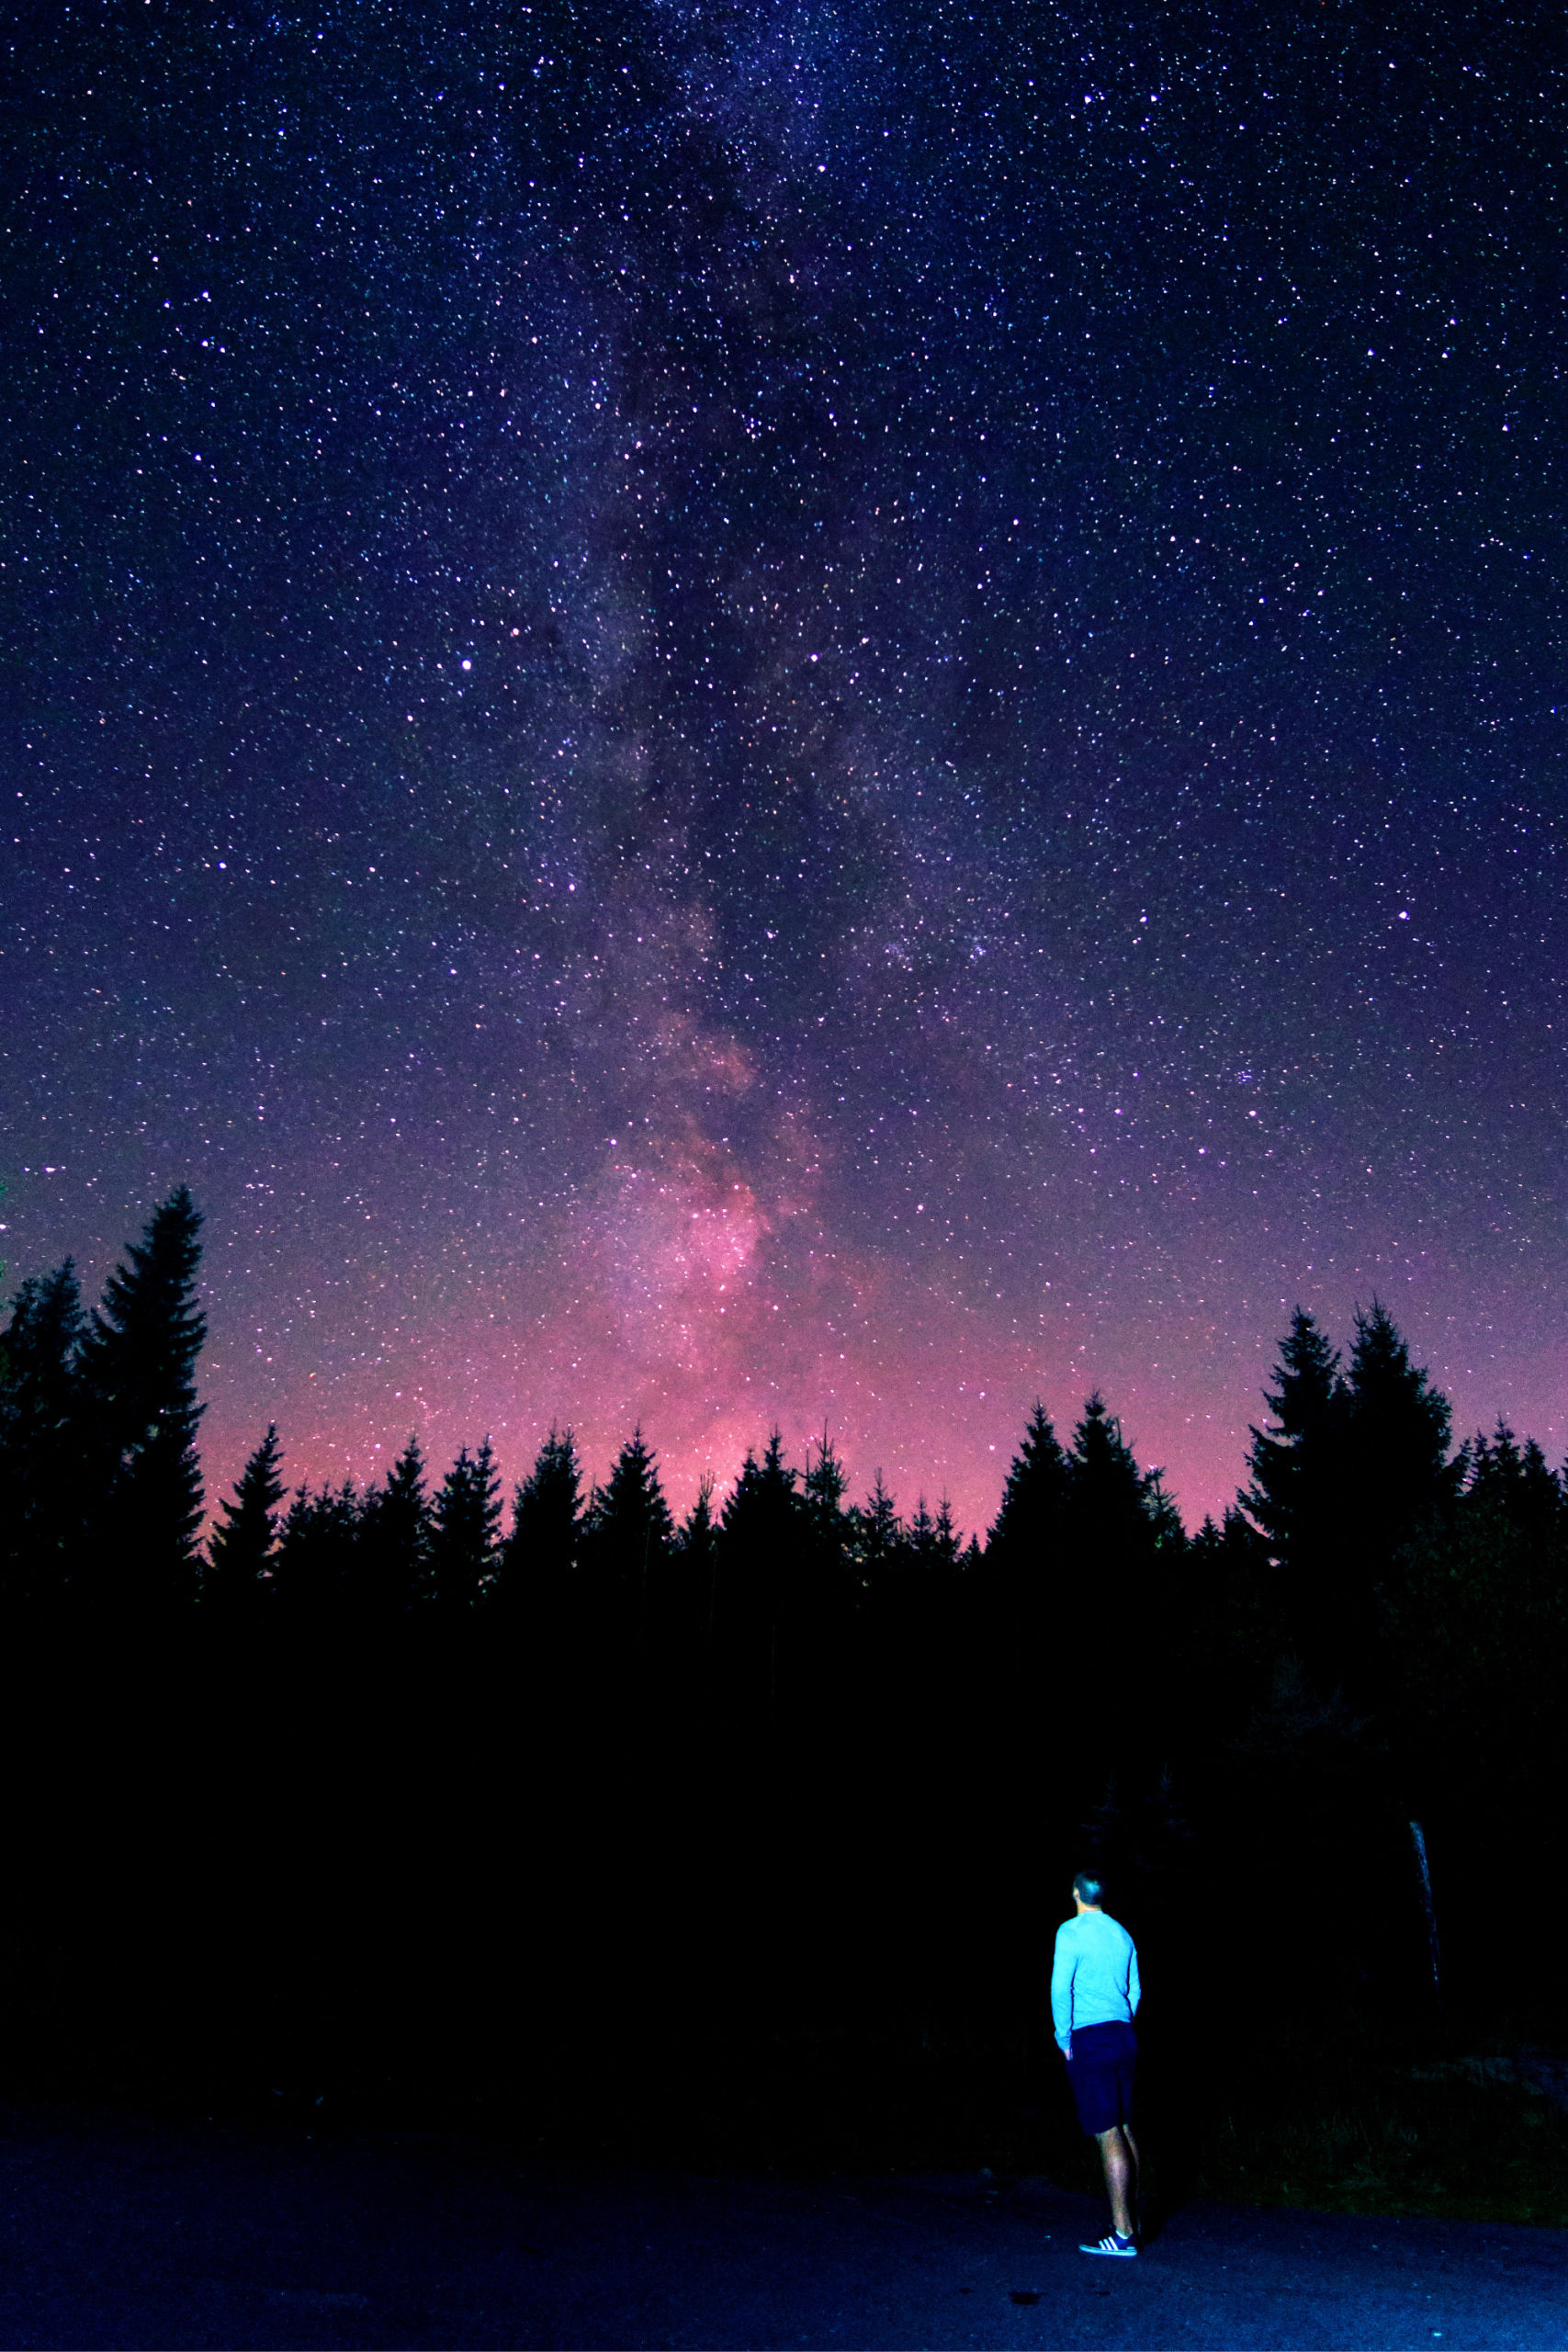
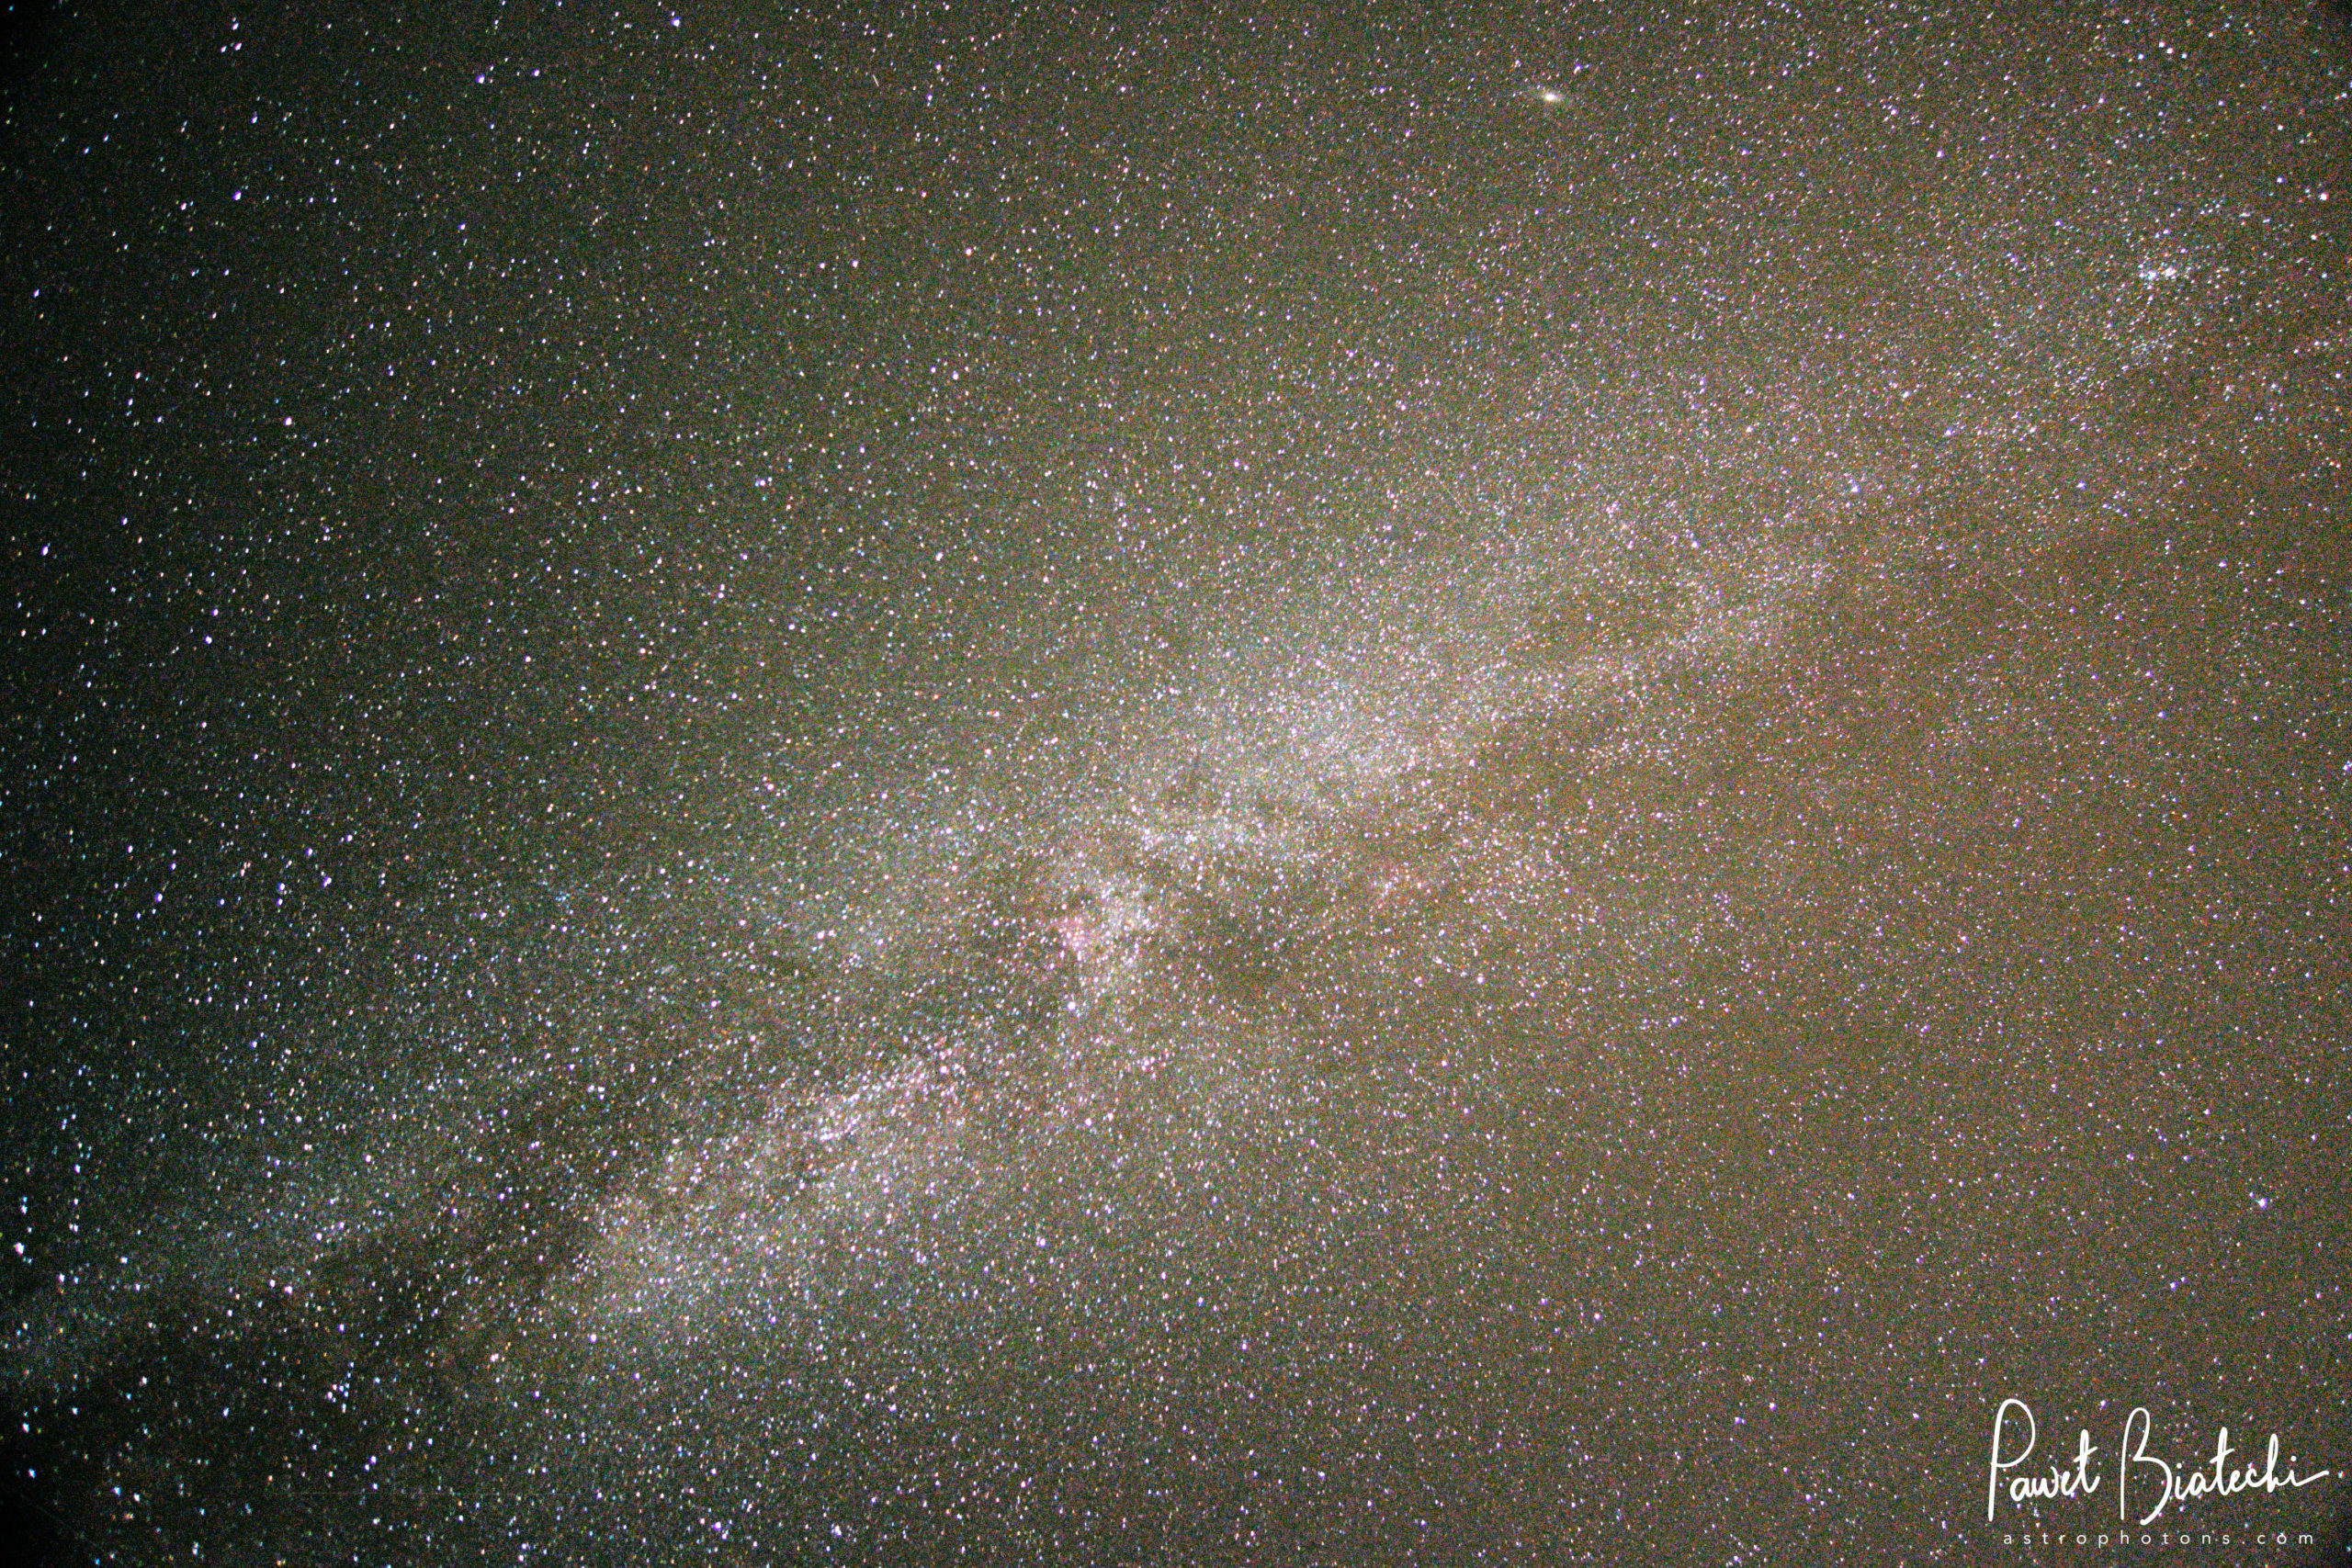
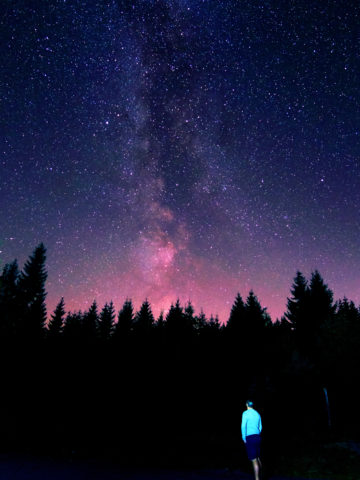
Widefield landscape shots of the Milky Way are the most popular form of astrophotography out there. It's because of two reasons:
- It's the easiest. You just place your astrophotography setup anywhere under the clear sky, and you are ready to go.
- It requires the least gear - only the camera, lens, and tripod (read more on Milky Way photography gear).
This is the genre where I started my astrophotography adventure, and I recommend every beginner take it this way. It's not hard, and the effects can be awe-inspiring.
Planetary
Planets are another popular subject among astrophotographers. This category includes the Moon, Mars, Jupiter, Saturn (with unique rings), etc. Although capturing the Moon is relatively easy, more minor planets are a more significant challenge.
Deep-Sky
This is what I (and MANY others) like the most! Nebulae, galaxies, star clusters, and other objects which are usually not visible to the naked eye - all of them are called Deep-Sky Objects (DSO). DSOs photography is my favorite type of astrophotography, and this blog is focused mainly on them.

Astronomy Basics for Astrophotographers
To be a successful astrophotographer, you have to know a few things about astronomy. When I was younger, I used to think that I had to be an expert, a certified astronomer, to produce those stunning images of the deep-sky objects. Boy, so wrong I was. You don't have to have an astronomy degree, yet to be consistent in your quality astrophotography work, you need to understand a few facts.
The Earth is Rotating Around Its Axis
What does it mean for an astrophotographer?
Typical day-photographers doing street, landscape, macro, or wedding photography make exposures fractions of a second long. In astrophotography, our single exposures are counted in minutes, not seconds.
You may not notice this with a naked eye, but in just one minute, stars on the night sky trail. And, if not compensated by a star tracker device (an equatorial mount), those trails will be exposed to your picture (which is not what you want, except when you are doing it intentionally to produce star-trailed astro pictures).
The Earth Orbits The Sun
In astrophotography, this means seasonality. Some deep-sky objects are available to photograph only during Summer, and some are winter-only astrophotography targets. A few examples:
- Spring (in astrophotography called the galaxy season): Bode, Cigar, Sombrero, and Pinwheel Galaxies
- Summer: Great Hercules Cluster, Lagoon, Trifid, Eagle, and Swan Nebulae
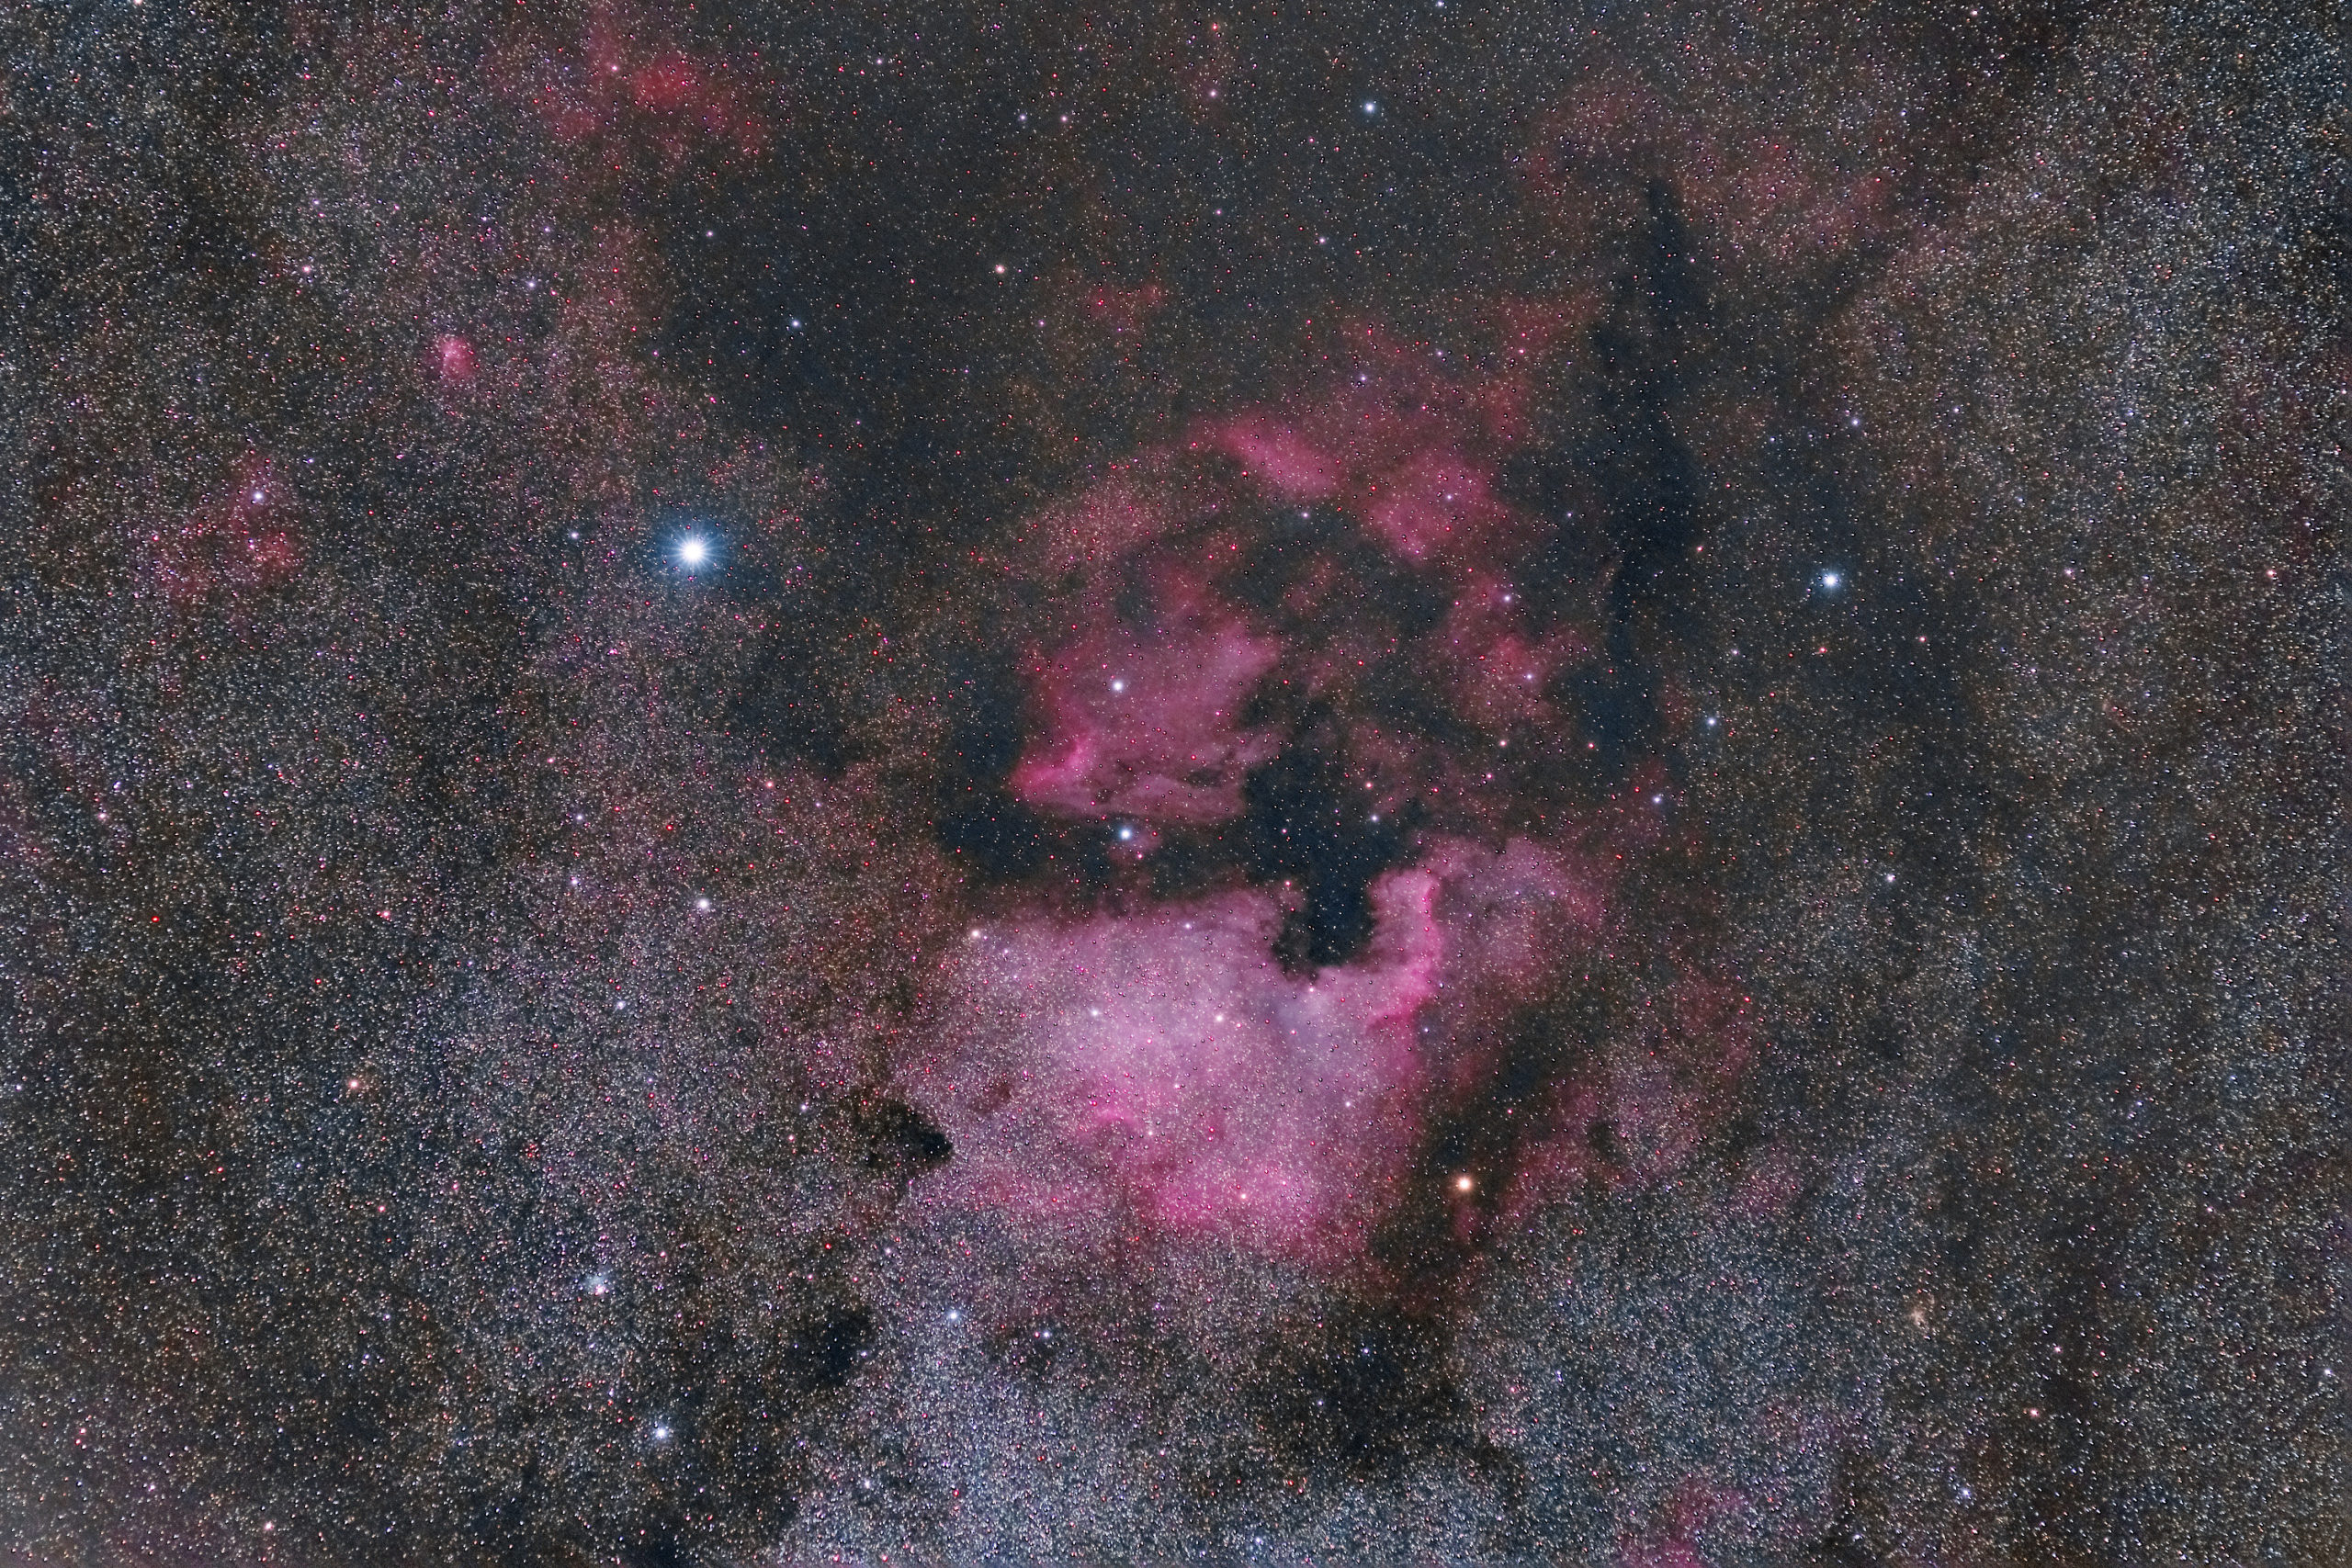
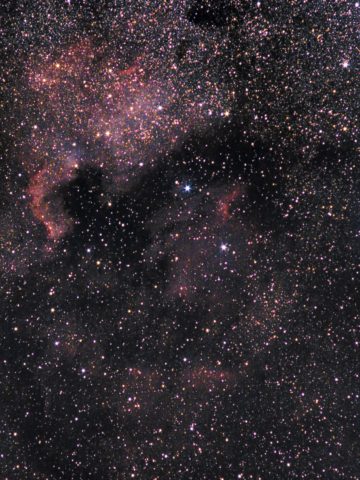
- Fall/Autumn: Andromeda Galaxy, North America Nebula, Veil Nebula
- Winter: Orion Nebula, Pleiades Star Cluster, Rosette Nebula, Heart Nebula, and California Nebulae
Check out the complete list of astrophotography targets by month.
For example, the Milky Way galactic core (the brightest part of the Milky Way) is best seen during Summer to Autumn (on the Northern Hemisphere).
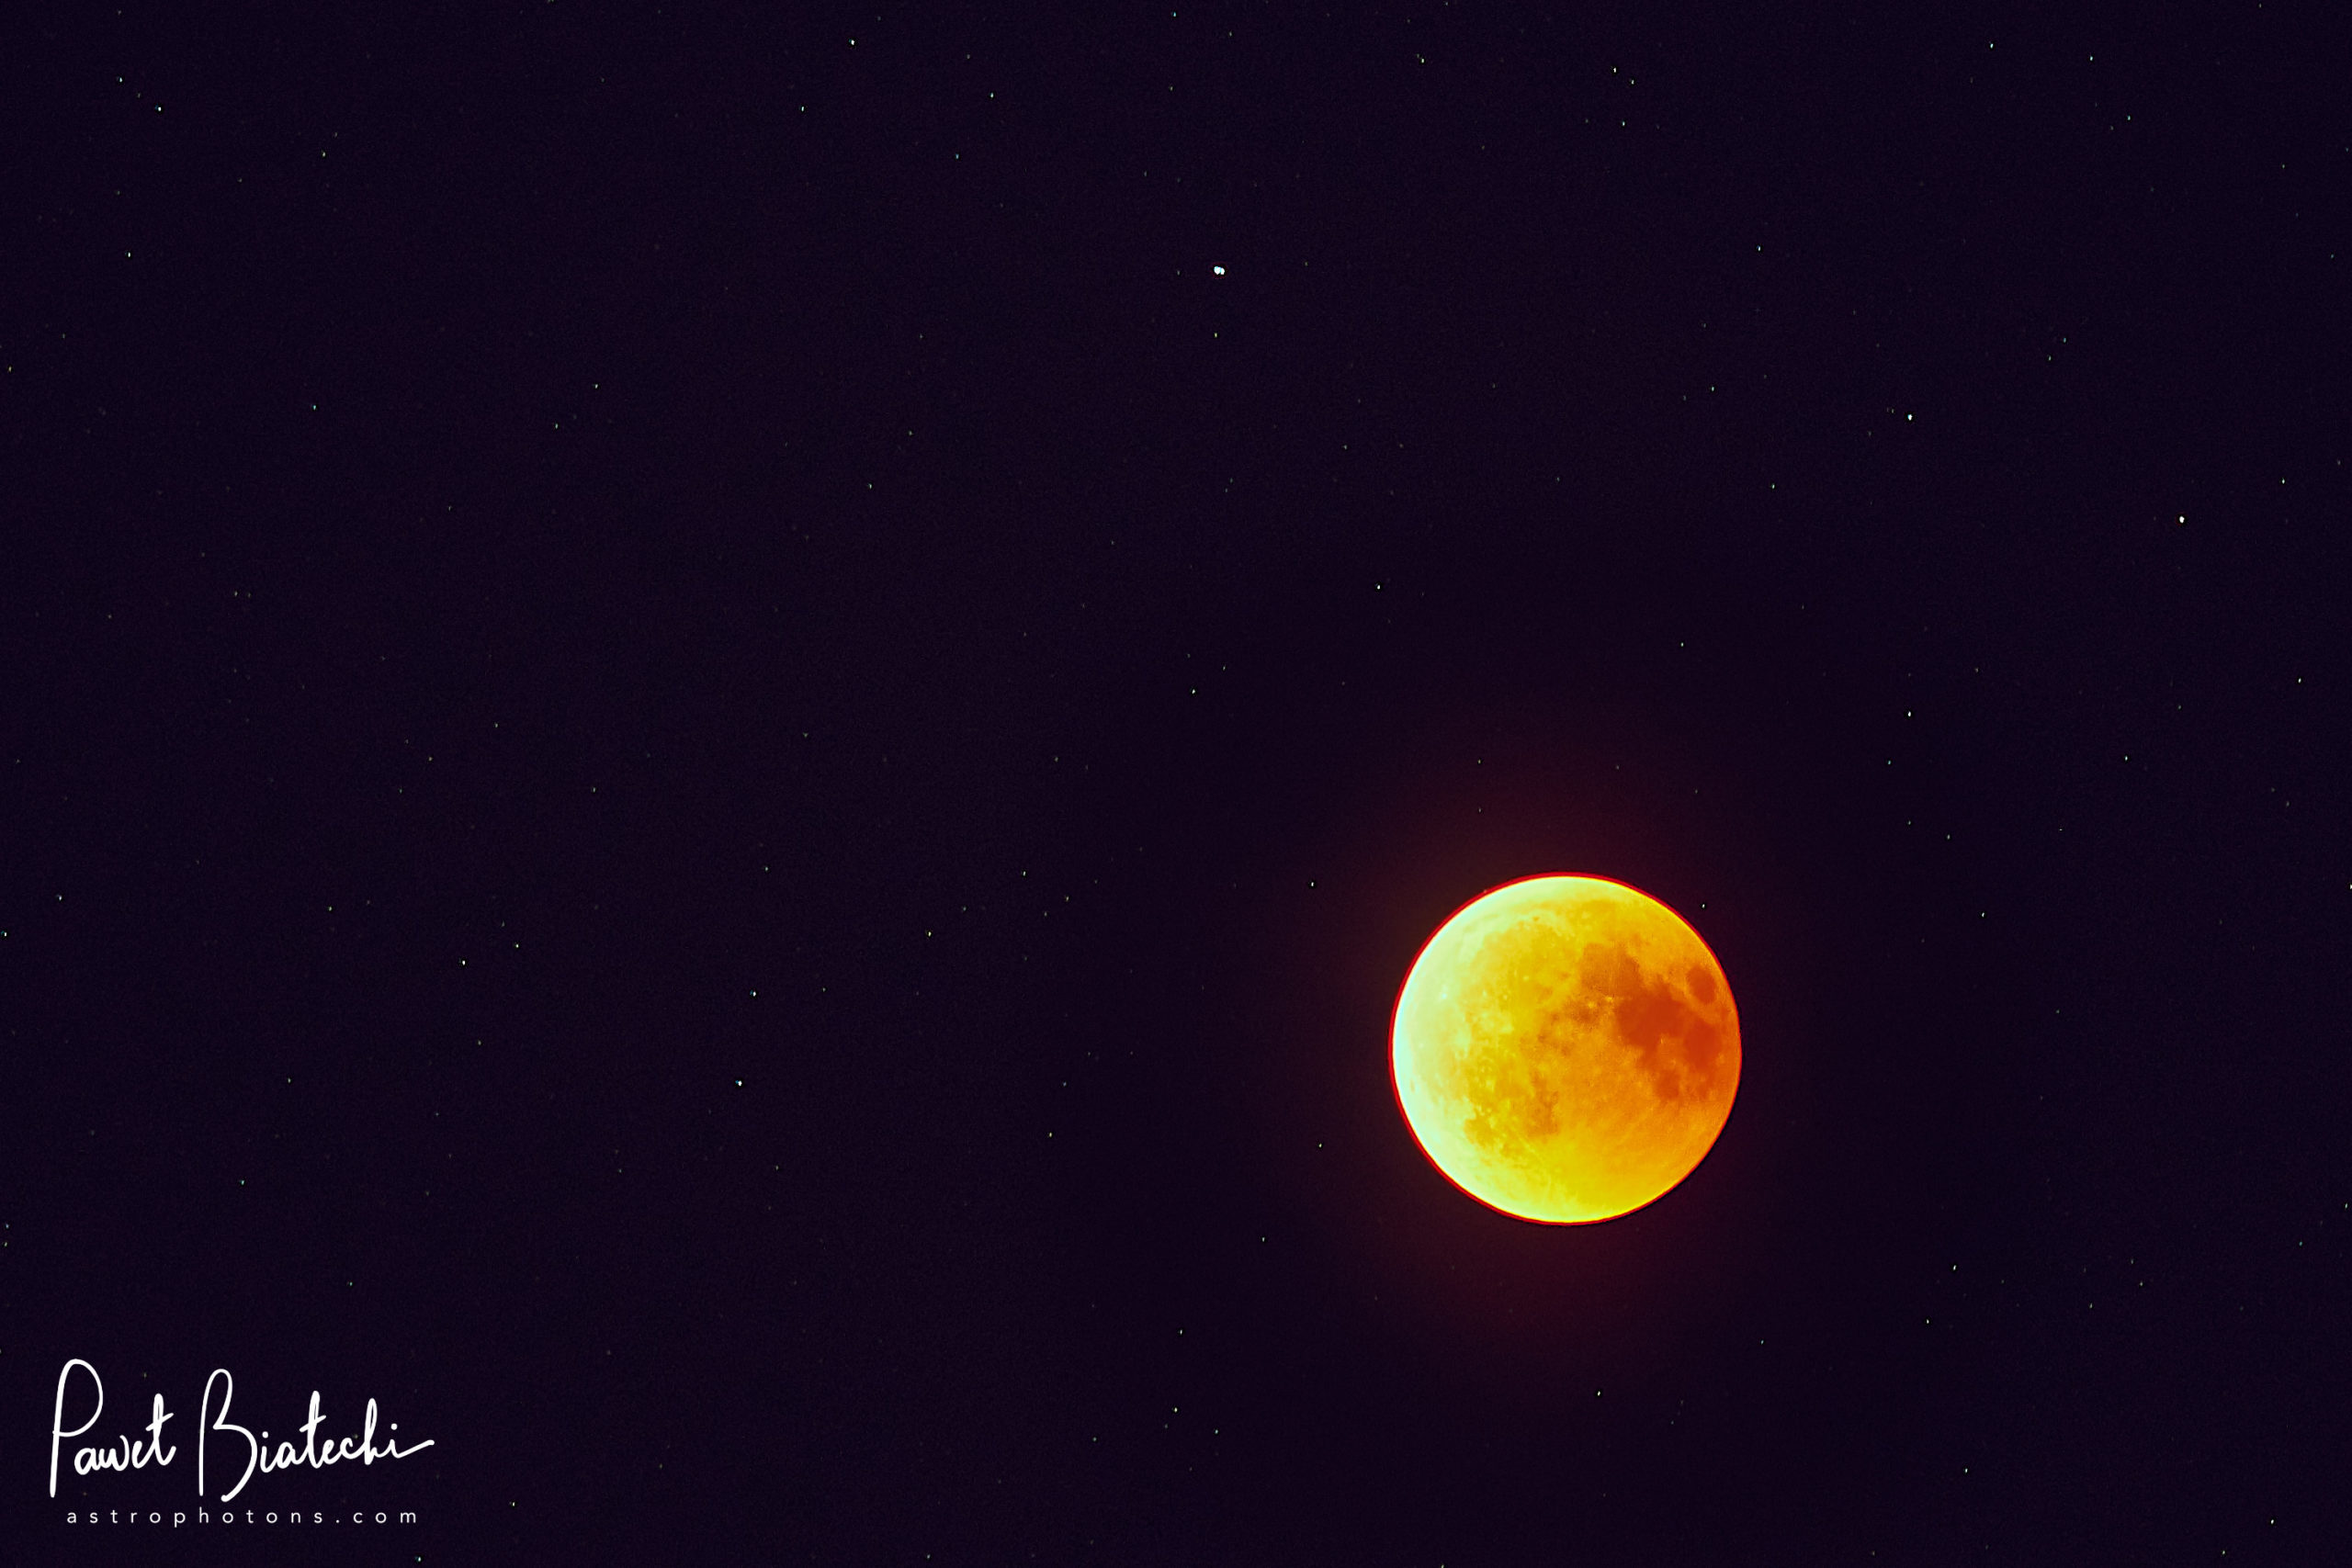
The Moon Orbits The Earth and it Has Phases
Photographing deep-sky objects during the full Moon is tricky. It's doable (using specialized narrowband filters, which block most of the spectrum), but it's best to wait for a moonless night (or a New Moon). Then, the results will be better (the background on the picture will be darker, and faint nebulae details will be more visible).
How to Find Polaris (The North Star) and why is This so Important
Spotting the North Star (Polaris) is probably the most crucial skill for every astrophotographer out there. Without knowing where the North Star is, you can't fast and correct set up your equatorial mount (there are advanced techniques to align your mount without seeing Polaris like the drift-align method, but they require more time). Luckily, finding Polaris is relatively easy.
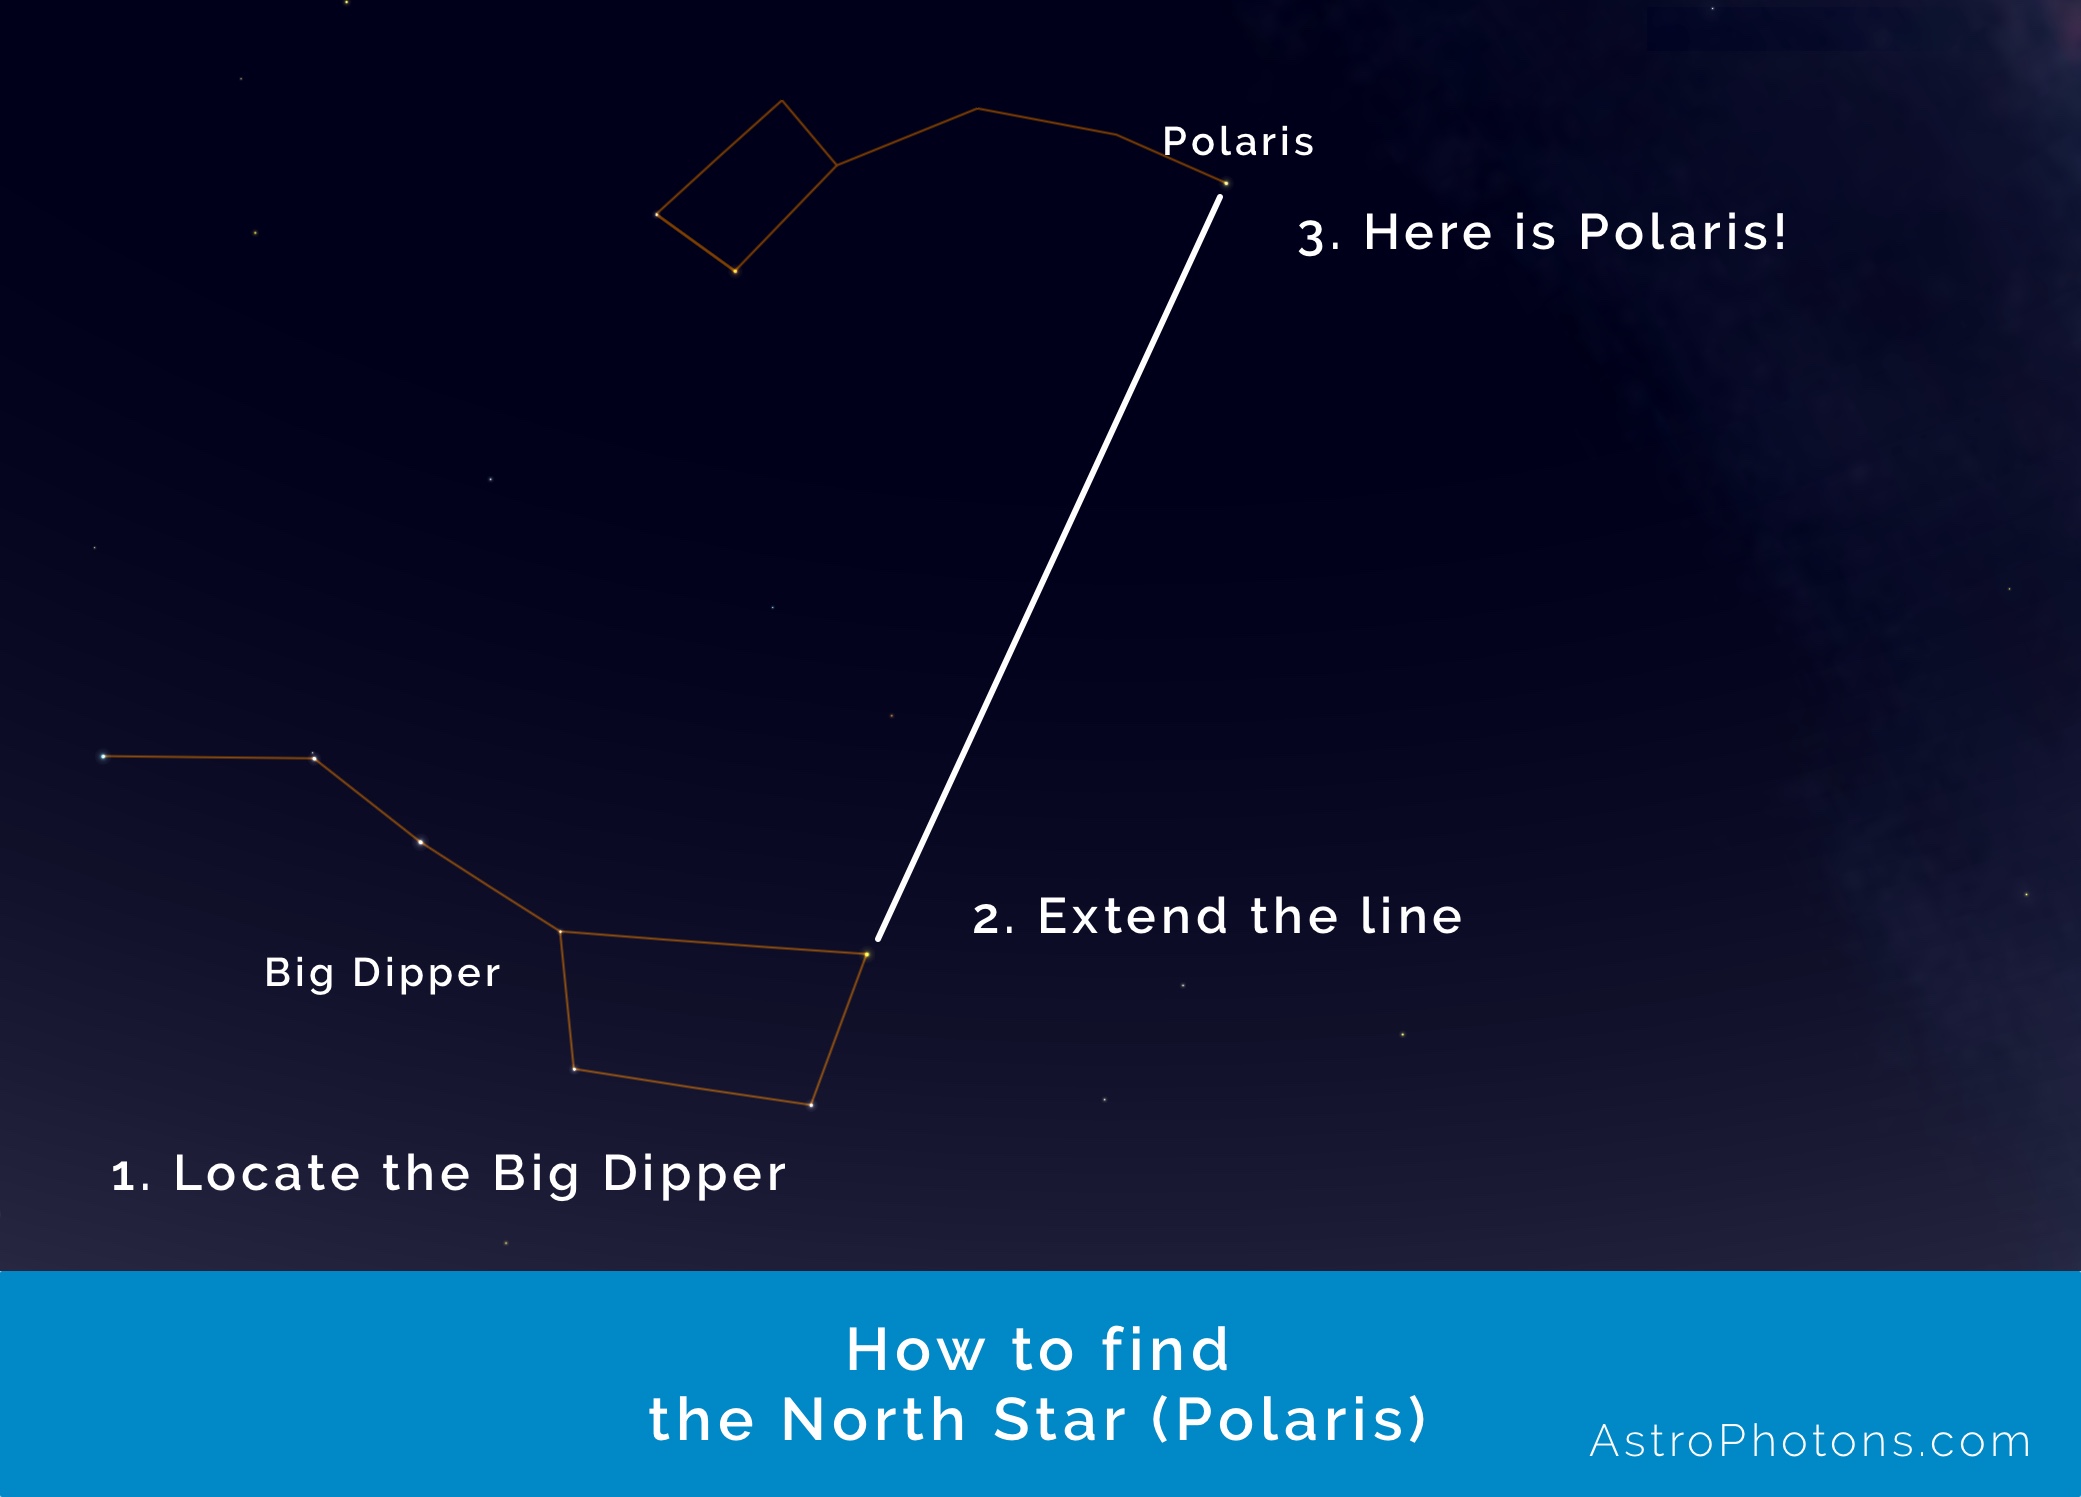
It may take some time initially, but after a few sessions, you will start seeing Polaris immediately. Of course, if you still have trouble finding the North Star, you can always use a mobile planetary app.
Astrophotography Gear
Astrophotography setup consists of many individual pieces. Every astrophotographer has their preferences and has built their rig from different parts.
There are many factors you will take into consideration when you are building your imaging rig:
- Price. This one is obvious. The deeper your pocket is, the better gear you can acquire.
- Mobility. Some people build stationary observatories in their backyards and some travel to dark-sky areas with their gear. The latter one will prefer a lighter setup.
- Quality of the sky in your area. Depending on the amount of light pollution in your photographing spot, you may be forced to use specific cameras (mono CMOS/CCD).
- Compatibility with specific software (eg. Windows, macOS, or Linux, depending on what type of computer you use - or maybe you will buy a whole new PC setup just for astrophotography. Post-processing can be power-consuming.)
So before you spend your money on astrophotography gear, find out what are your real needs and goals.
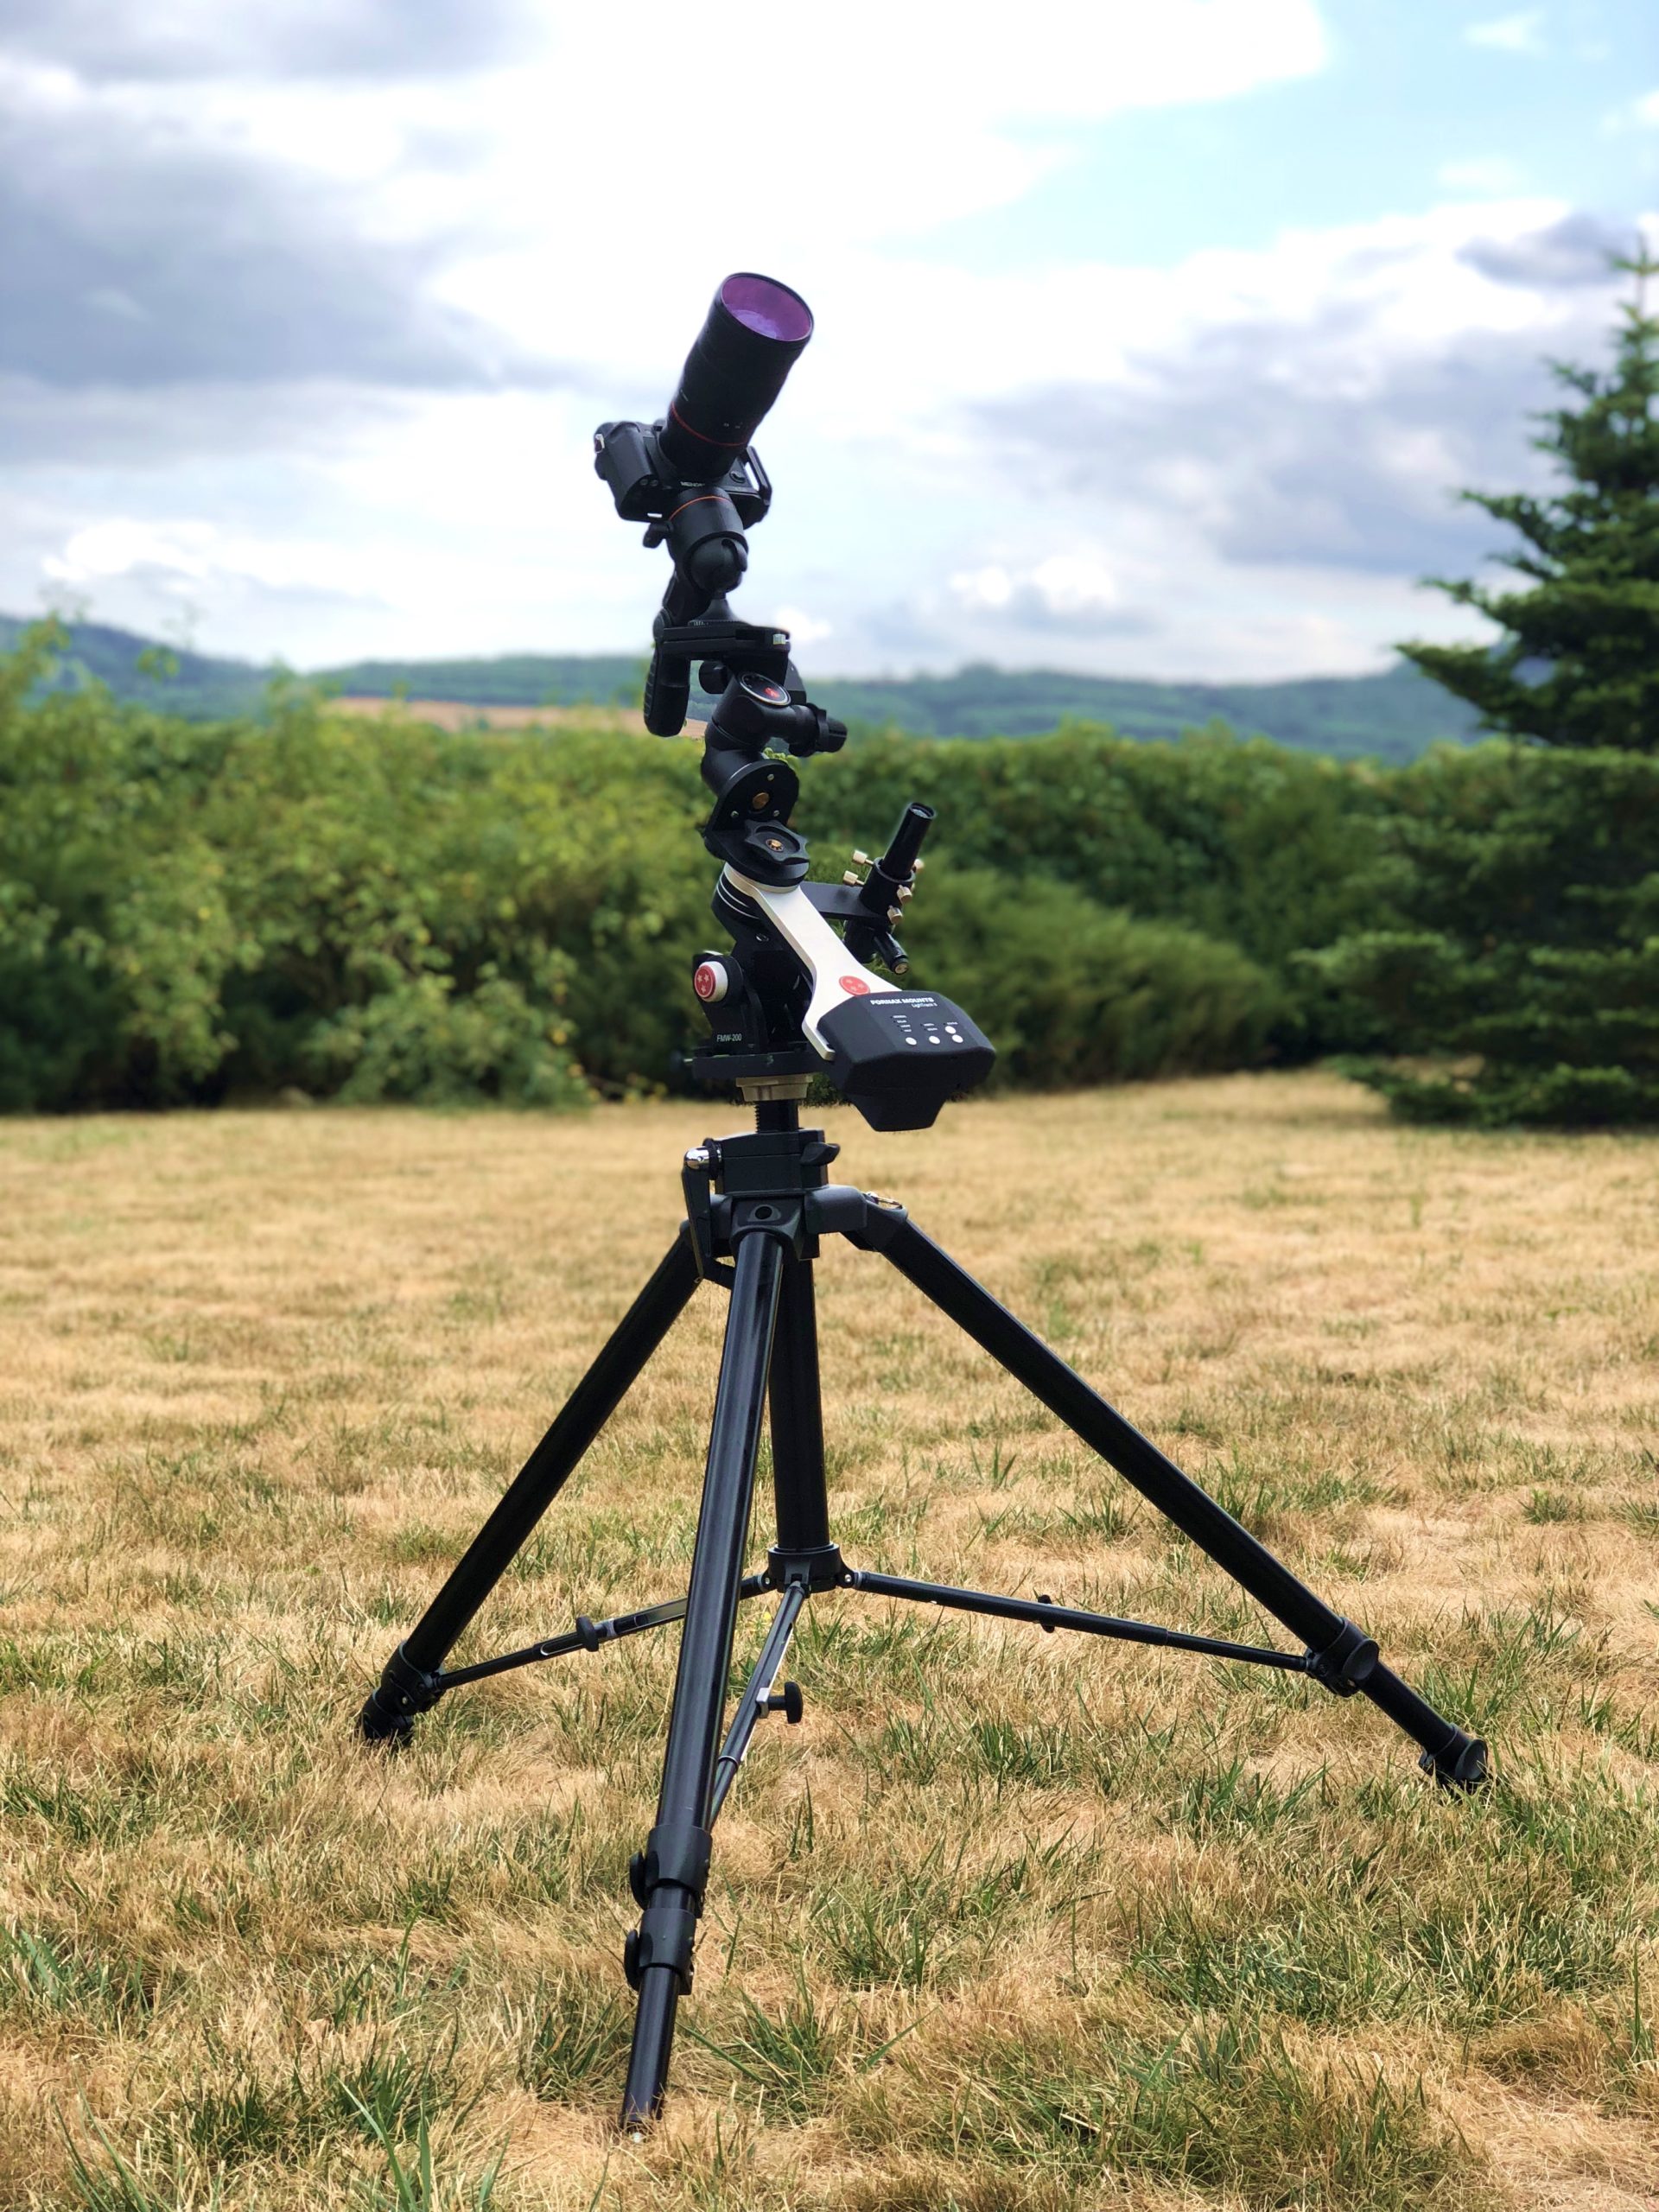
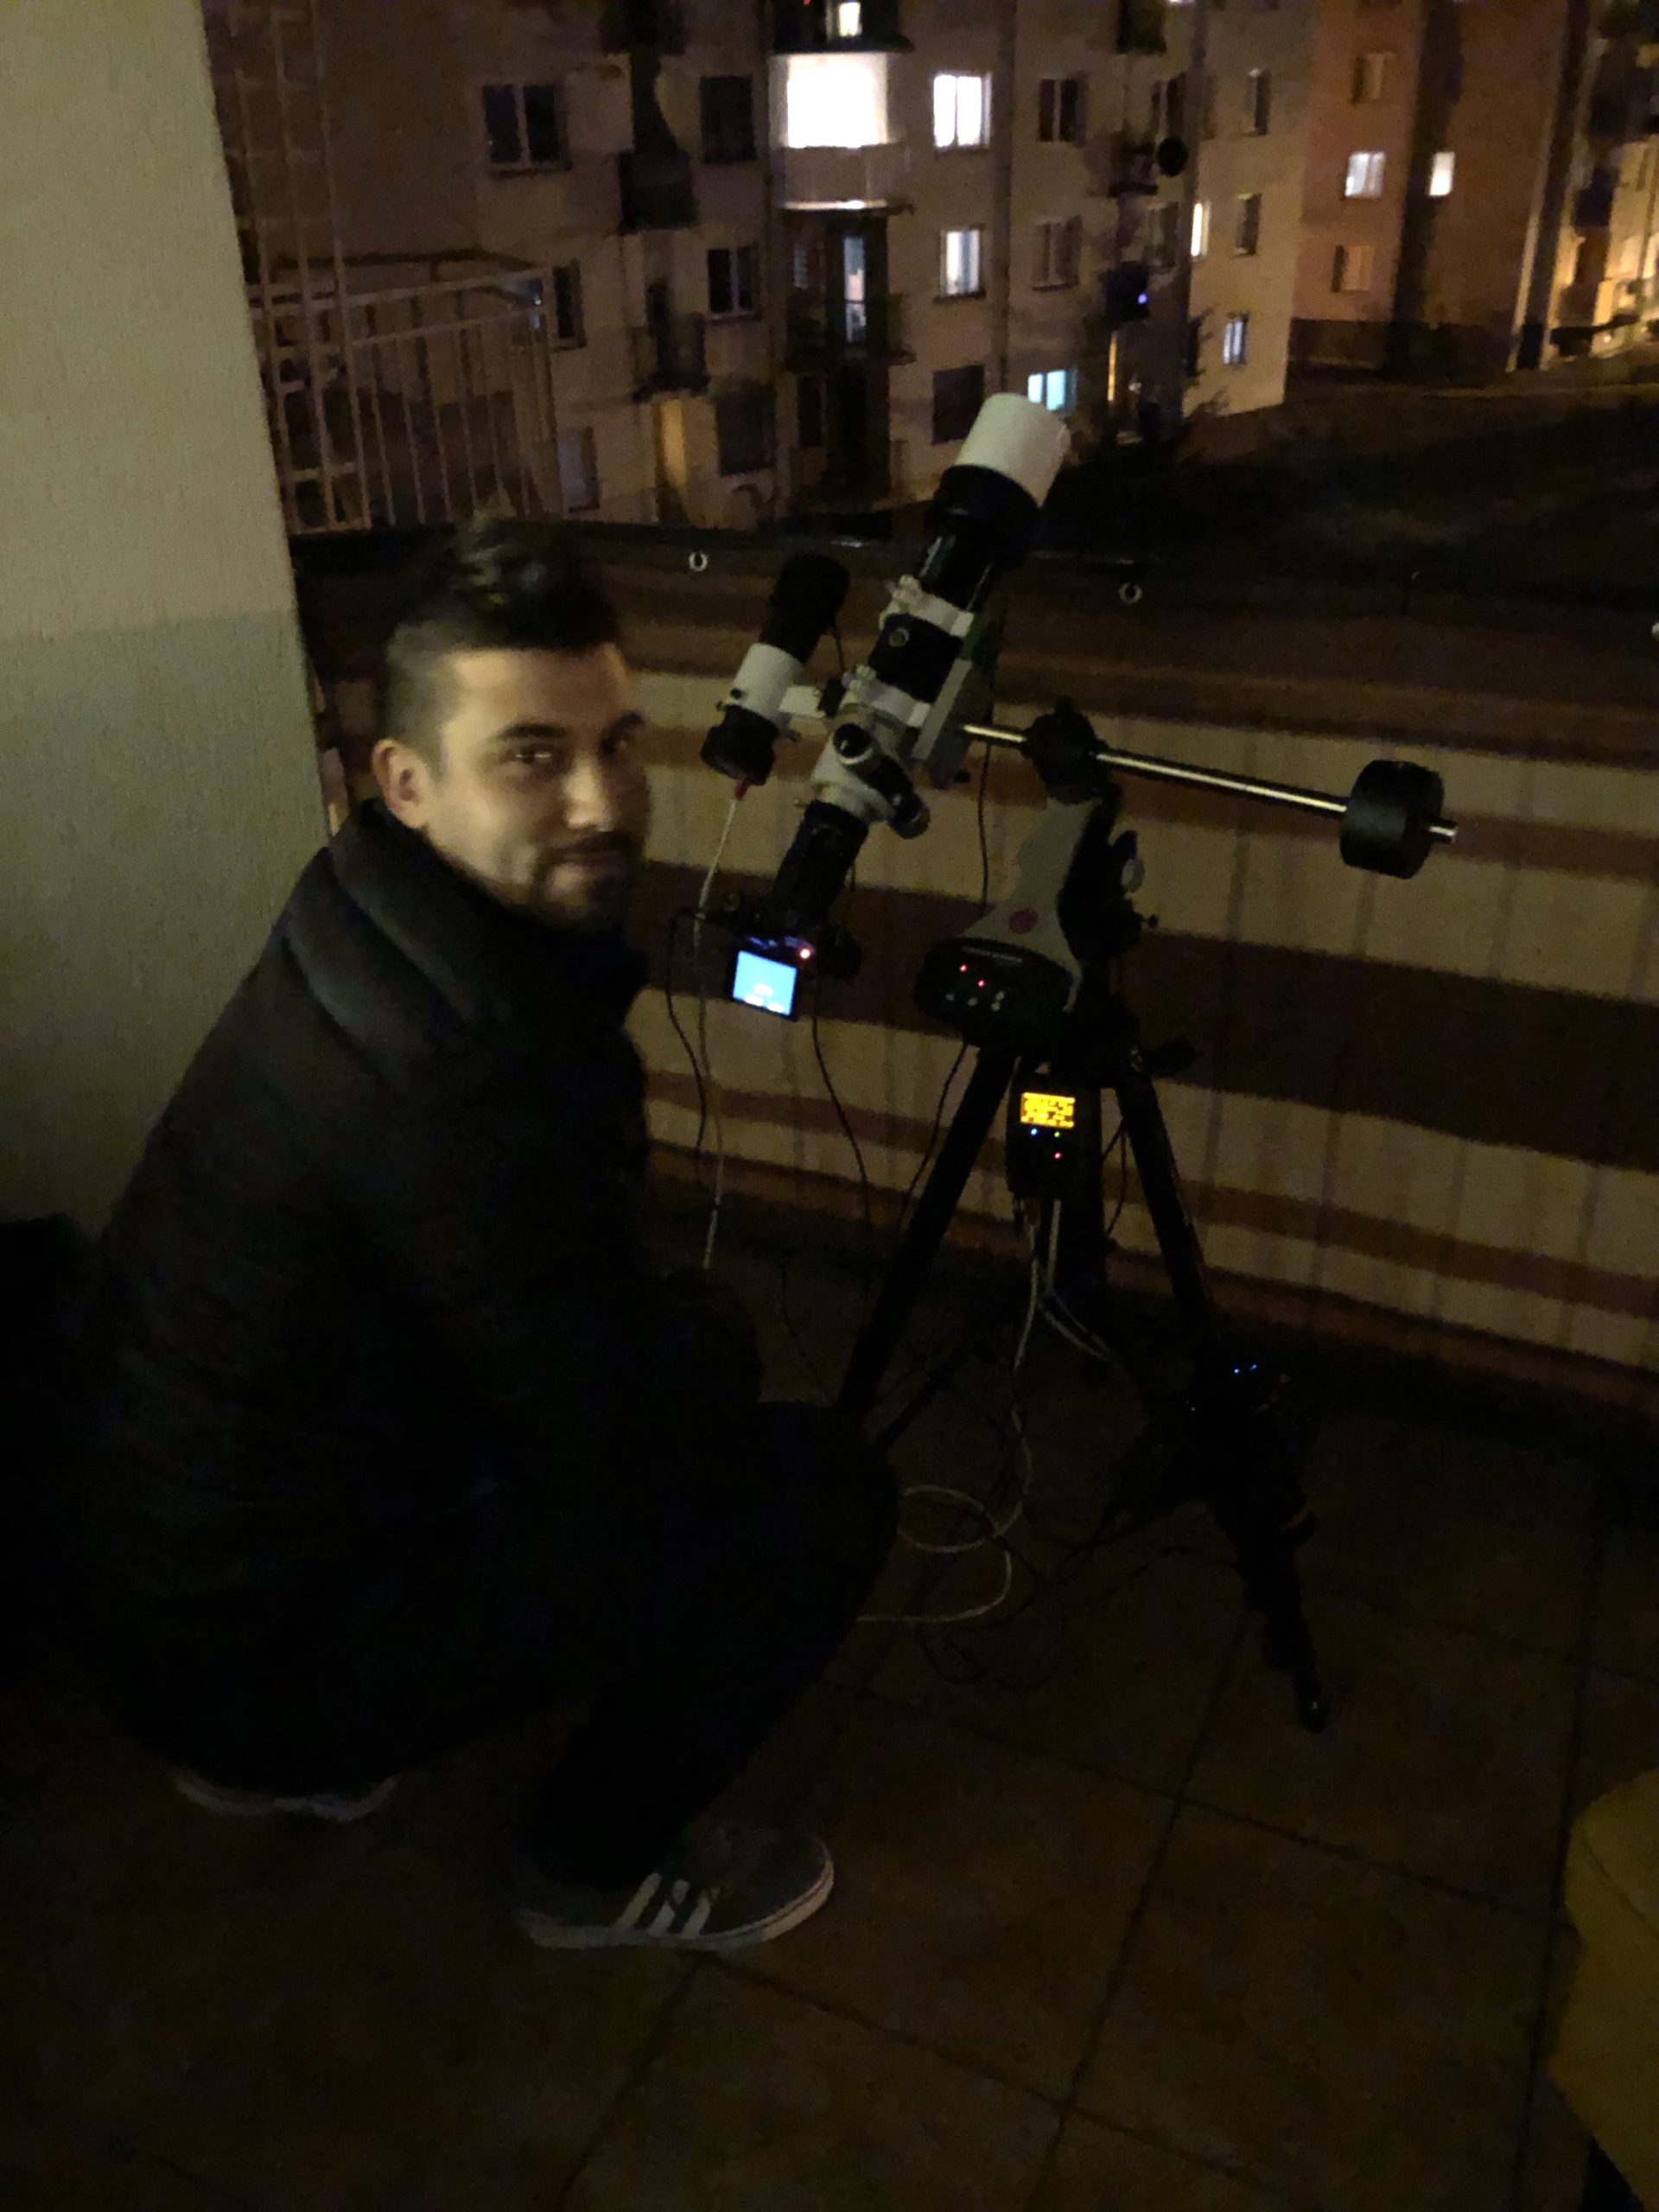
Equatorial Mount
So, as a complete beginner, you could expect that the first item on the astrophotography gear list will be a telescope or a camera, not some fancy mount (and what is it actually?). Well, a camera, telescope, tripod, and filters are an all-important part of your imaging train, but the heart and foundation of every astrophotography rig is an equatorial mount.
What is Equatorial Mount and How it Works
An equatorial mount is a device that compensates for Earth's rotation. Instead of placing your camera directly on a tripod, you install your equatorial mount on a tripod and then your camera on the mount. This way, your images will have pinpoint stars instead of star-lines due to the Earth rotating around its axis.
Using an equatorial mount, you can expose for ten or twenty minutes (for a single camera exposure!) and still have your deep-sky object in the camera frame at the same position, motionless. It's impossible to do without the mount.
Camera
Choosing your first camera for astrophotography is not as simple as it sounds. Although you can produce fantastic results with all primary brand cameras, it all comes to personal needs and preferences.
DSLR and Mirrorless Cameras (MILC)
Using DSLR or MILC as your first astrophotography camera is an excellent idea. Although they are not as good as dedicated astronomy cameras, they have a few advantages over the CCDs:
- Price. DSLR's are far cheaper than dedicated mono cameras.
- Built-in LCD screens. It's fantastic when you can see your picture just after the camera ended making an exposure. And you don't need a laptop for it.
- Built-in power sources (batteries). You don't have to worry about looking for a 12V electricity source (as most cameras and mounts use this voltage). You just buy two or three additional batteries for your camera, and you are ready for the whole night of astrophotography.
- Ability to use outside astrophotography. Holidays. Family meetings. Your kid events in school. It's not a deal-breaker, rather a nice add-on.
Some astrophotographers don't even plan to upgrade to a dedicated camera. That's OK, as you can produce APOD-quality pictures with DSLRs and MILCs. It's a matter of preference and skill (in image acquiring and post-processing).
Recommended DSLRs and MILCs
Canon
Canon is the most popular DSLR manufacturer on the astrophotography market, and it's probably the best brand to go if:
- You want specifically a DSLR and not a dedicated astronomy camera.
- The size of the camera doesn't matter for you (DSLRs are usually bigger and heavier than mirrorless and astro-dedicated cameras).
Different types of astrophotography software widely support canons, so you should not have any problems with drivers, post-processing apps, camera controllers, etc.
With Canons, you can use fantastic clip-in filters (H-alpha, e.g.). You buy one filter (of one size), and you can use it with various lenses. You don't need a different dimension of a filter for additional lenses.
Also, you can modify your Canon by removing the internal IR-cut filter. This way, your camera will become a full-spectrum camera, more sensitive to H-alpha signal than stock cameras from a shop.
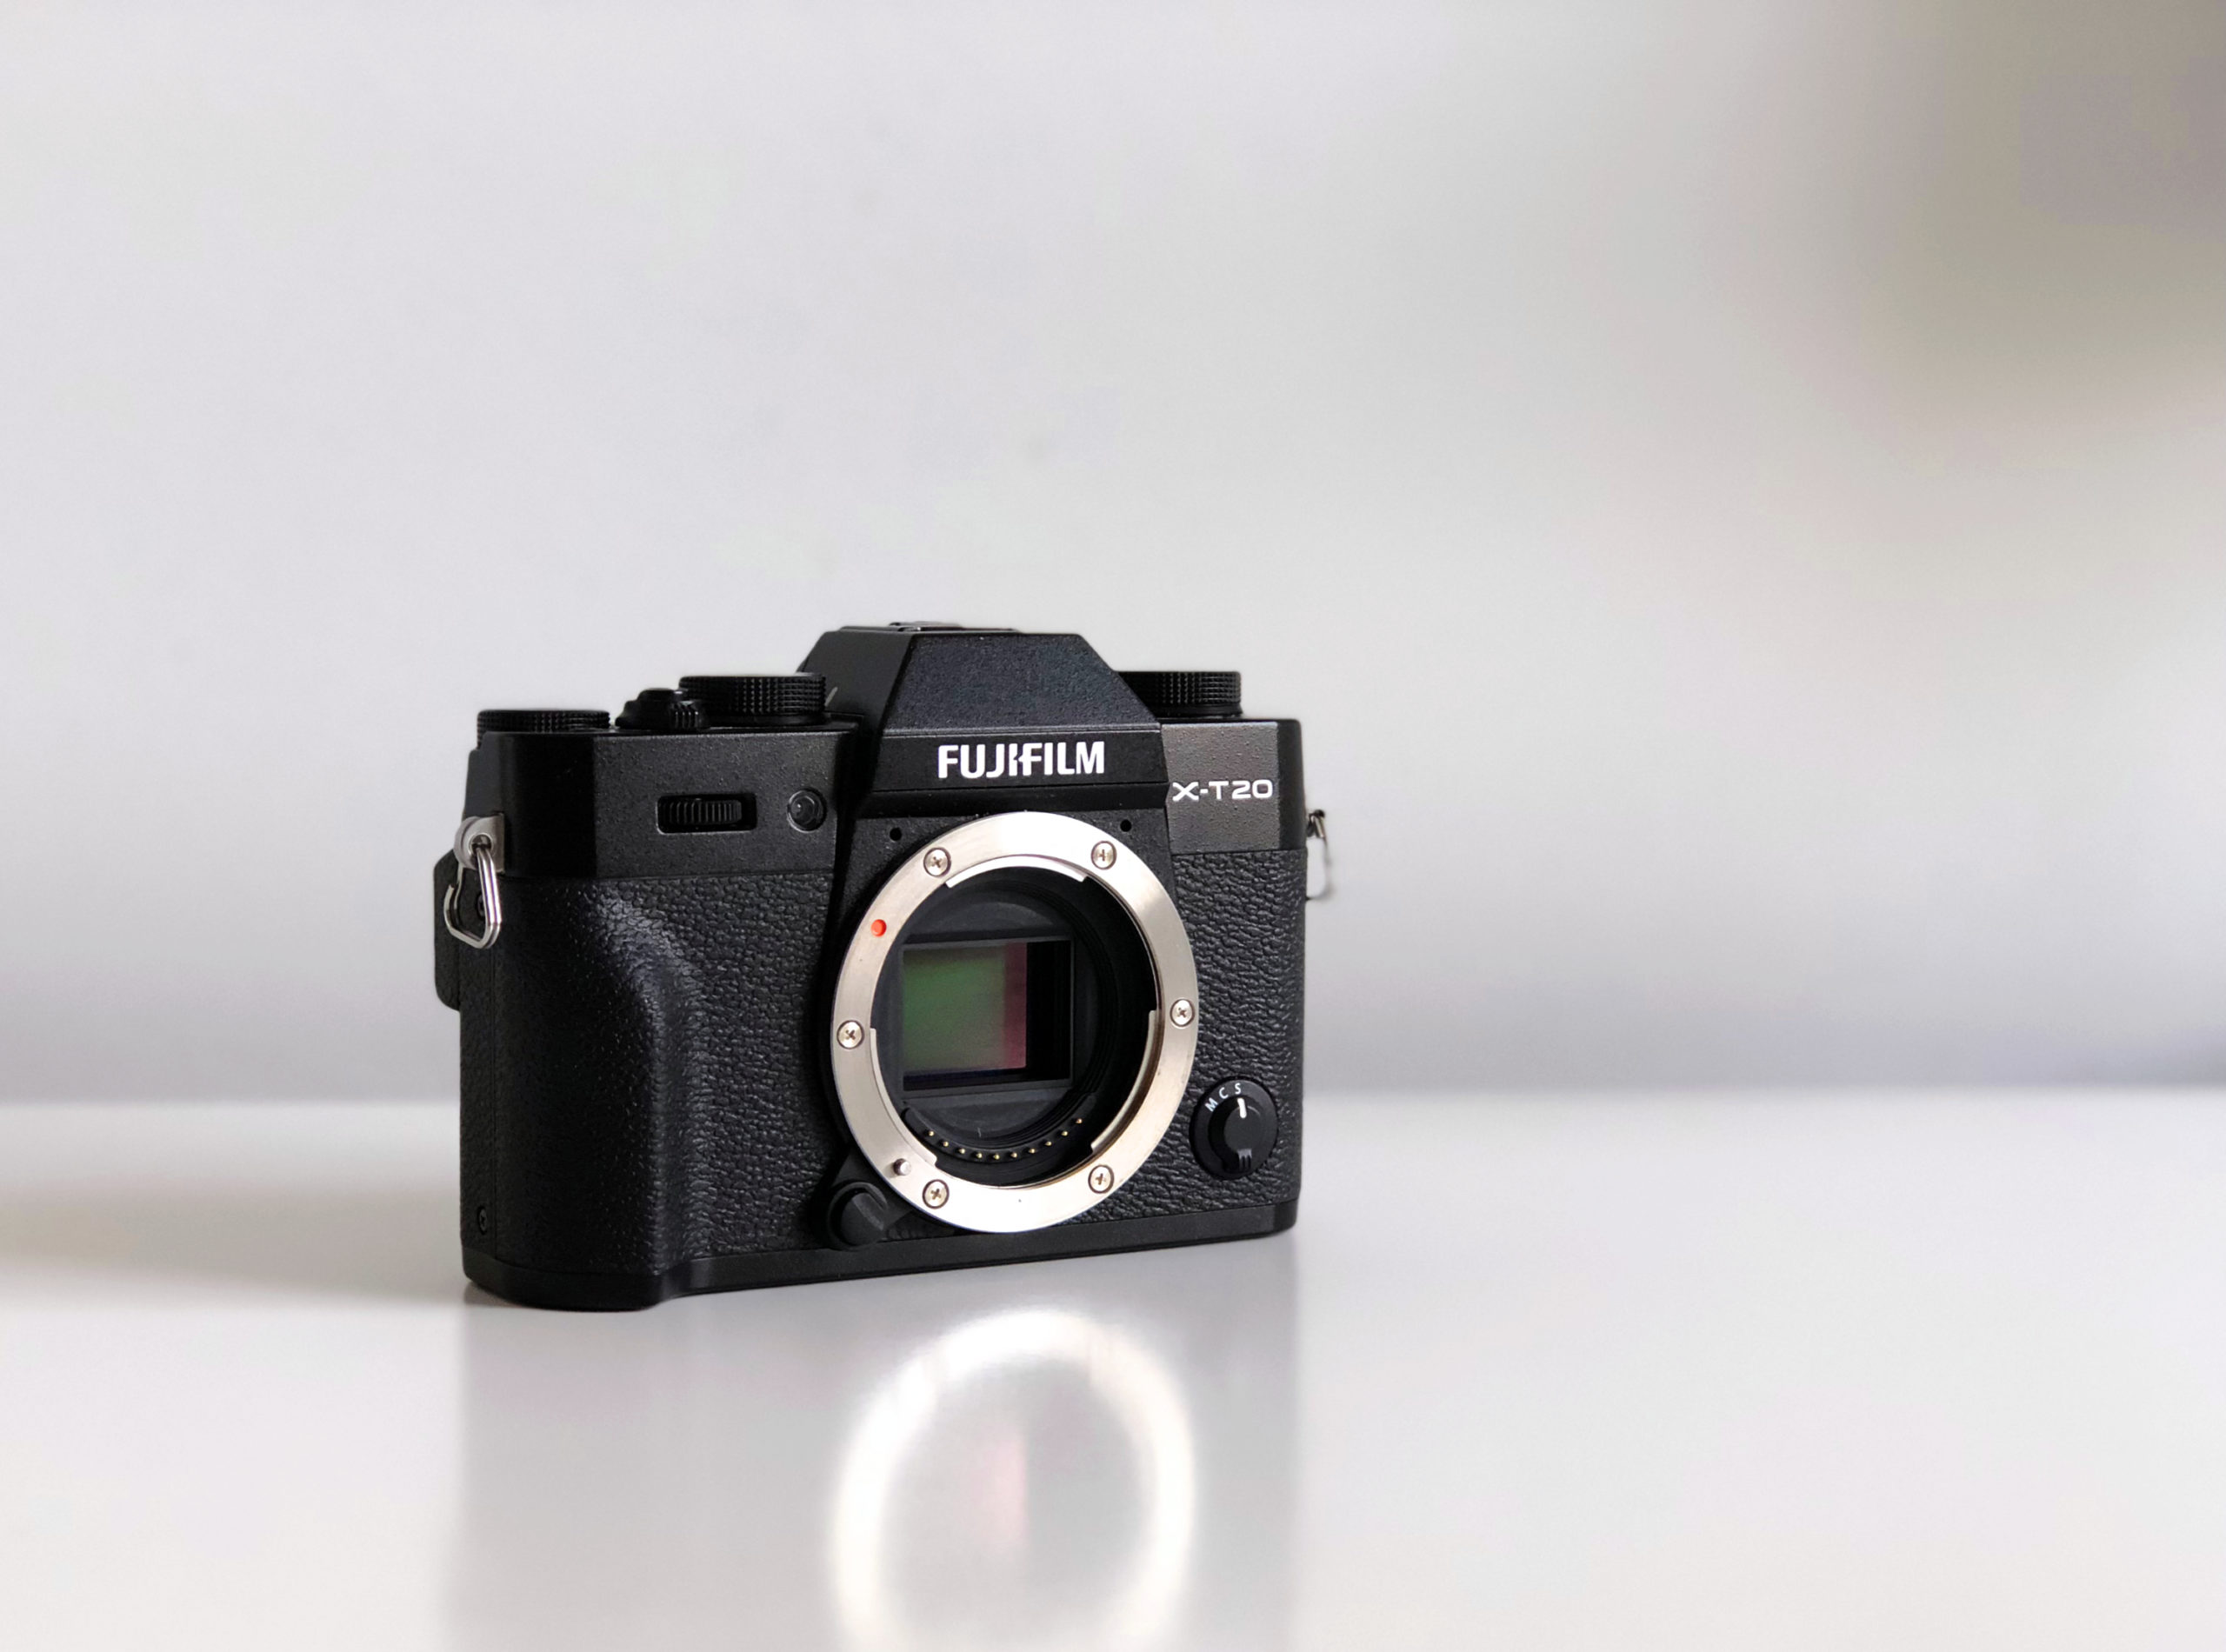
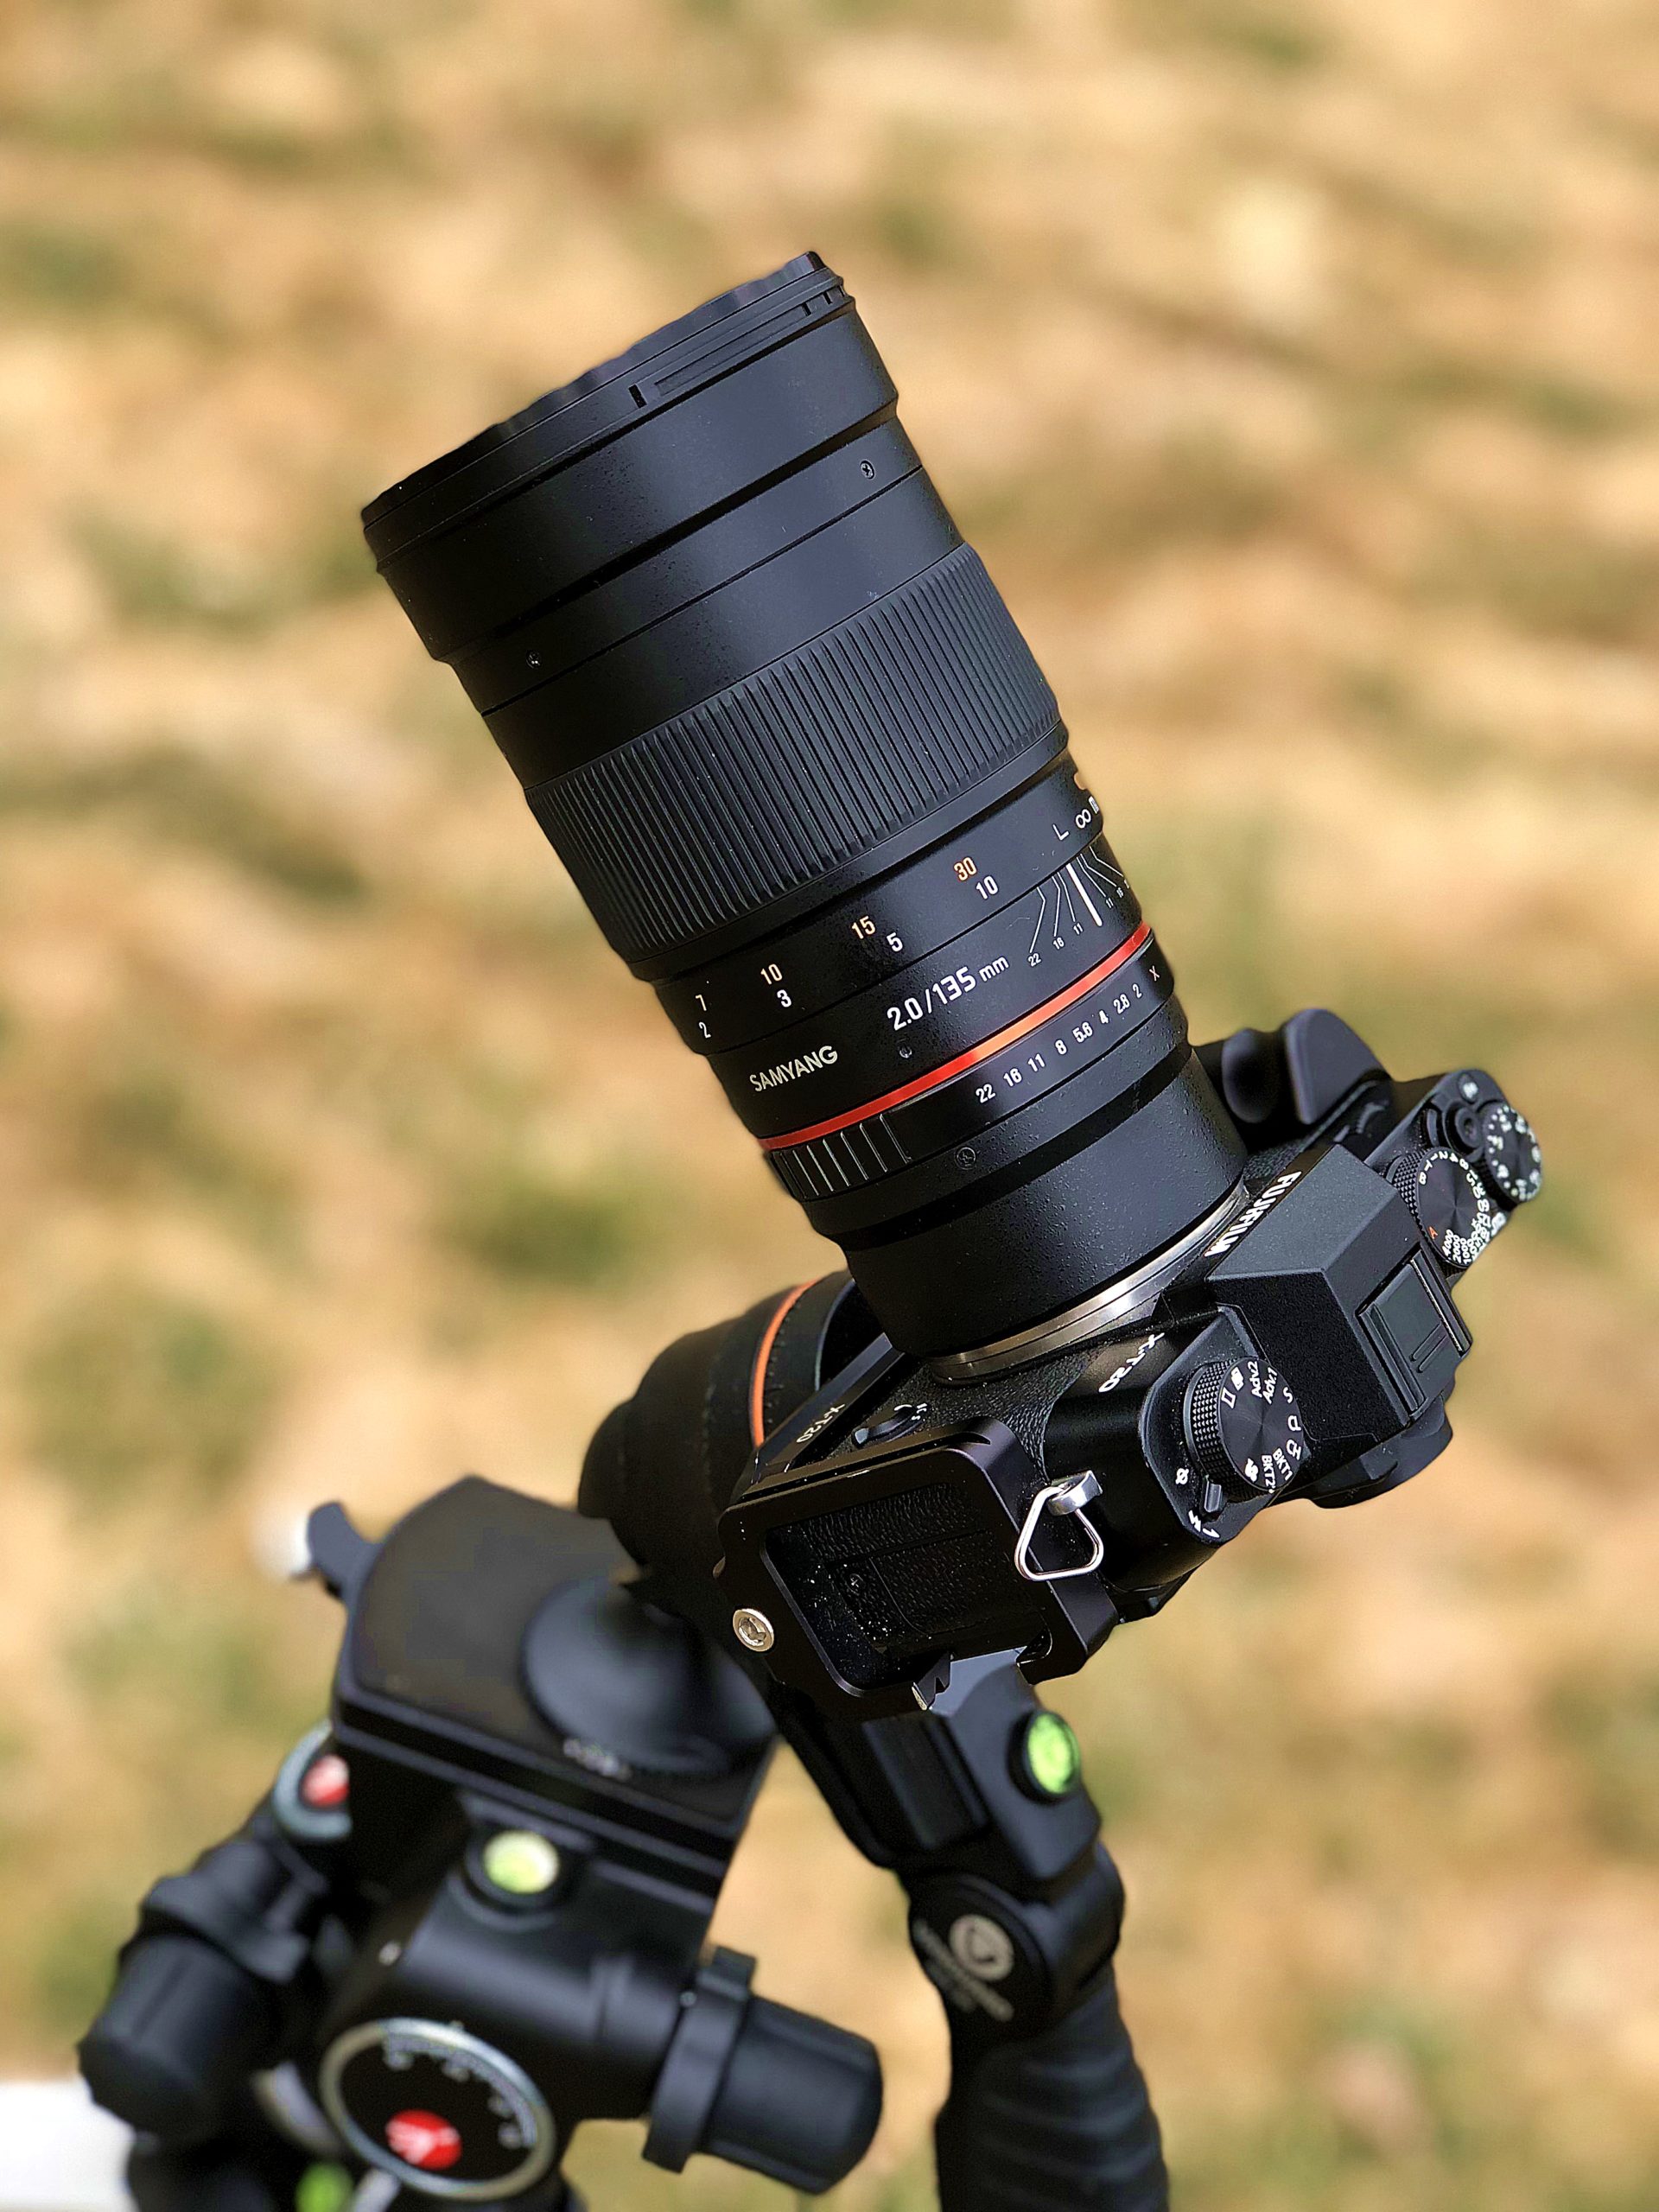
Why I chose Fuji

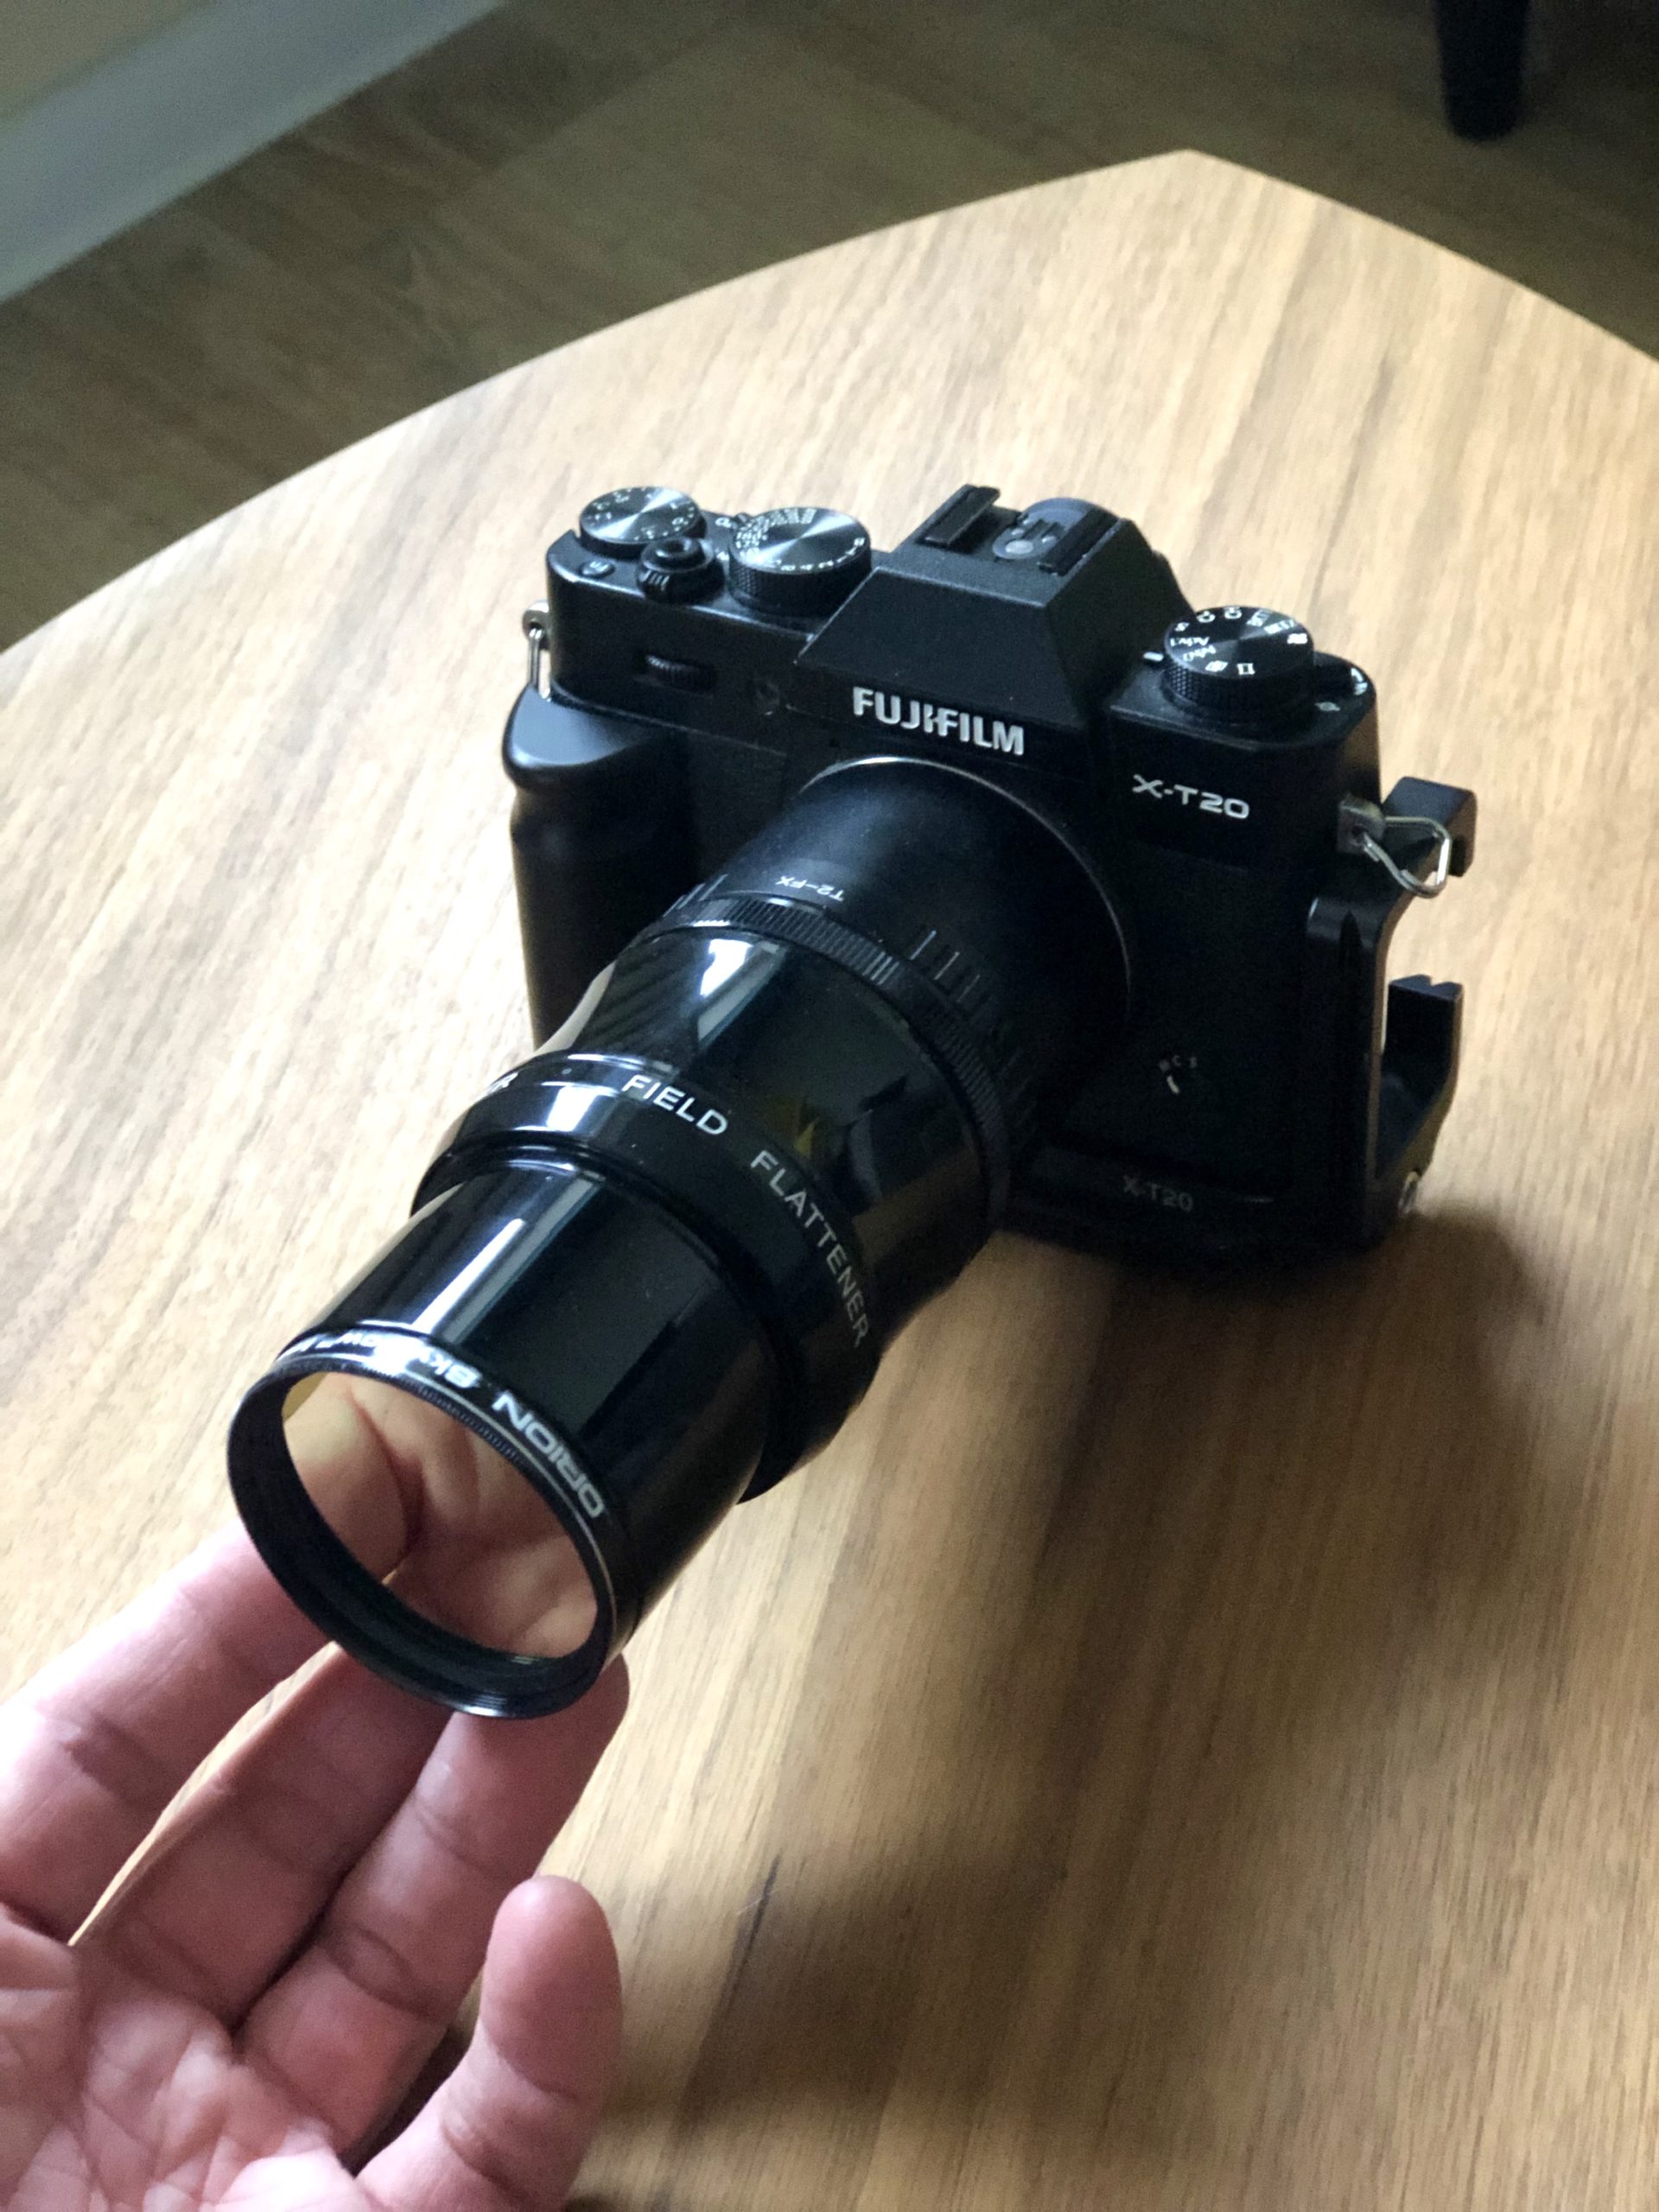
In 2017, I bought a brand new Fujifilm X-T20, and to this day, I still use it as my main (and only) astro imaging camera. Back then, my main goal was to have a small and portable camera, so huge Canon DSLRs were a no-no for me. Back at the time, Sony and Fuji were making the best mirrorless cameras, but Sony suffered from a so-called "star eater" problem. So, Fuji was a clear winner for me.
Also, as I later discovered (lucky me), the Fuji X-Trans sensor is not equipped with a low-pass filter, which means more H-alpha signals are coming to the matrix. So it's a very good thing for photographing high H-alpha emitting regions like the Rosette, California, or North America Nebulae.
Dedicated Astronomy Cameras (CCD/CMOS)
This is where your wallet may get hurt. As I don't own a dedicated astronomy camera yet, I will write only what I know from the Internet. So how do they differ from "normal" day-use cameras?
DSLR vs. CCD
First of all, astronomical CCDs are designed to work only when connected to a computer. They are not stand-alone, don't have LCD screens, and need to be connected via USB to a PC to take a picture. That means you have to carry a laptop with your rig. Also, they are far more pricey.
That's the cons, now the pros. More advanced CCD cameras have built-in sensor cooling, which means a lot less noise in your pictures. Also, with mono CCD cameras (color ones also exist), you can use different filters (like red, green, blue, or narrowband H-alpha) to produce images in different wavelengths of the visible spectrum (best - like the best of the best on the whole world - astrophotography images are made this way). That, of course, comes with an additional cost (filter wheel).
Which One to Choose
CCD cameras are more expensive, but they give better imaging results than DSLRs. Yet, for a beginner, a DSLR/mirrorless camera is a better choice, in my opinion. It's cheaper, simpler to operate, and gives you more freedom to carry your rig outside your city without additional components (laptop, battery, cables). Also, you can use a DSLR/MILC on typical, daily occasions. And when you reach the limitations of a DSLR, you can always replace it with a mono CCD in the future.
Telescope or (Telephoto) Lens
The common misconception is that you have to use a telescope for astrophotography. You don't! A high-quality telephoto lens is a fantastic entry point into astrophotography.
Widefield Milky Way Shots
It would help if you had a widefield photography lens, not a telescope, to capture widefield Milky Way shots. Different manufacturers have different models in their offer. Still, the one lens is unbeatable in terms of price-to-quality ratio, and it's available for most mounts camera: the Rokinon/Samyang 12mm f/2.0.

With a fast lens like this, you can capture the Milky Way without using an equatorial mount (although with the one, you will get better results), which is fantastic for people on a budget or for people who try to minimize the weight of their equipment for easy travel.
Telescope (APO Refractor) vs. Telephoto Lens
Although it's best to use an apochromatic refractor telescope to capture nebulae and galaxies, you can do it almost as well with a telephoto lens. The difference will be a smaller resolution of the final image due to the larger field of view, but the overcome for this is shooting bigger targets (those which don't entirely fit into the telescope FOV) like nebulae and going for galaxies later with a telescope.
Also, dedicated APO refractor telescopes are better corrected for vignetting, coma, and chromatic aberration. However, telephoto lenses are not usually designed for astrophotography, so those factors are not primary when producers make their optics.
With telescopes, you can (and for deep-sky imaging, you should) use field flatteners/correctors. Those devices do exactly what they say - they flatten the field of view and reduce vignetting.
Telephoto lenses are also more portable—less weight, easier to carry the whole setup.
Due to the shorter focal length, telephoto lenses are also more forgiving when using a tracking mount. APO telescopes have longer focal lengths, but this comes with the need to polar-align more precisely and generally track the sky better. In addition, getting your setup ready for the shooting is faster with a telephoto lens than with a telescope (where you also usually need to set up counterweights and balance your rig).
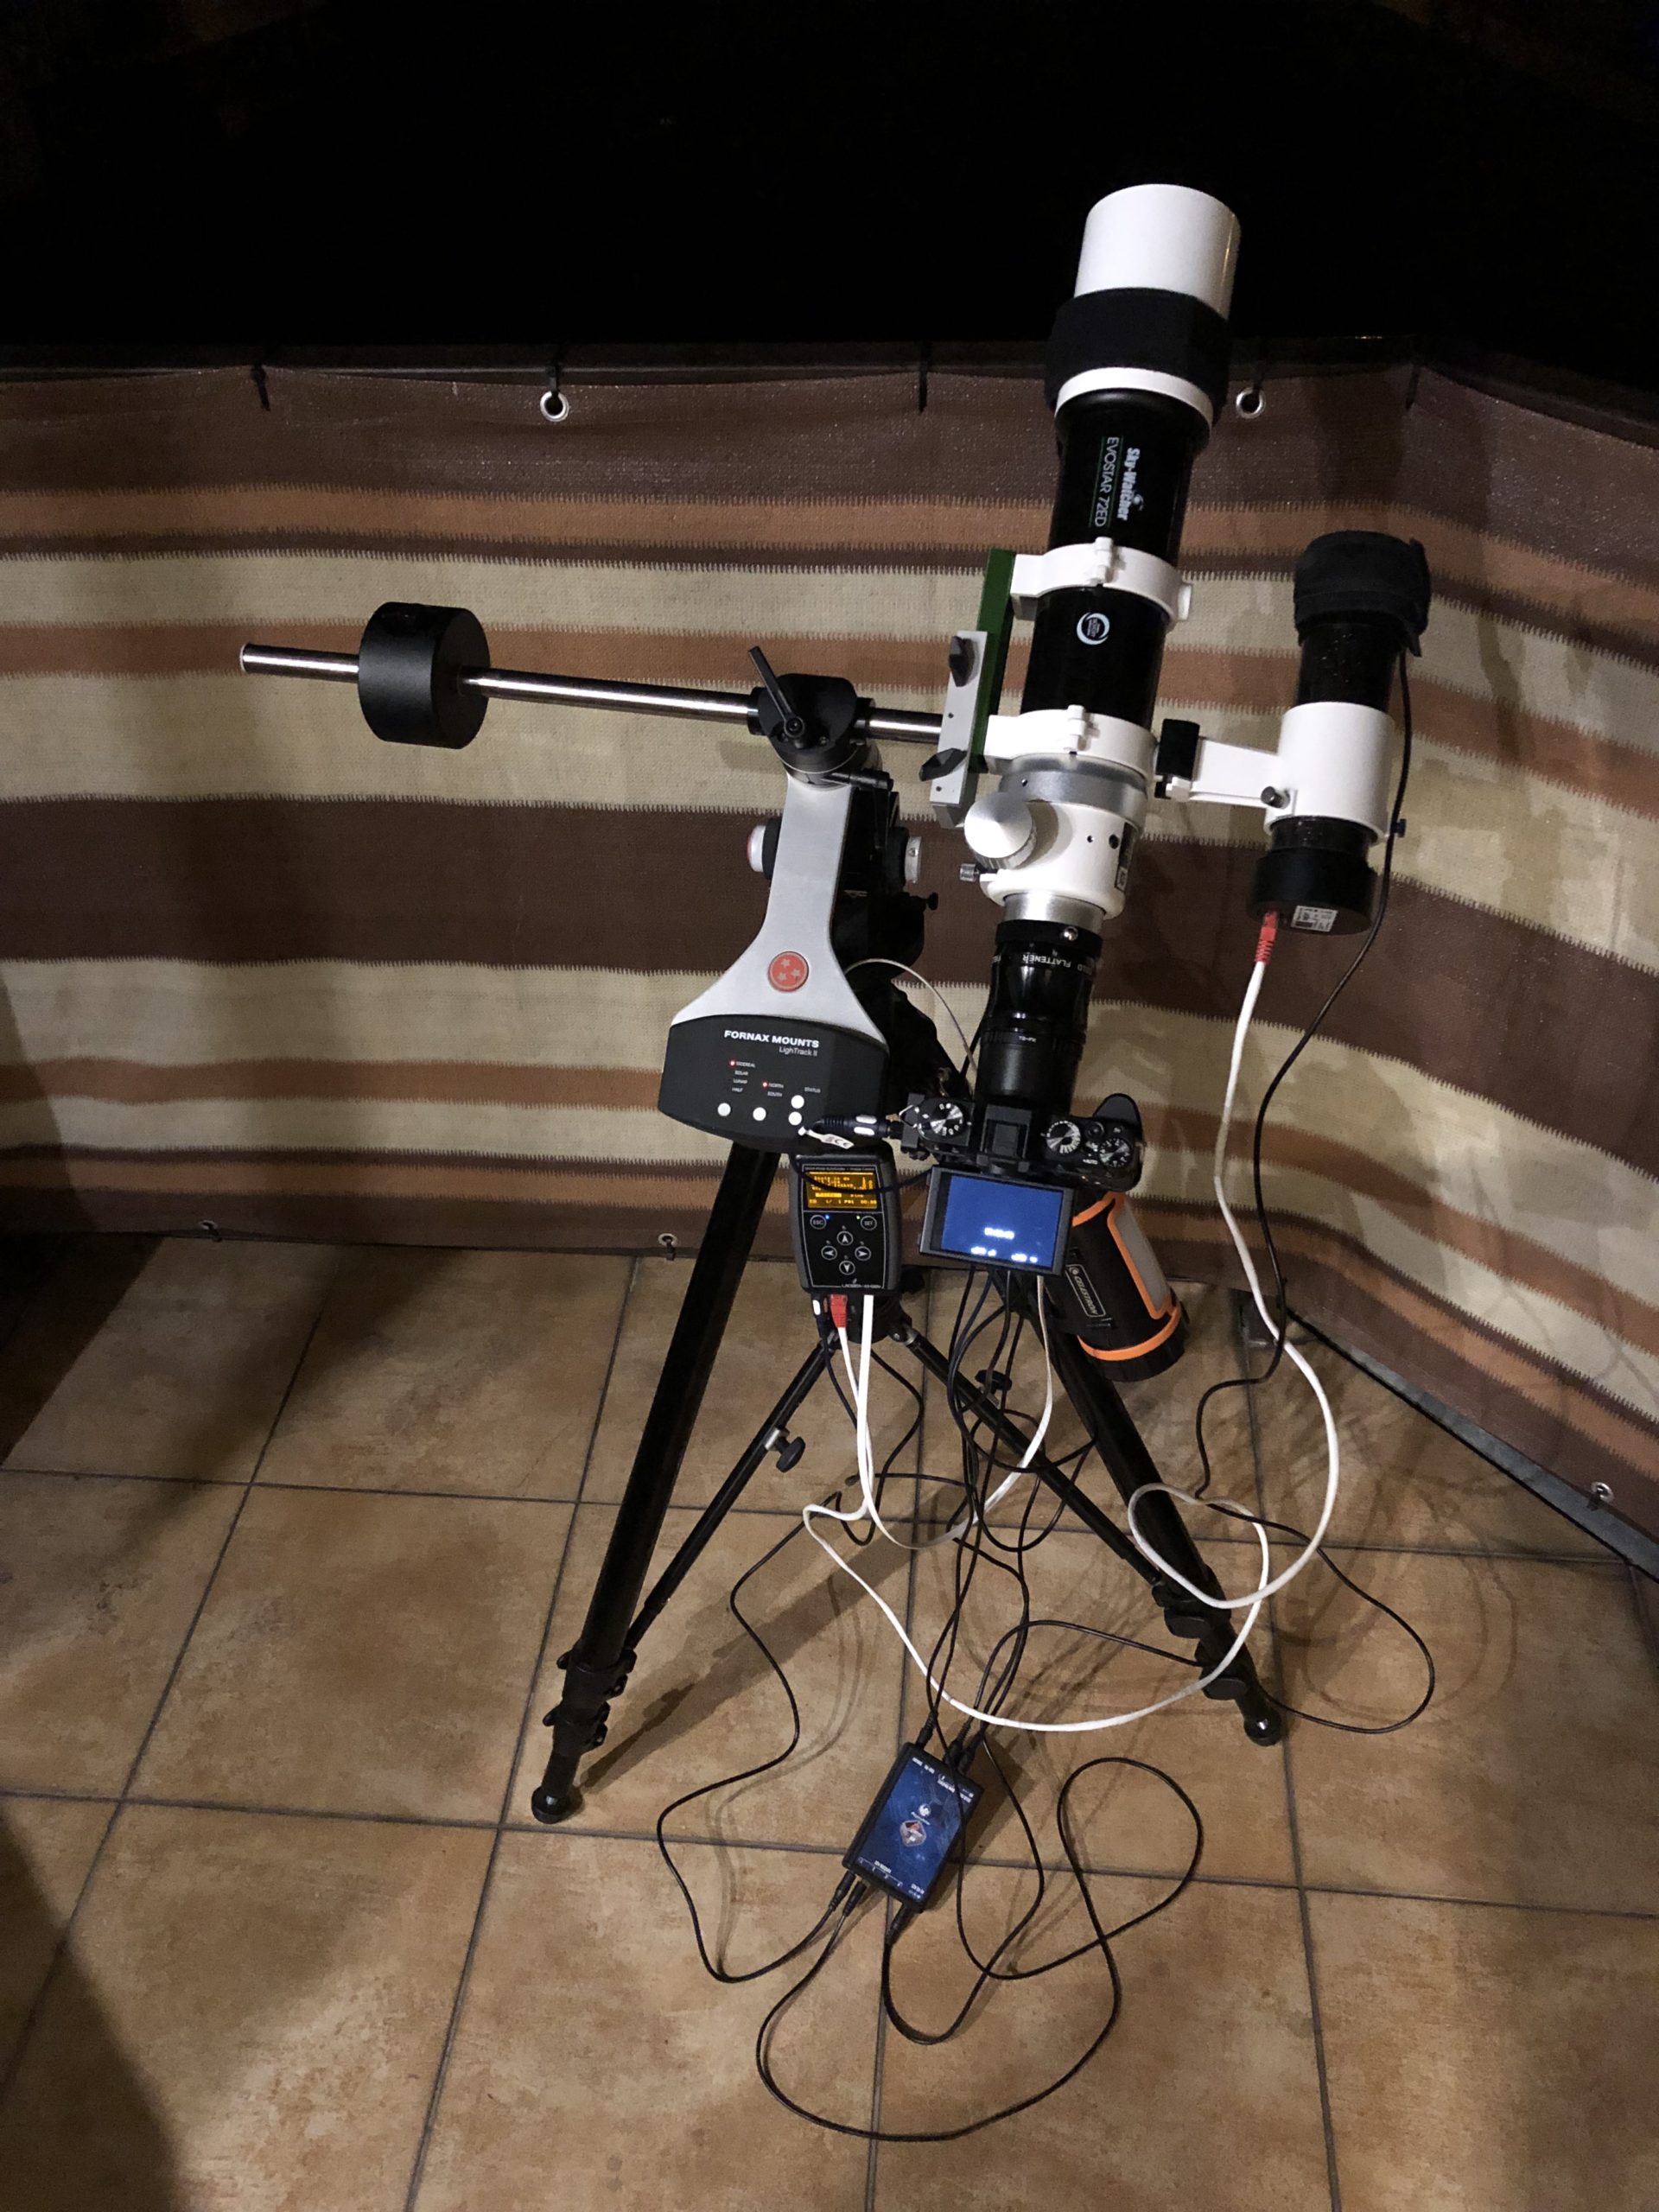
It may sound like I advise against getting a telescope, but hell no! Like my Sky-Watcher Evostar 72ED, the small APO telescope is a fantastic entry point into astrophotography; it's just a little more challenging at the beginning than a simple telephoto lens. If you can afford it, an APO refractor is the way to go.
Tripod
You have to have a solid tripod for astrophotography. Wind will shake your rig if the tripod is not sturdy enough.
Some equatorial mounts come with a dedicated tripod, and they are fine. However, if you are building your rig from the ground up, I recommend buying a tripod with at least double the carrying capacity than the summarized camera, mount, and lens weight. This way, you will be sure your rig won't wave.
You can use a surveyor's tripod if you are on a budget. Maybe it's not a fancy-looking one, but it does the job right, and the money you save you can spend on a better equatorial mount.
Filters
For a beginner DSLR astrophotographer, the only filter I recommend is a light pollution filter.
A light pollution filter is a must if you live and shoot from a city (even a small one like mine - 20k people). A filter of this type doesn't block all the light pollution in your area, but it significantly reduces and is worth buying. I use the Orion SkyGlow Imaging Filter for my telescope, and I'm delighted with it. Another popular option among the astrophotography community is the IDAS LPS filter - I haven't tested it yet, but other people say it's also good.
Do you already have some photography equipment? Use it!
Don't rush to the astronomy store for the new equipment if you already have some DSLR cameras with manual shooting mode. Try it first, especially if you have some fast (f/2.8 or faster) lens. You can capture some DSOs on the night sky, even on a stationary tripod, especially if the lens is wide enough (8-23/35mm). The standard 50mm portrait lens will be better used on an equatorial tracking mount.
Gear you don't need as a beginner astrophotographer
Autoguiding System
Autoguiders are devices that help your mount track better by correcting its imperfections in tracking. They are helpful for giant telescopes with long focal lengths. However, for a beginner telescope (400mm-600mm focal length), the good polar alignment is enough to have pinpoint, sharp stars.
Eyepieces/Diagonals
You don't need telescope eyepieces if you build your setup for astrophotography-only, not for visual observation. You connect your camera directly to the telescope (via the proper adapter) and see the sky on a camera LCD screen or your laptop. Save money for a better mount.
How to Plan Your Astrophotography Sessions
Planning is essential, as time is limited, and there are many targets to photograph! When I was at the beginning of my astrophotography adventure, I used to go and shoot just anything I could aim for, but the longer I'm in the hobby, the more organized I become. So, to get the most out of your time under the stars, plan your imaging sessions before leaving your home. There are many things to consider.
Target
Knowing WHAT you want to photograph is crucial. Different nebulae and galaxies are available during different seasons and hours, so planning is key to success.
Location
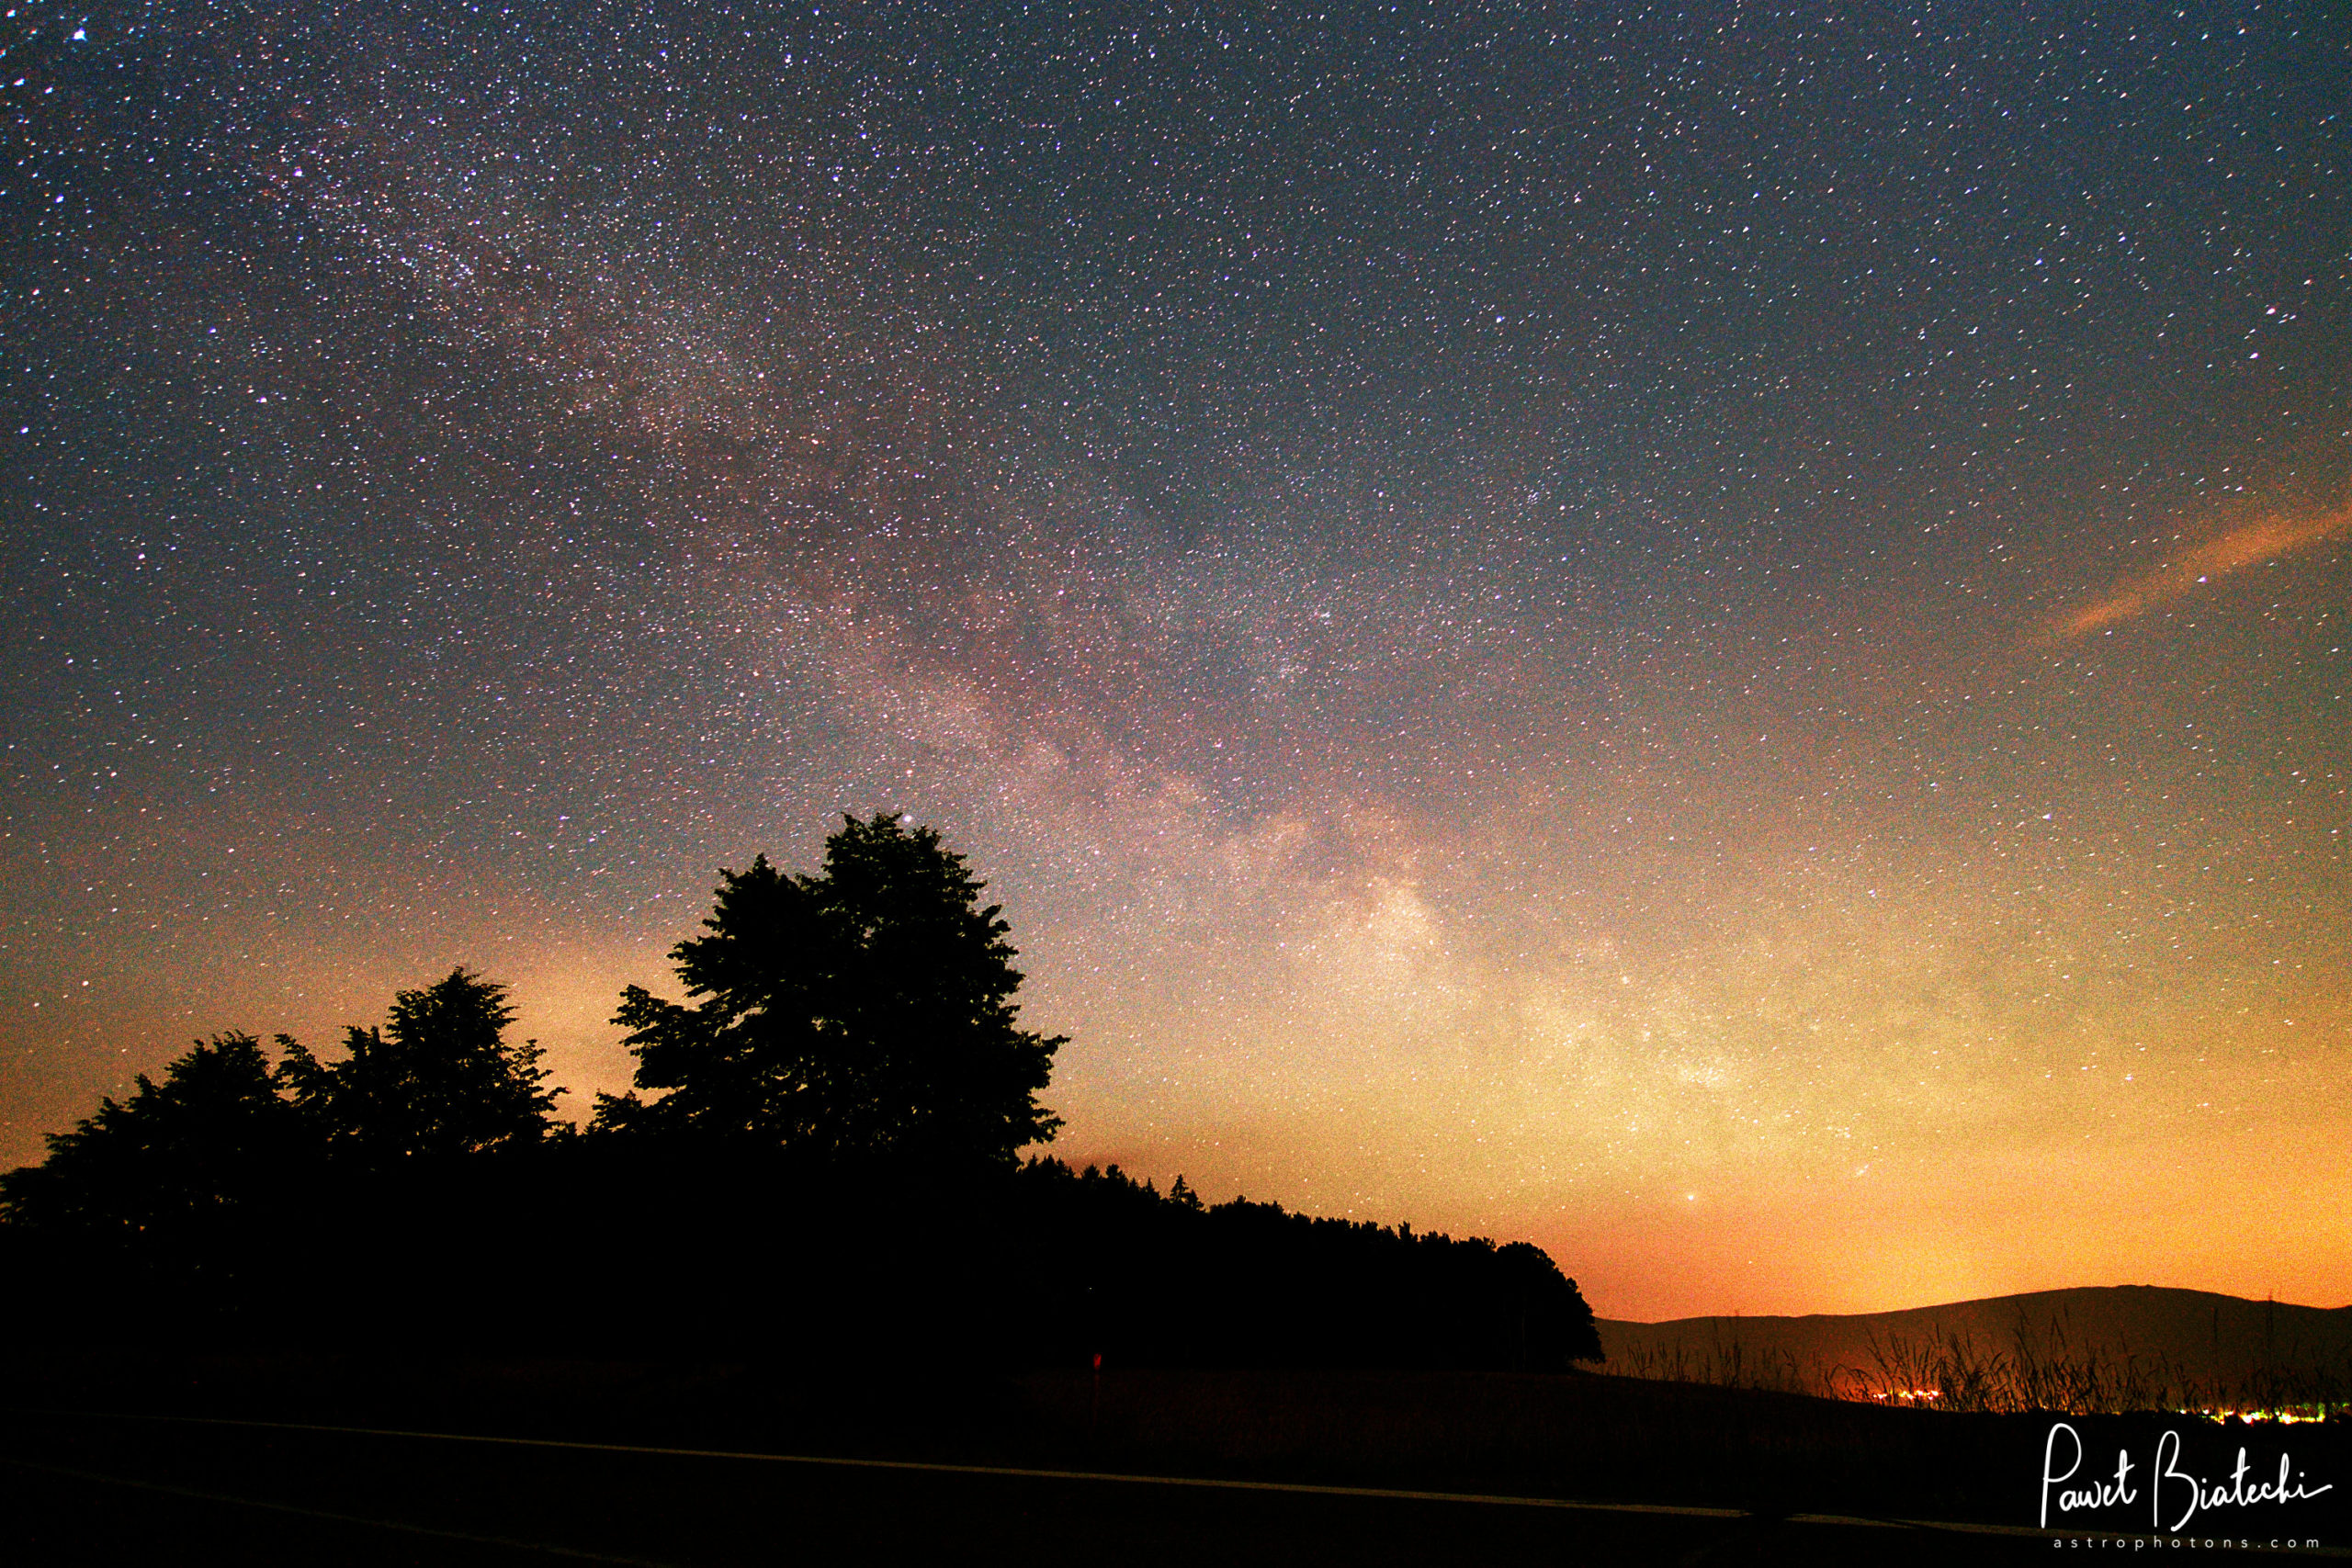
You want to do astrophotography from the darkest possible place. That way, not only will you improve your picture's signal-to-noise ratio, but also your post-processing routine will be much easier. The best way to find a high-quality astronomy and astrophotography night sky in your area is to use the Light Pollution Map web app.
Safety is another aspect. Avoid bears.
Weather
Clouds are your number one enemy, and the wind is the second. Avoid them if possible. My favorite weather forecast for planning astrophotography sessions is Ventusky.
Moon phase
The best astrophotography conditions are when there is a New Moon, and it's on the other side of the Earth at the moment. You can check the actual Moon state at MoonCalc.
Packing astrophotography gear
Triple-check you have all your astrophotography gear before leaving your home (if you shoot outside). Of course, if you shoot from your balcony or a backyard, this doesn't apply to you. But if you have to travel outside the city for your imaging sessions, then be sure you have packed all pieces of your astrophotography gear. The best way is to do a self-written checklist of required equipment and to prepare with it in your hand. Some significant points to include on it:
- Charge and test all your batteries.
- Check cables.
- Inspect your flashlight.
- Check if you have free memory on your SD card.
- Refuel gas in your car.
- Pack some warm clothes in case of
bad weather. - Grab some snacks and drinks.
It's better to sacrifice ten minutes for gear inspection before leaving than to realize at the shooting site that you forgot one piece of required equipment and ruined your whole session this night.
What To Photograph: Interesting Beginner Astrophotography Targets
OK, but where to point my telescope and what to photograph? Those are the common questions new astrophotographers ask. The space is enormous, and whenever you point your telescope in the sky, there can be countless stars.
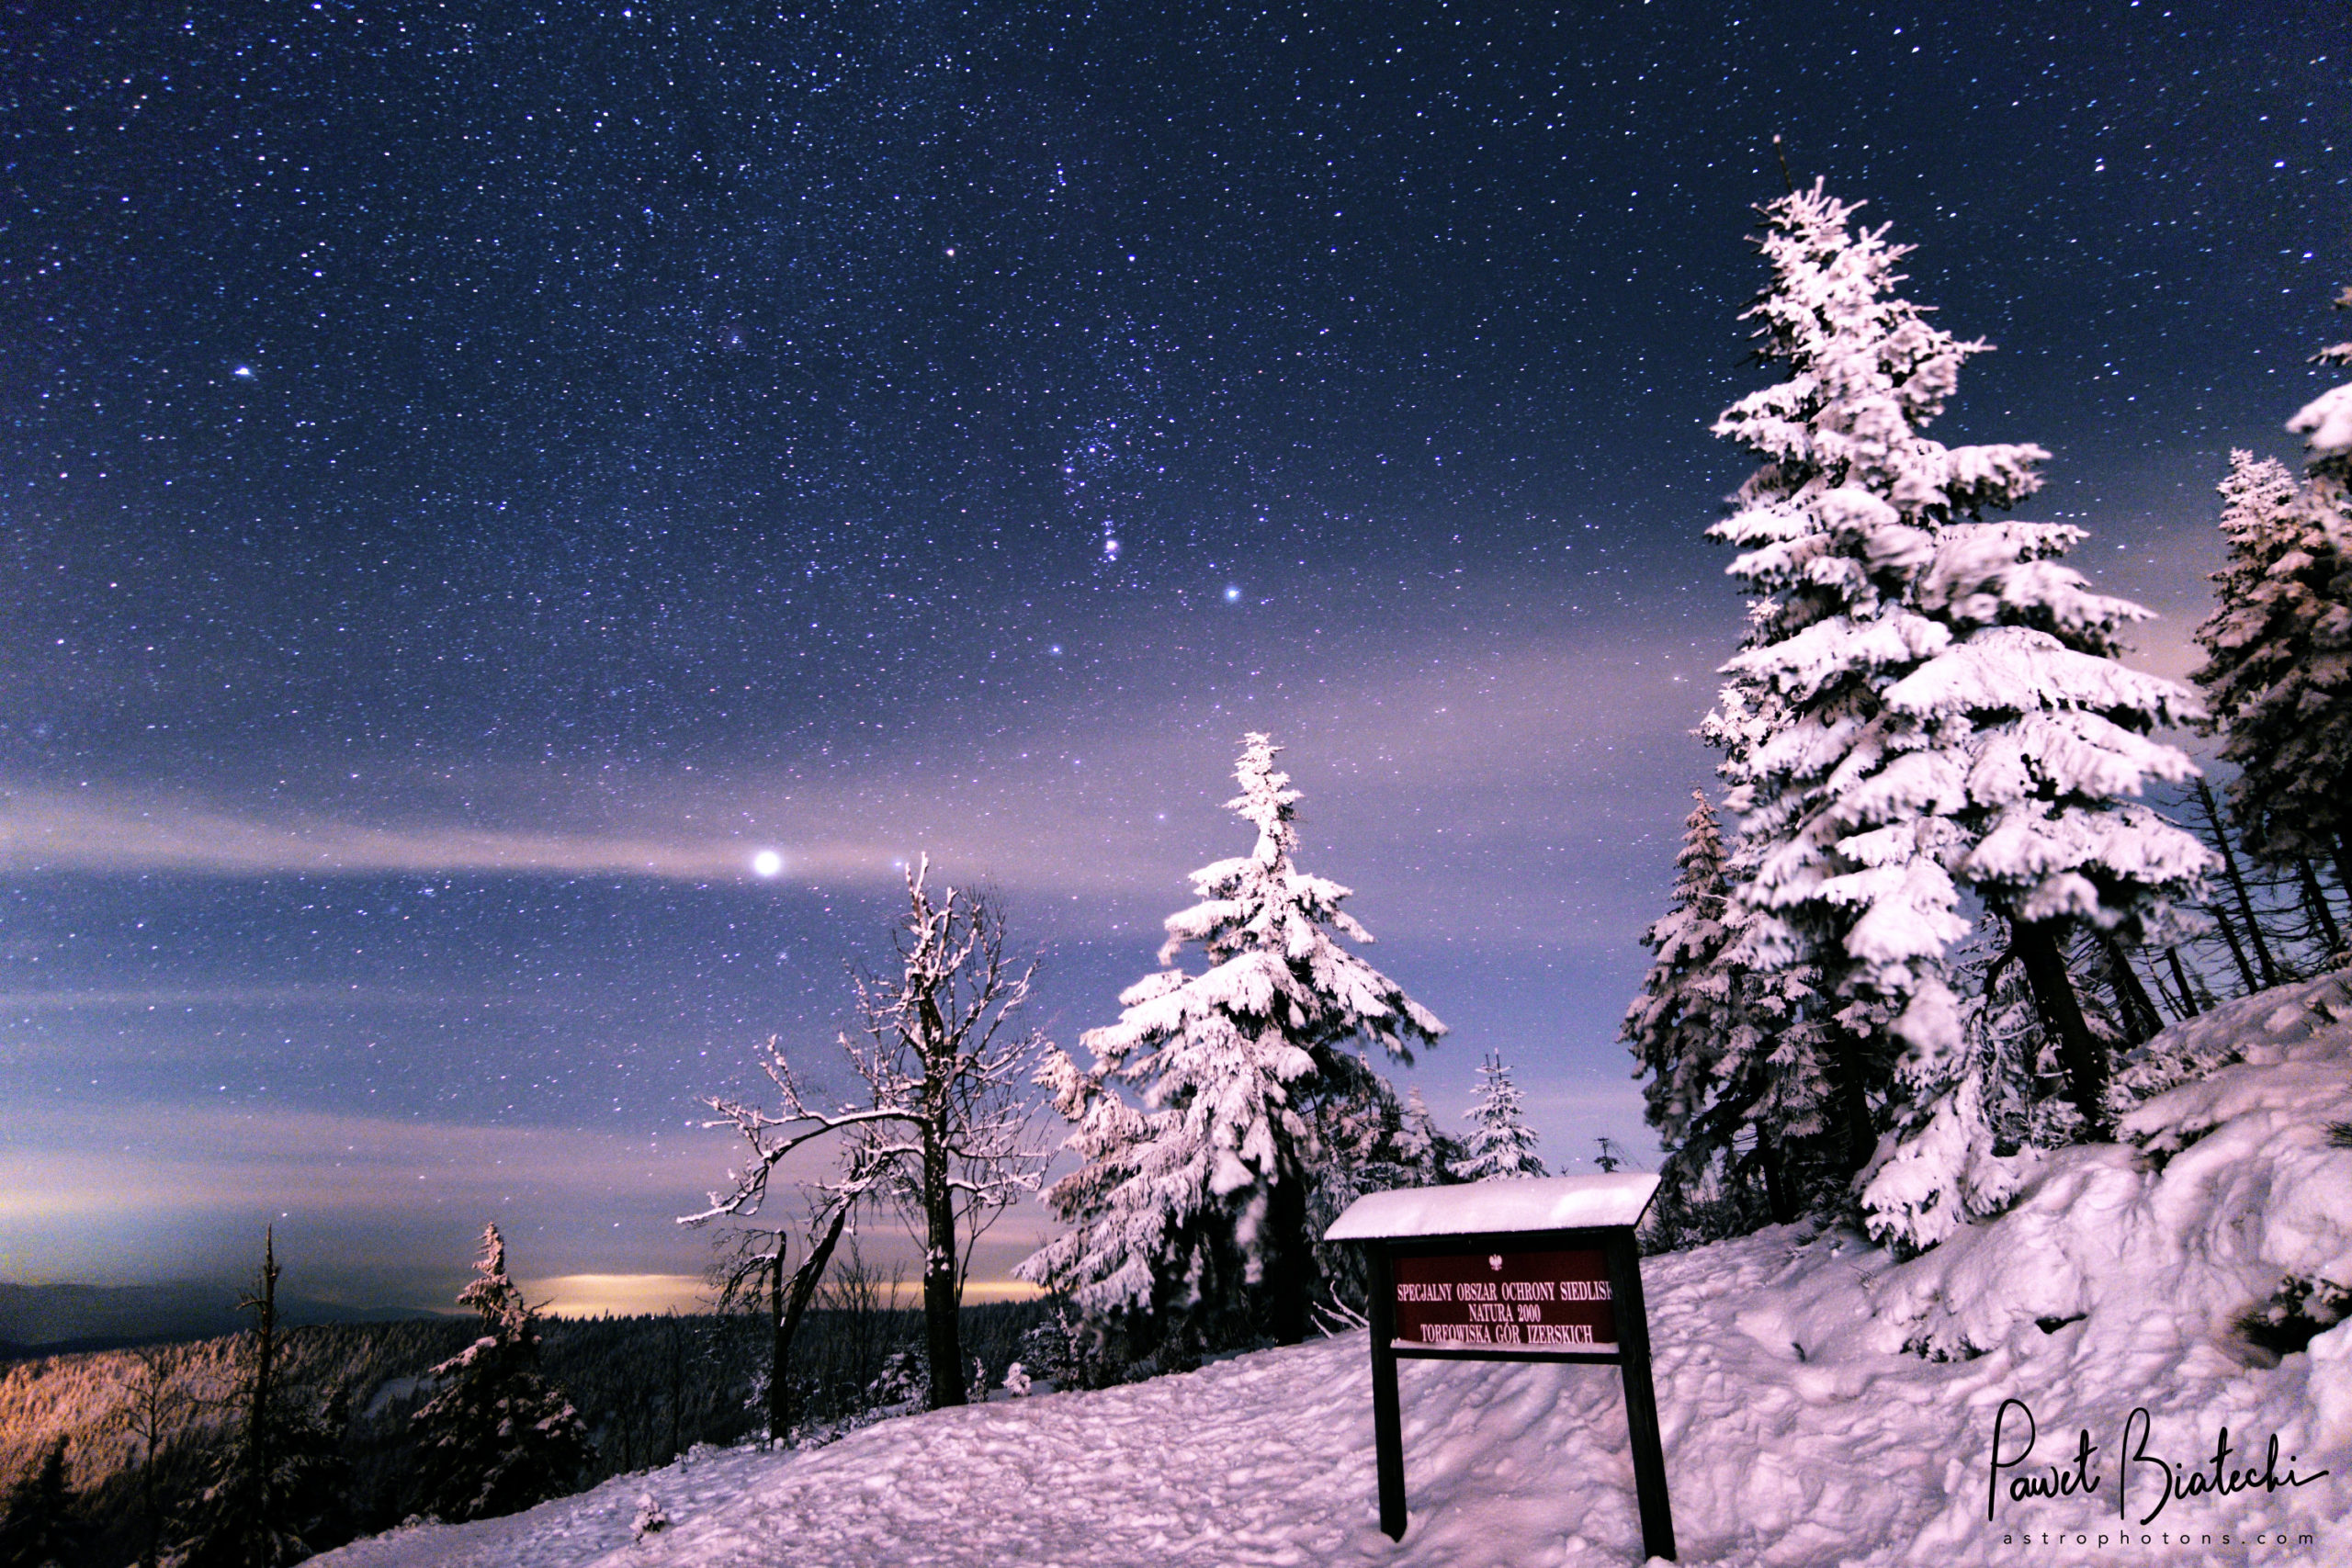
Milky Way
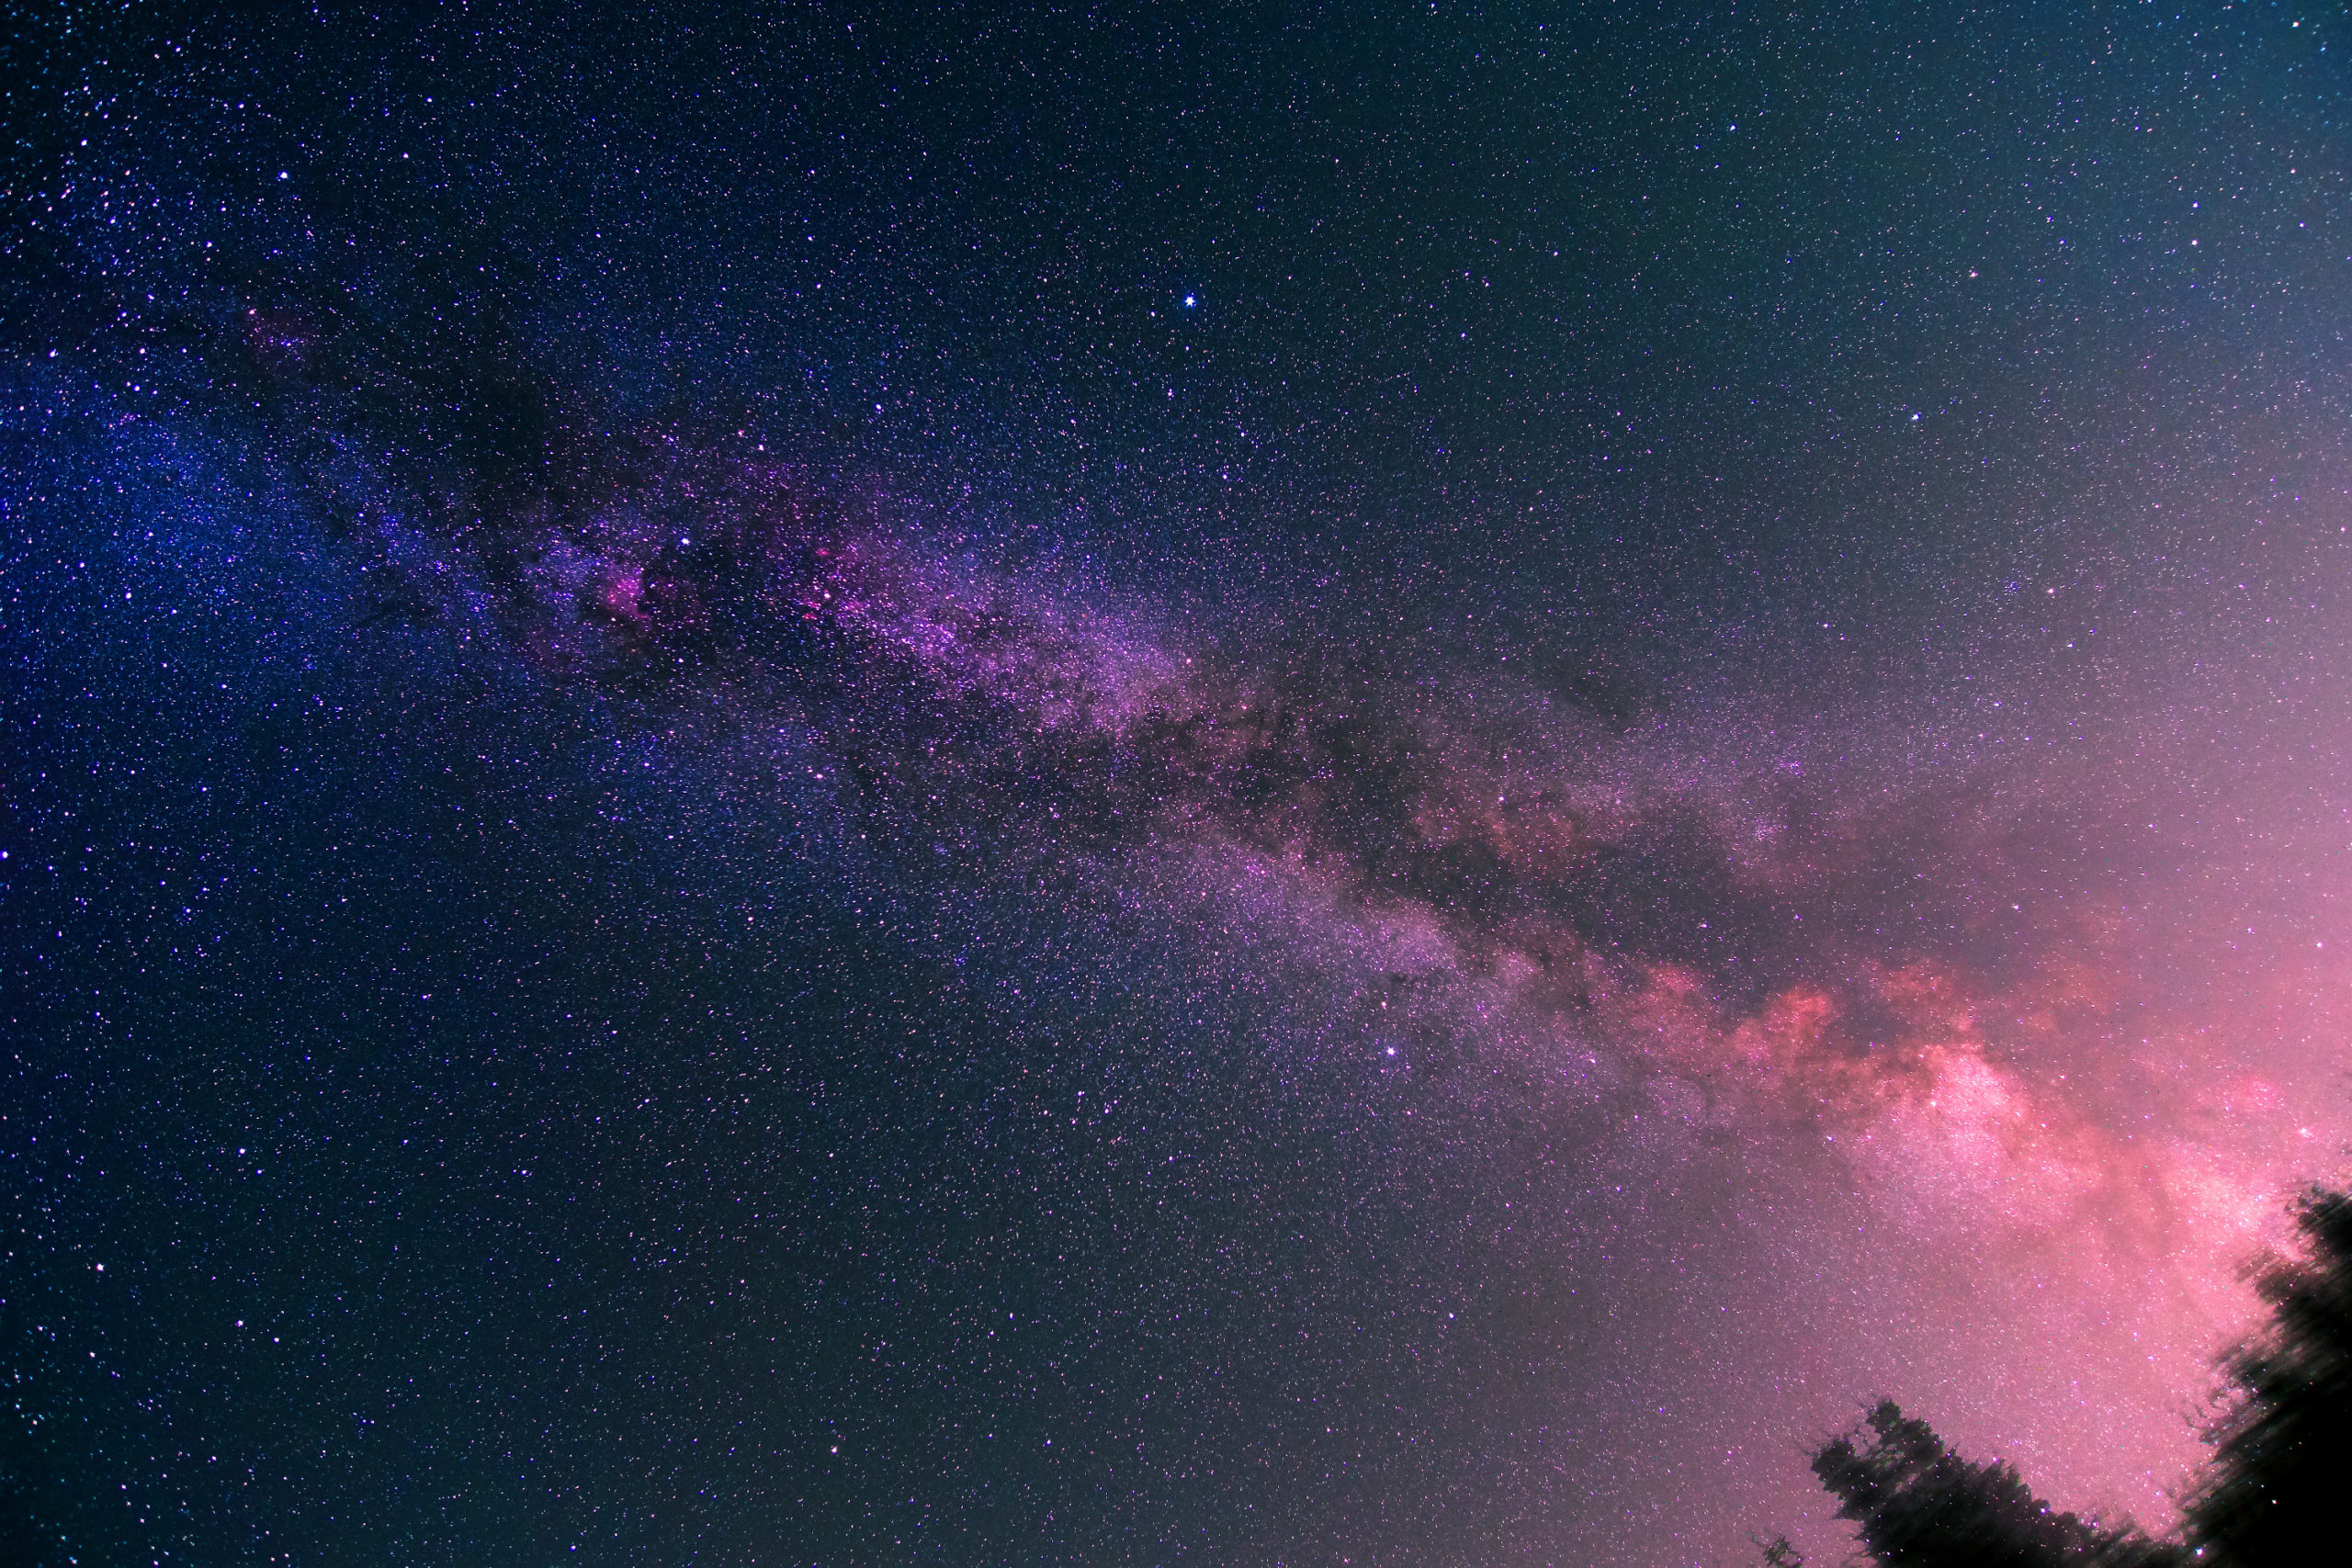
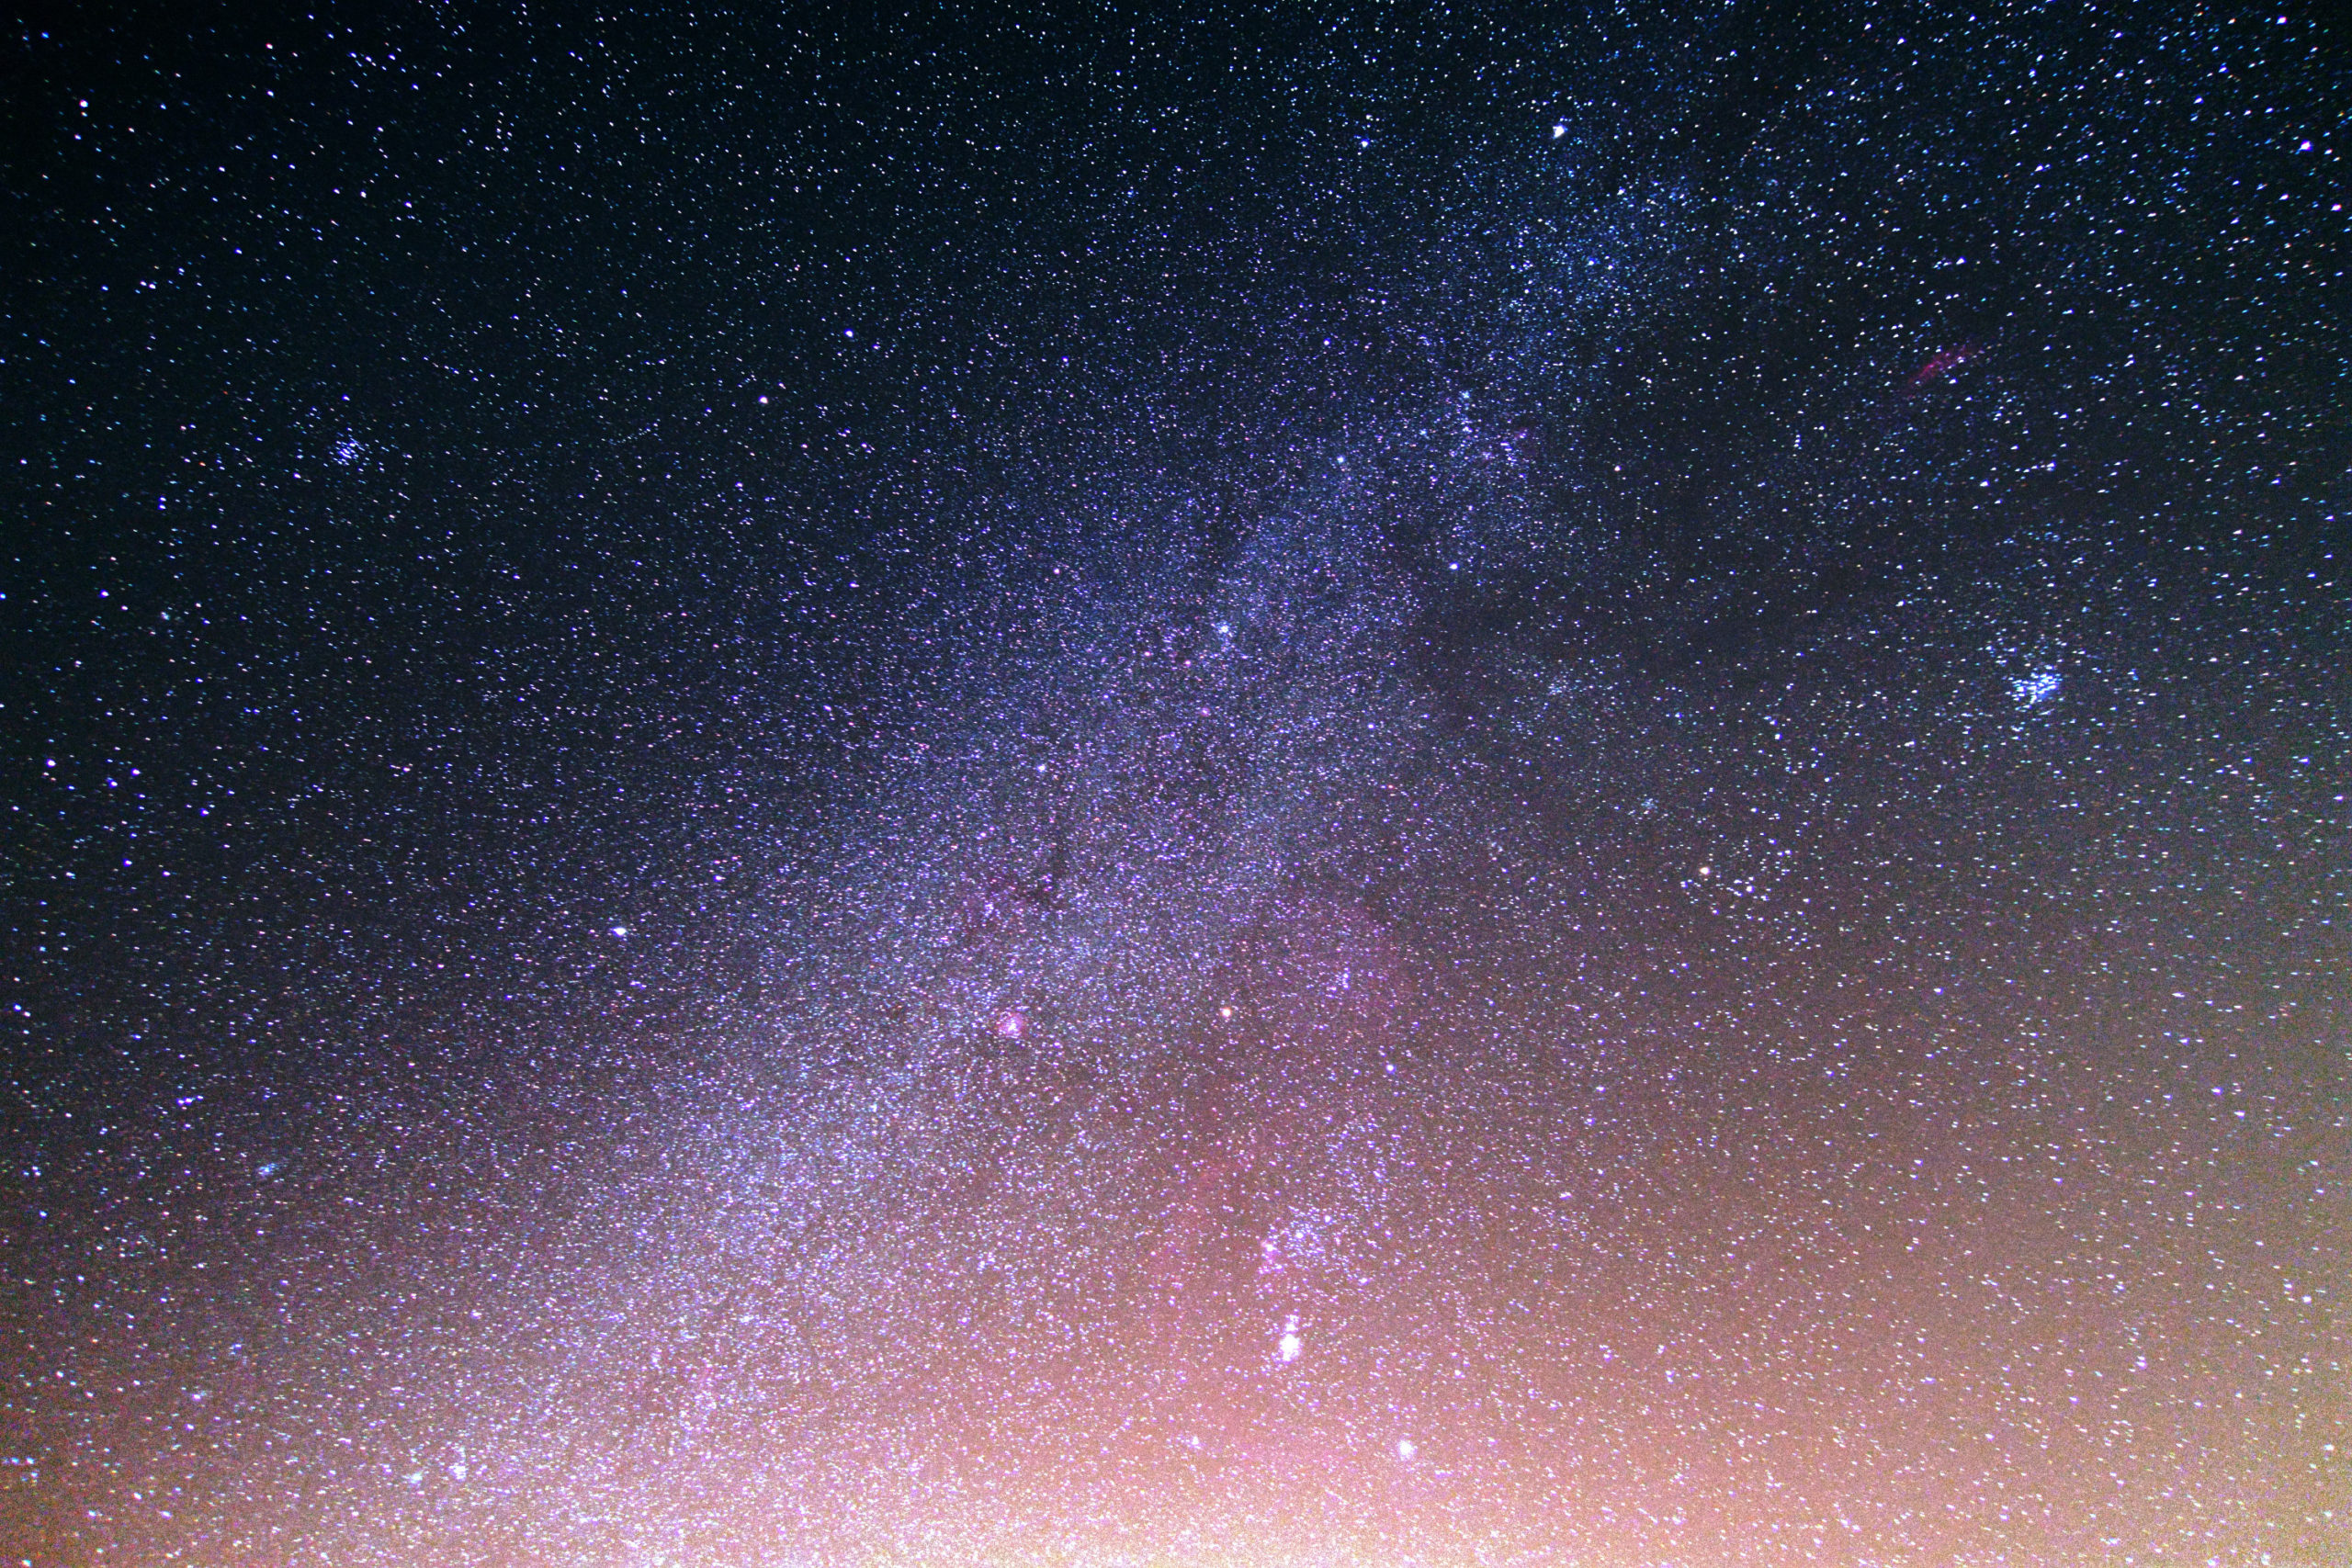
Wide-field Milky Way shots on a stationary tripod are the easiest way to get into this hobby. As you don't have to use (although for the best results, it's recommended) an equatorial mount on such short focal lengths, doing this kind of astrophotography is fast, not complicated, and just purely fun.
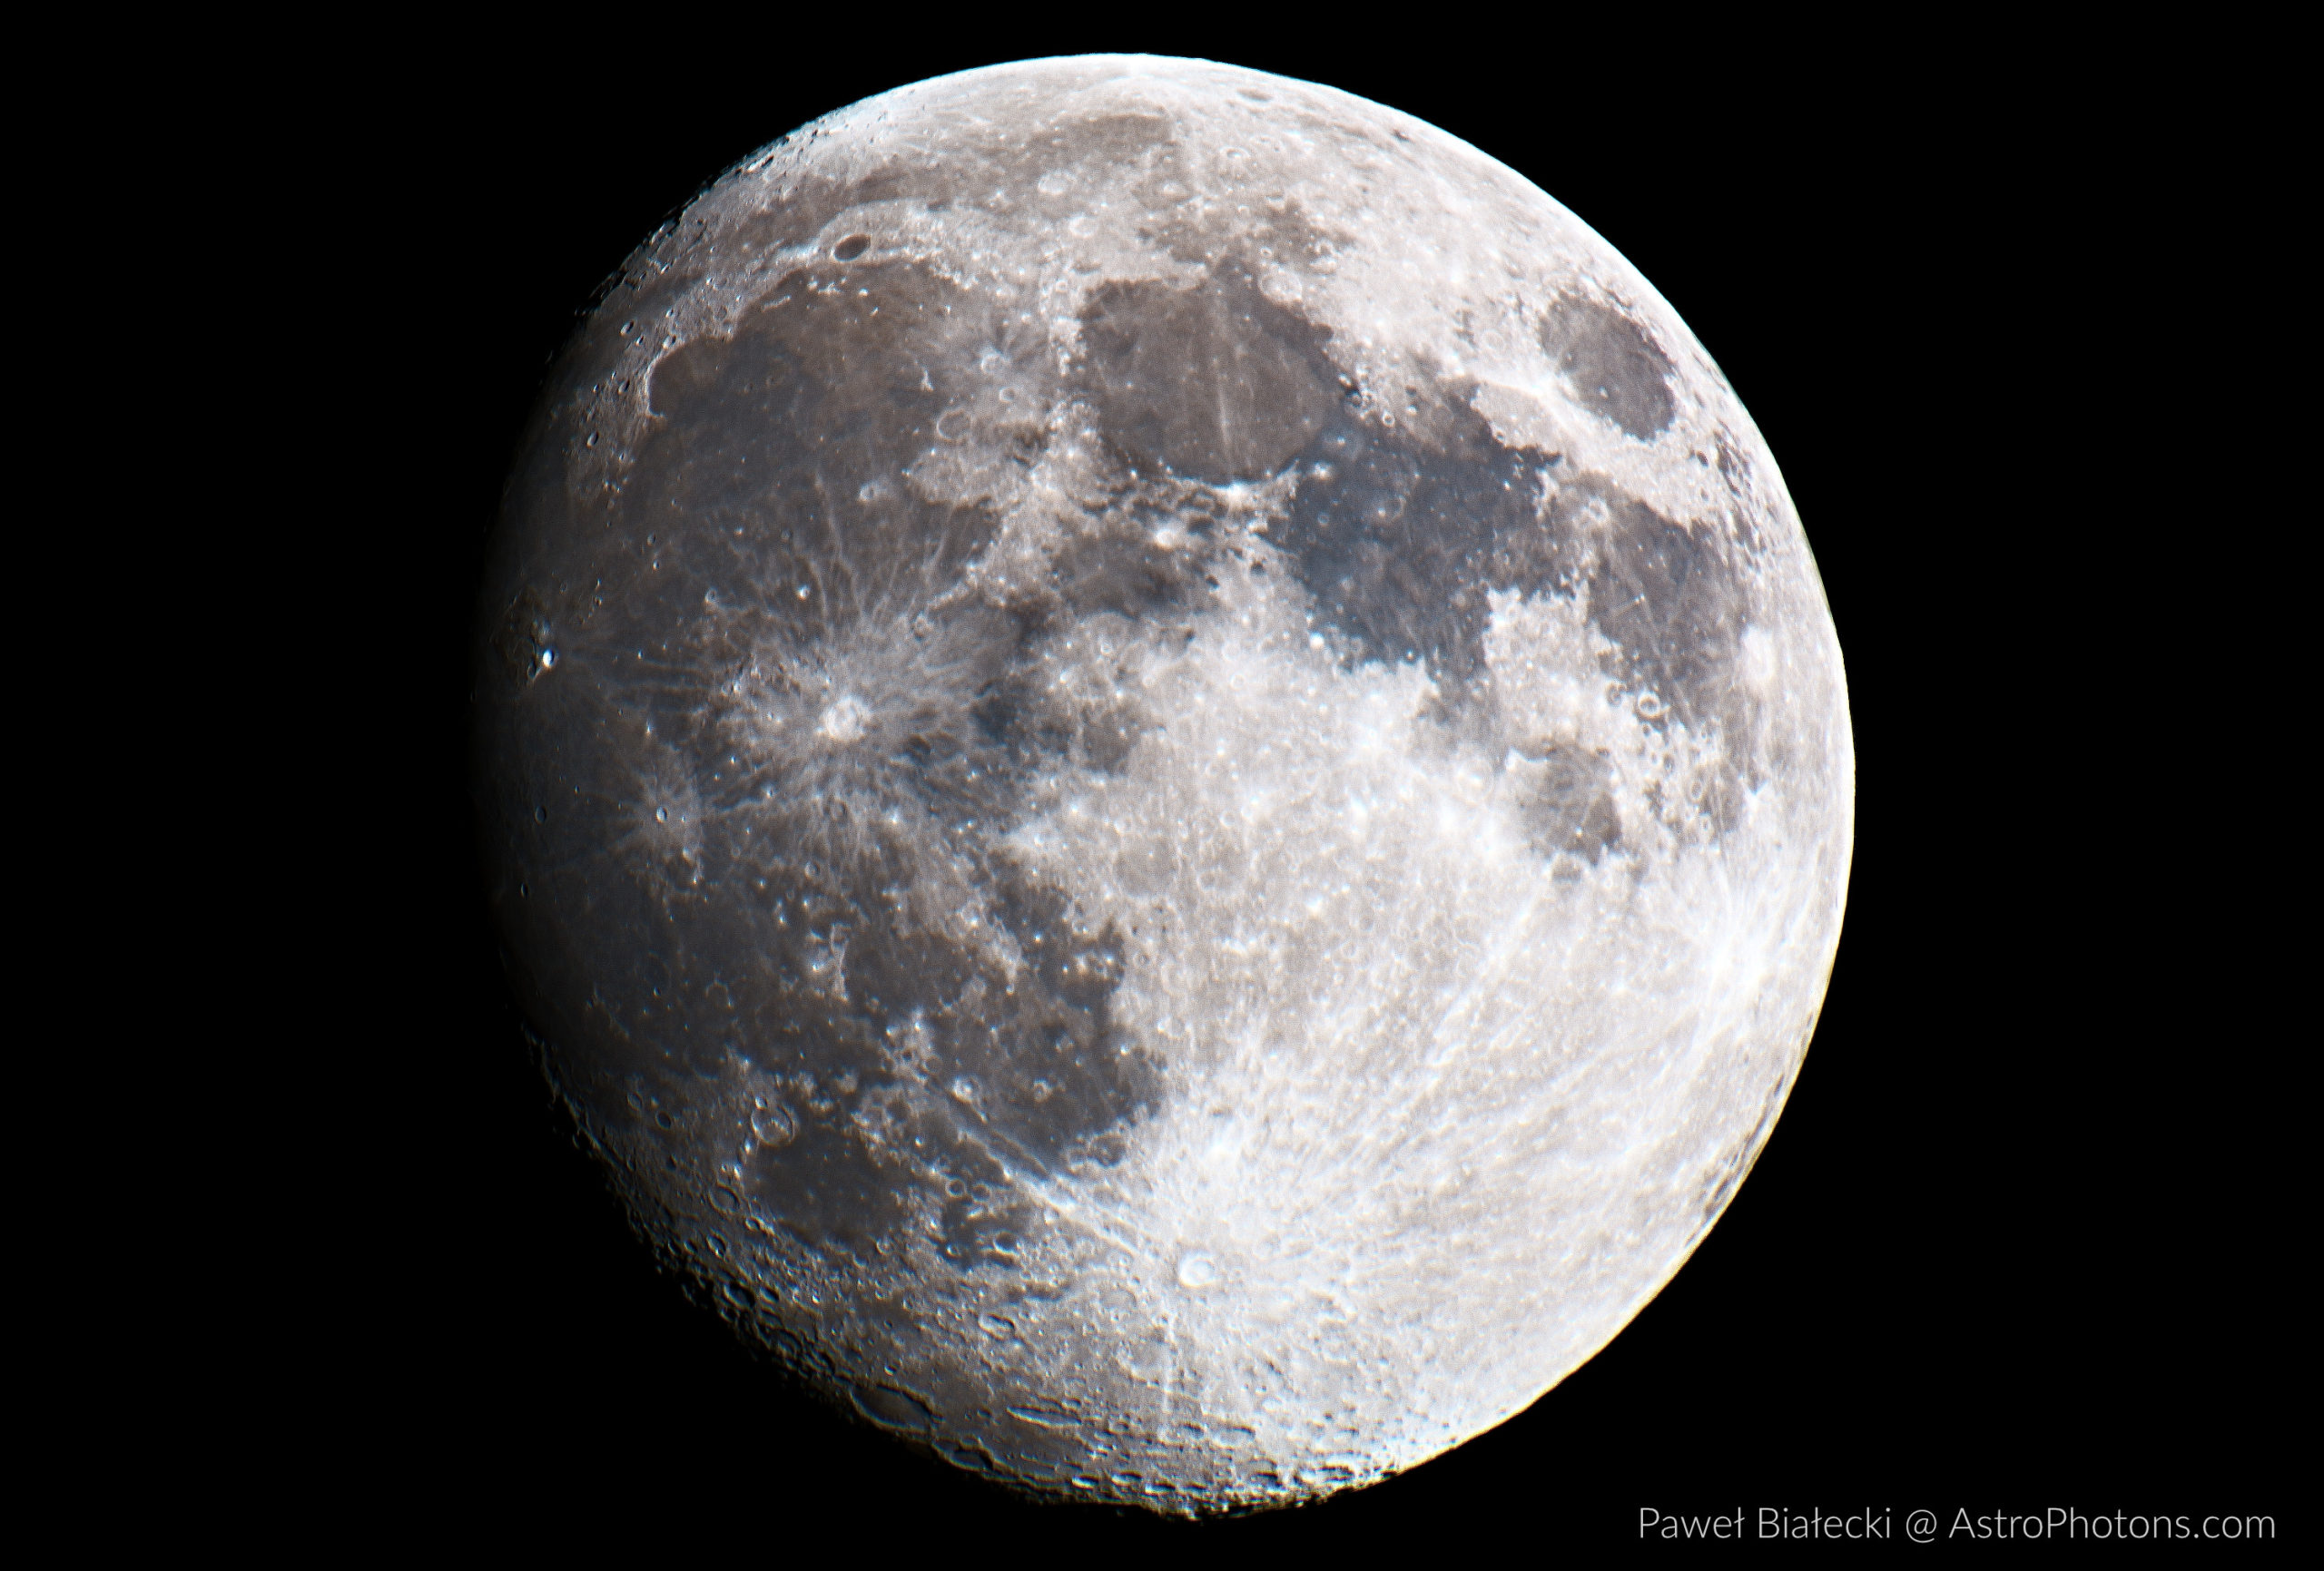
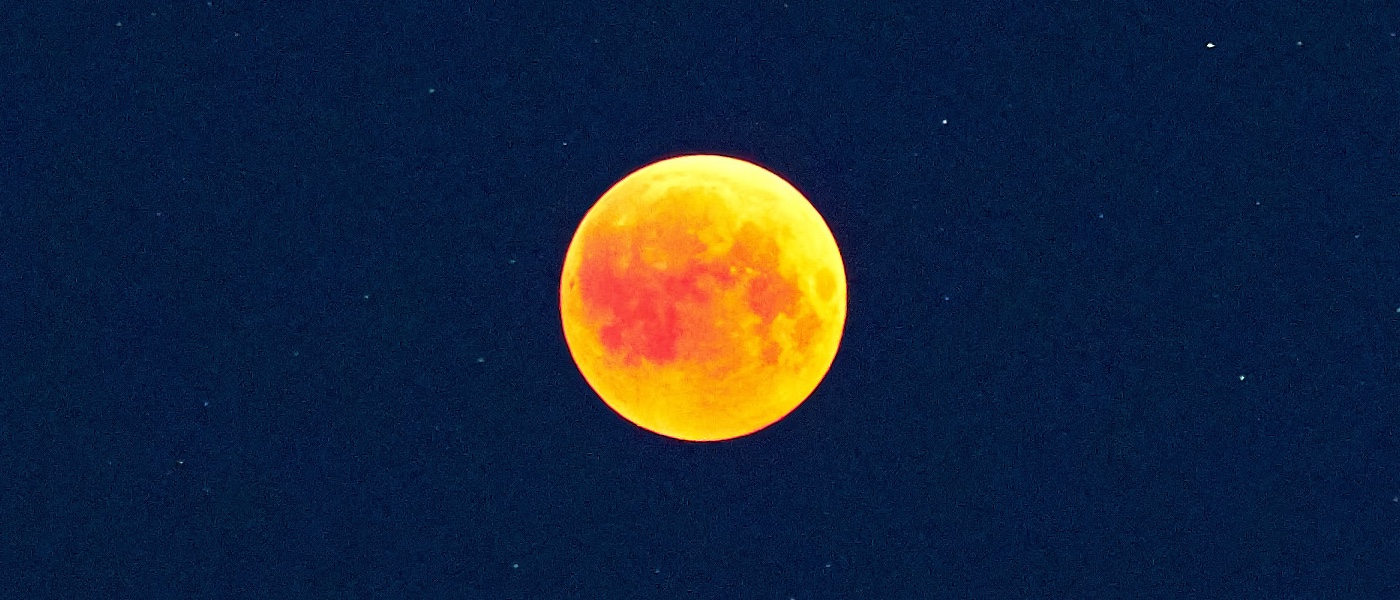
Moon
Moon is probably the most straightforward and photographed object in the night sky. It's so bright that you don't need an equatorial mount to capture it, only a telephoto lens or a small telescope.
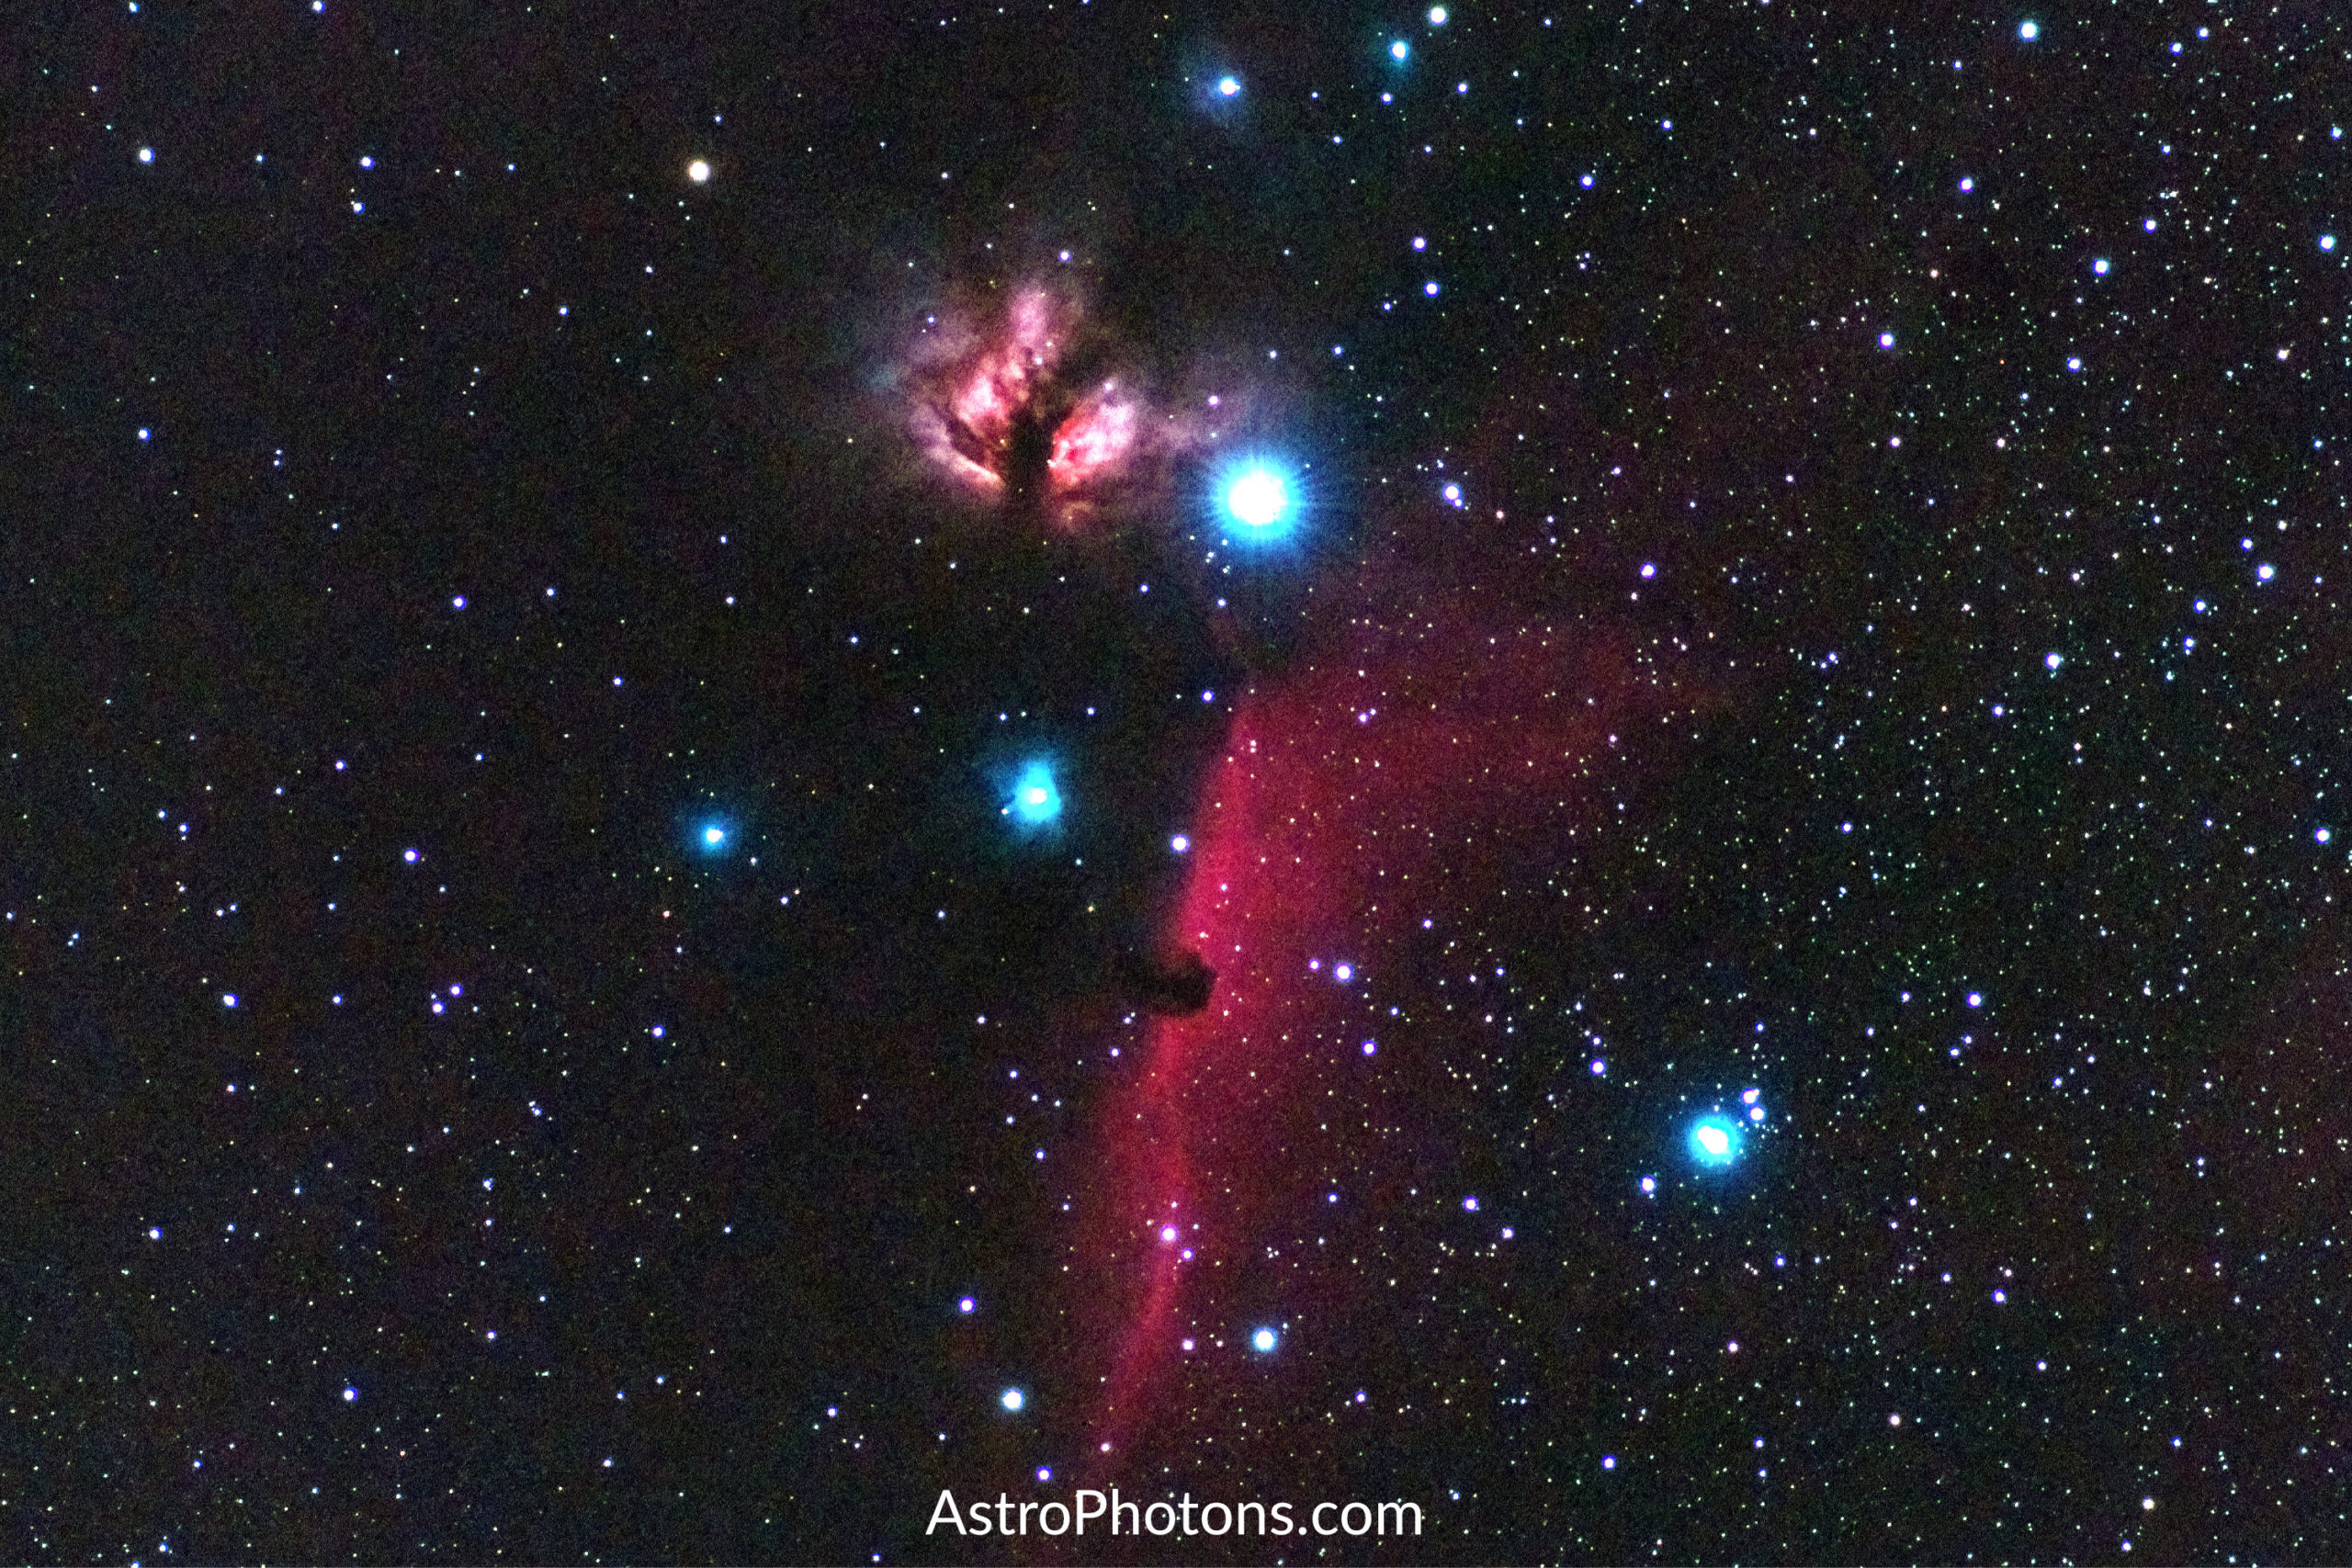
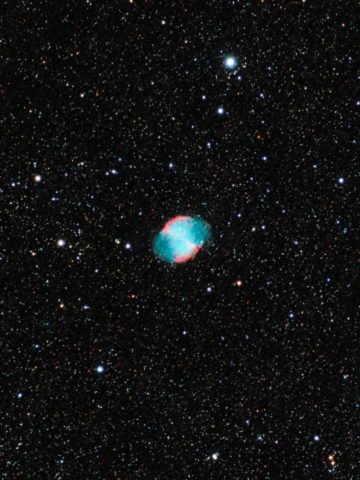
Deep-Sky Objects
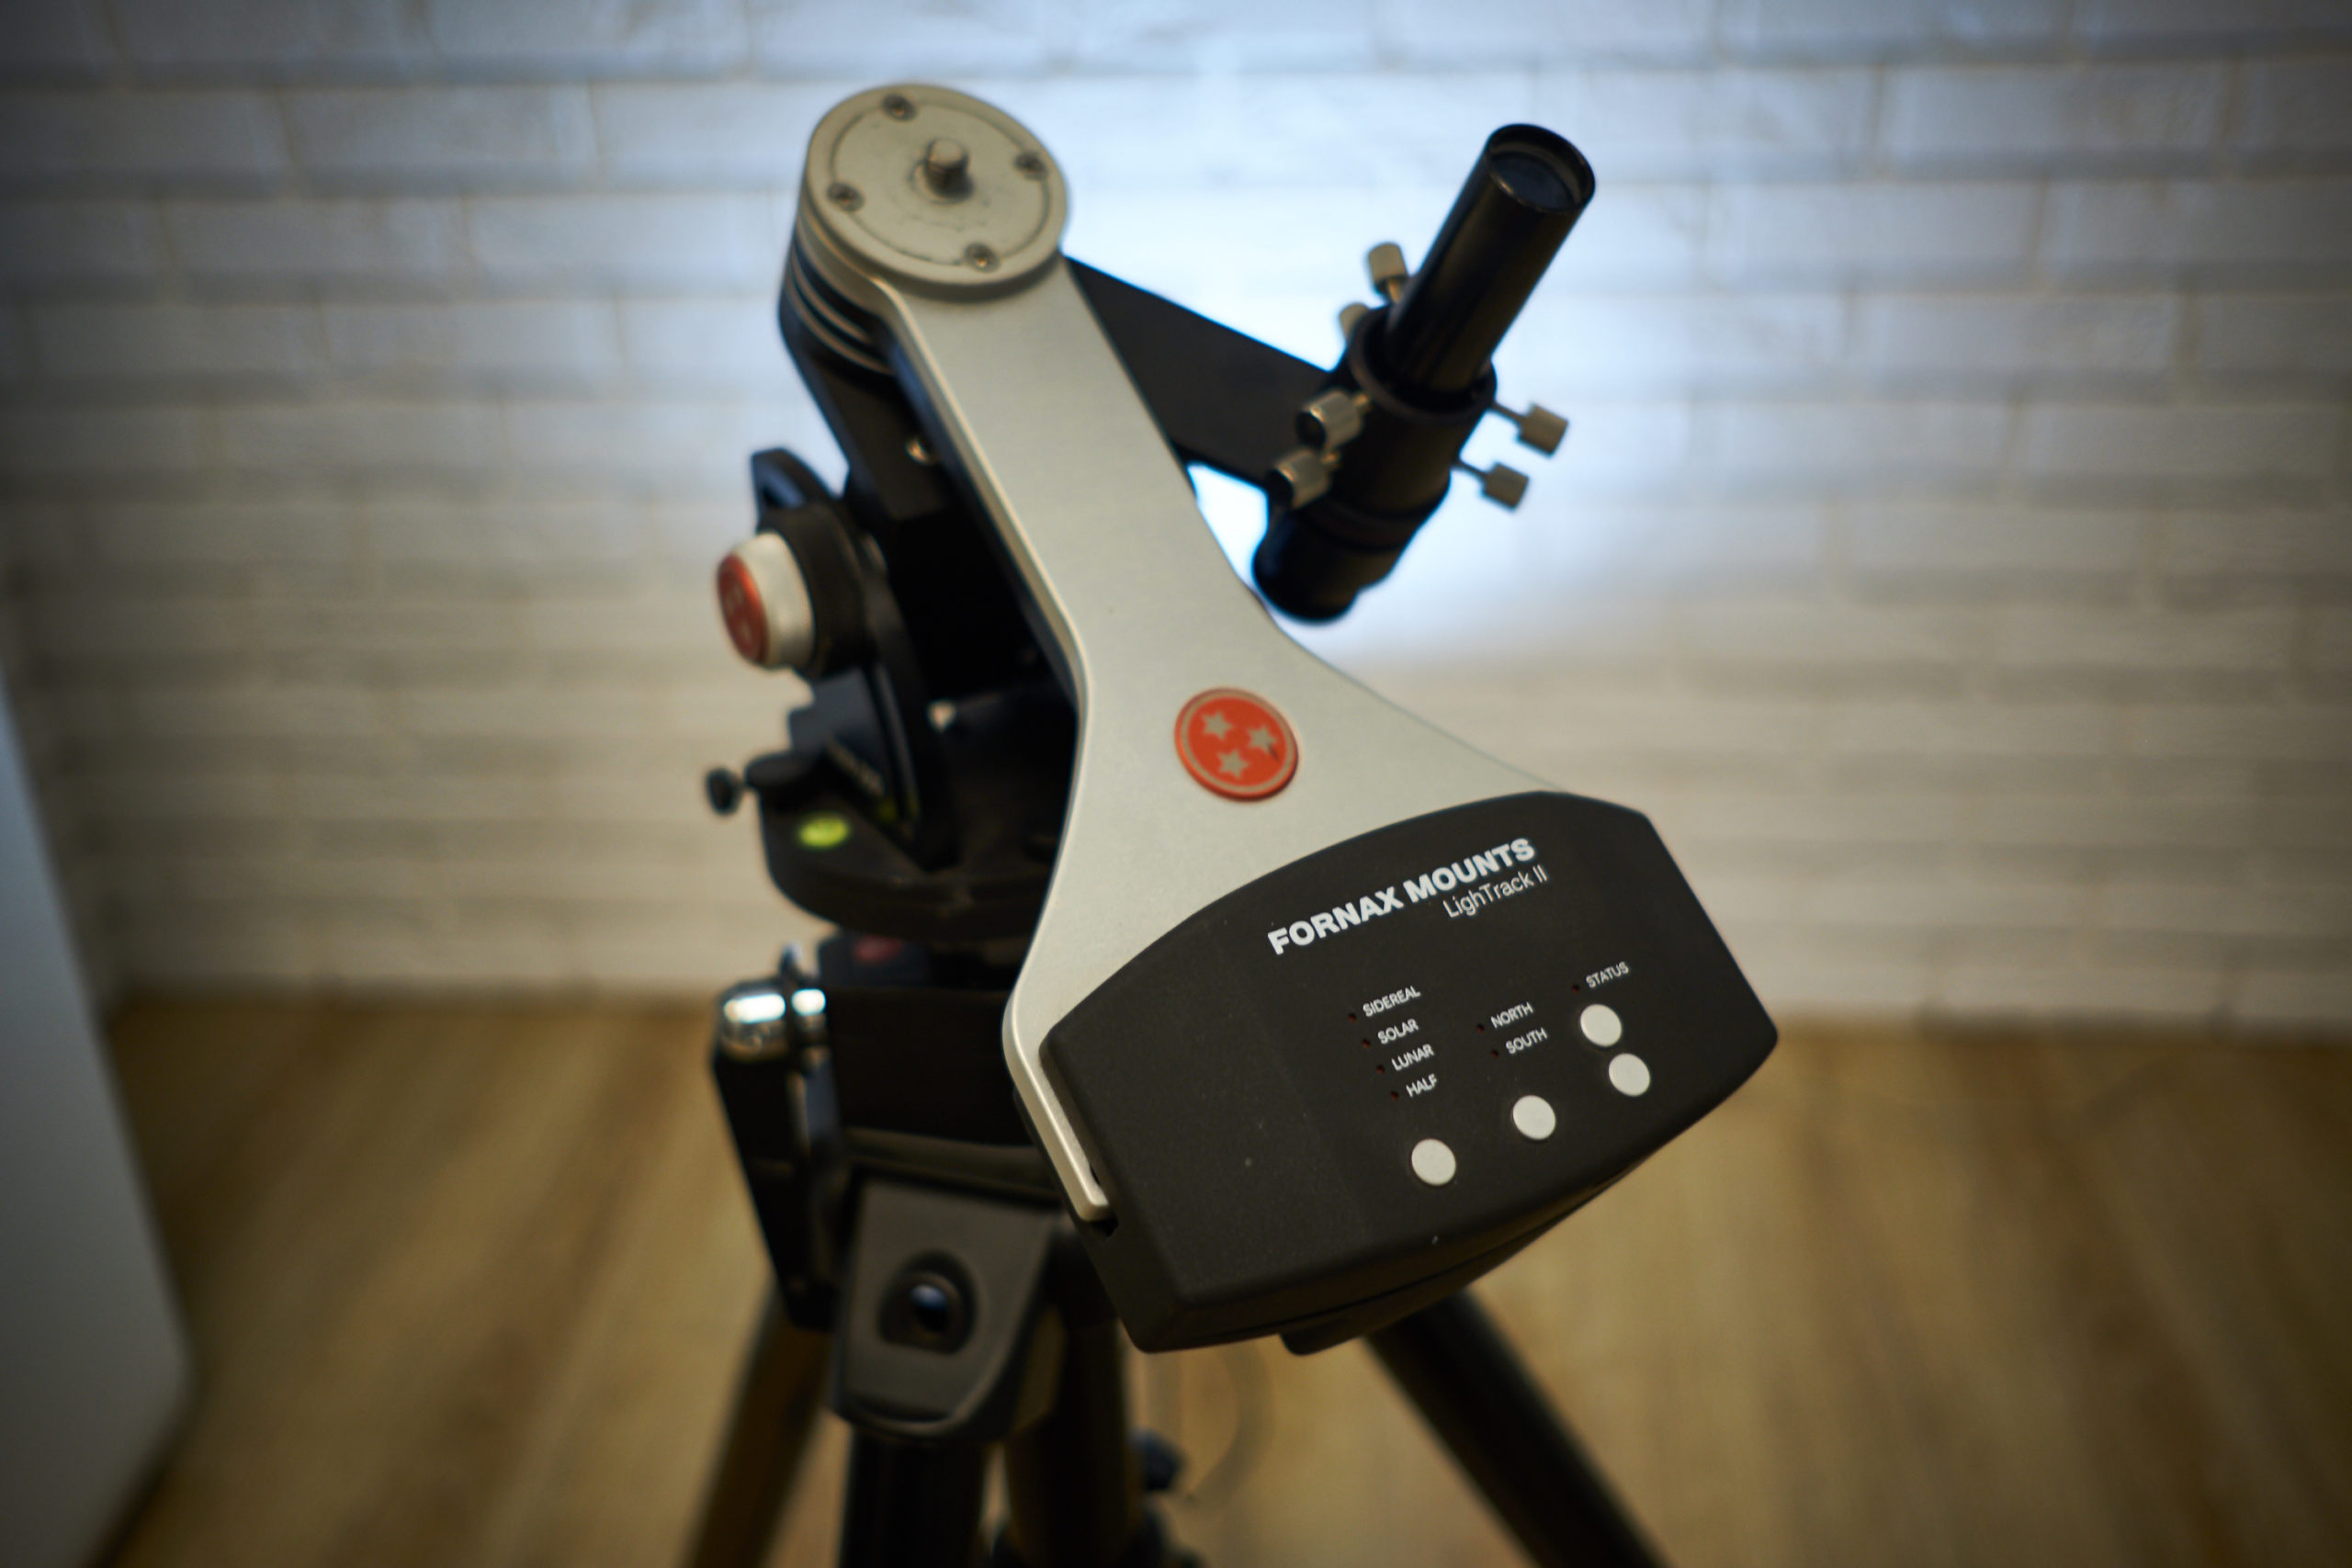
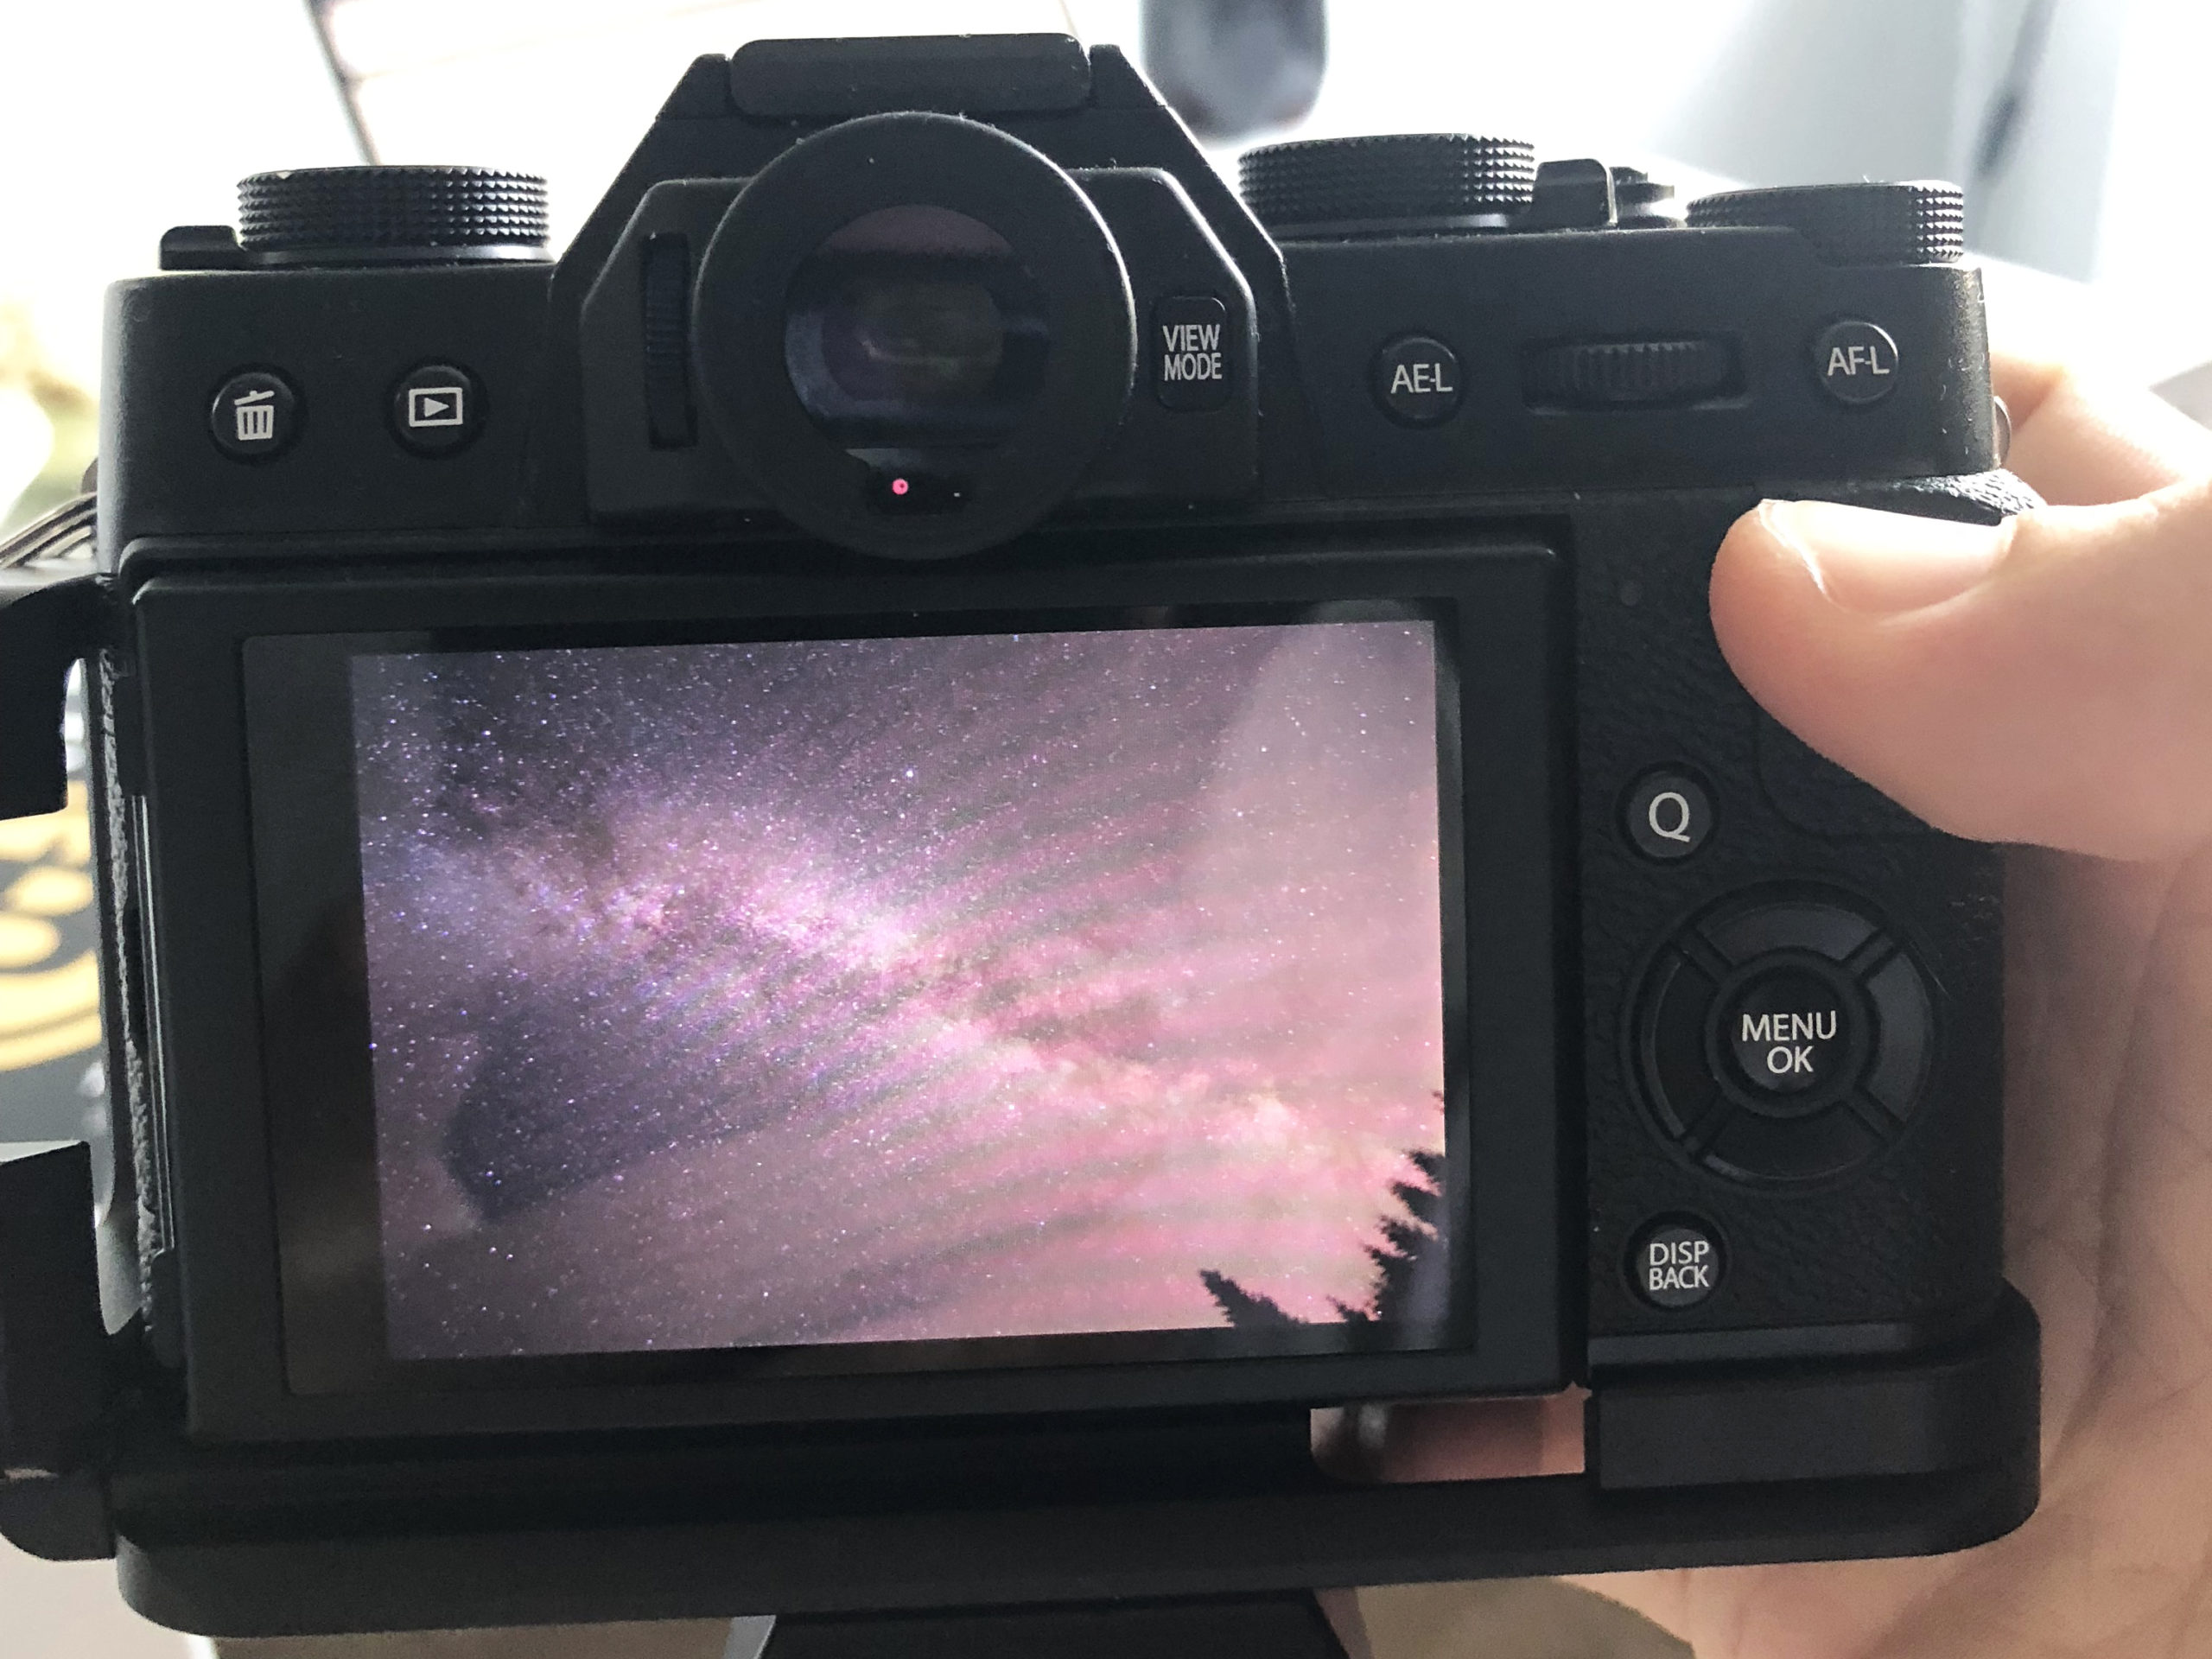
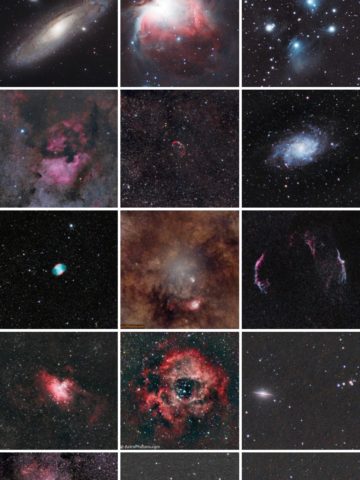
Using an equatorial mount, you can capture some deep-sky objects even with a 50mm portrait lens, but a small APO telescope will be the best to get the best results. The deep-sky pictures below were taken with my Fuji X-T20 camera, Sky-Watcher Evostar 72ED telescope, and Fornax LighTrack II mount. This setup is a fantastic entry-level choice for beginners.
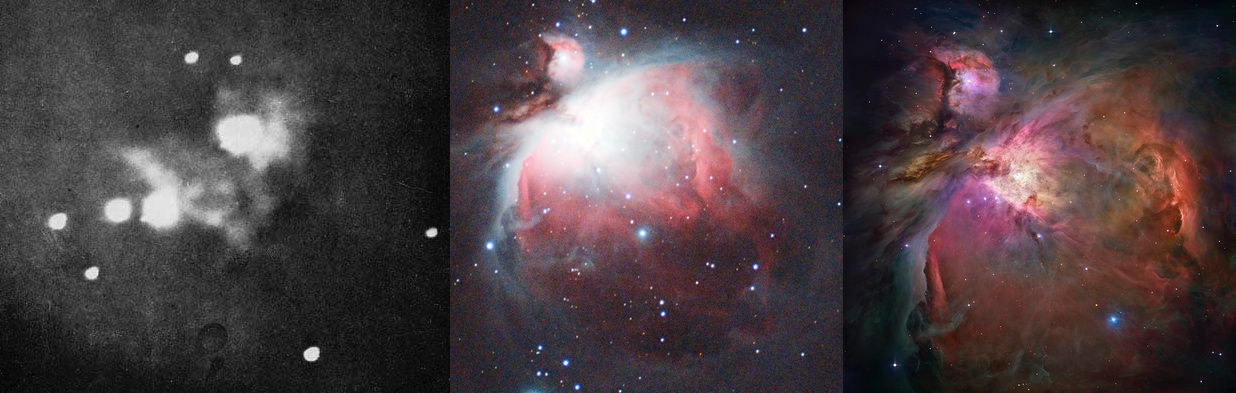
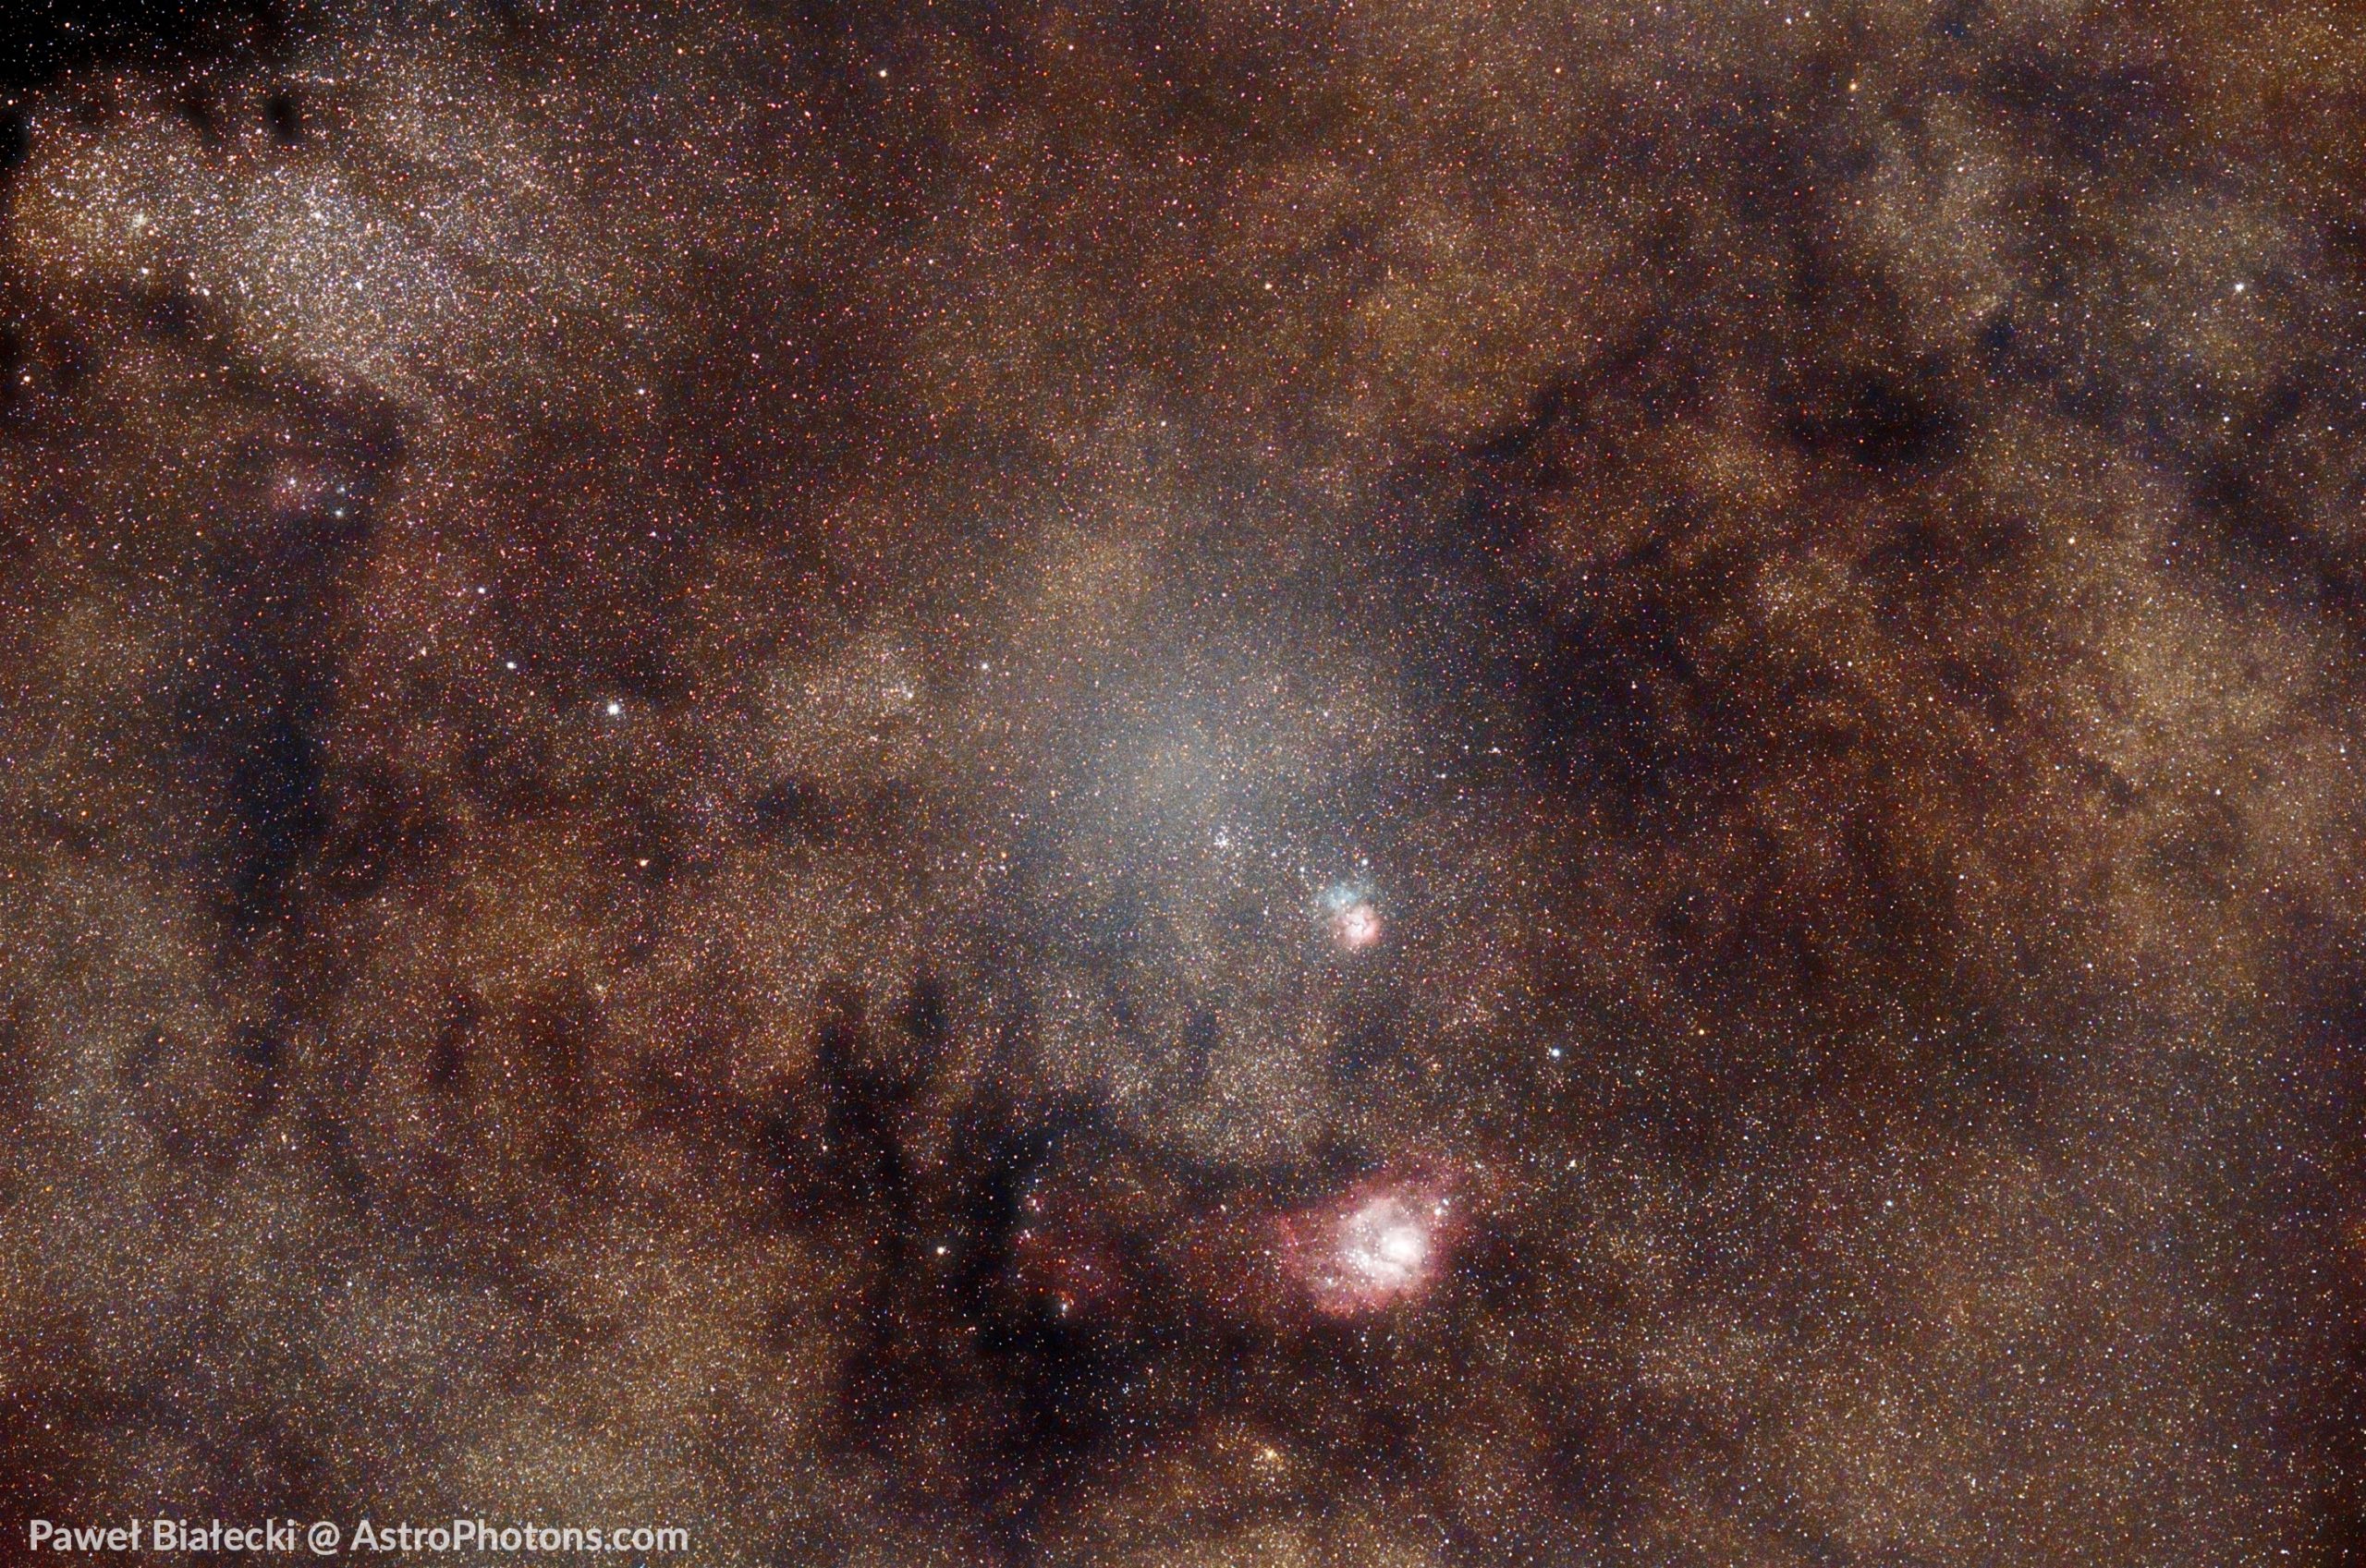
Orion Nebula (M42)
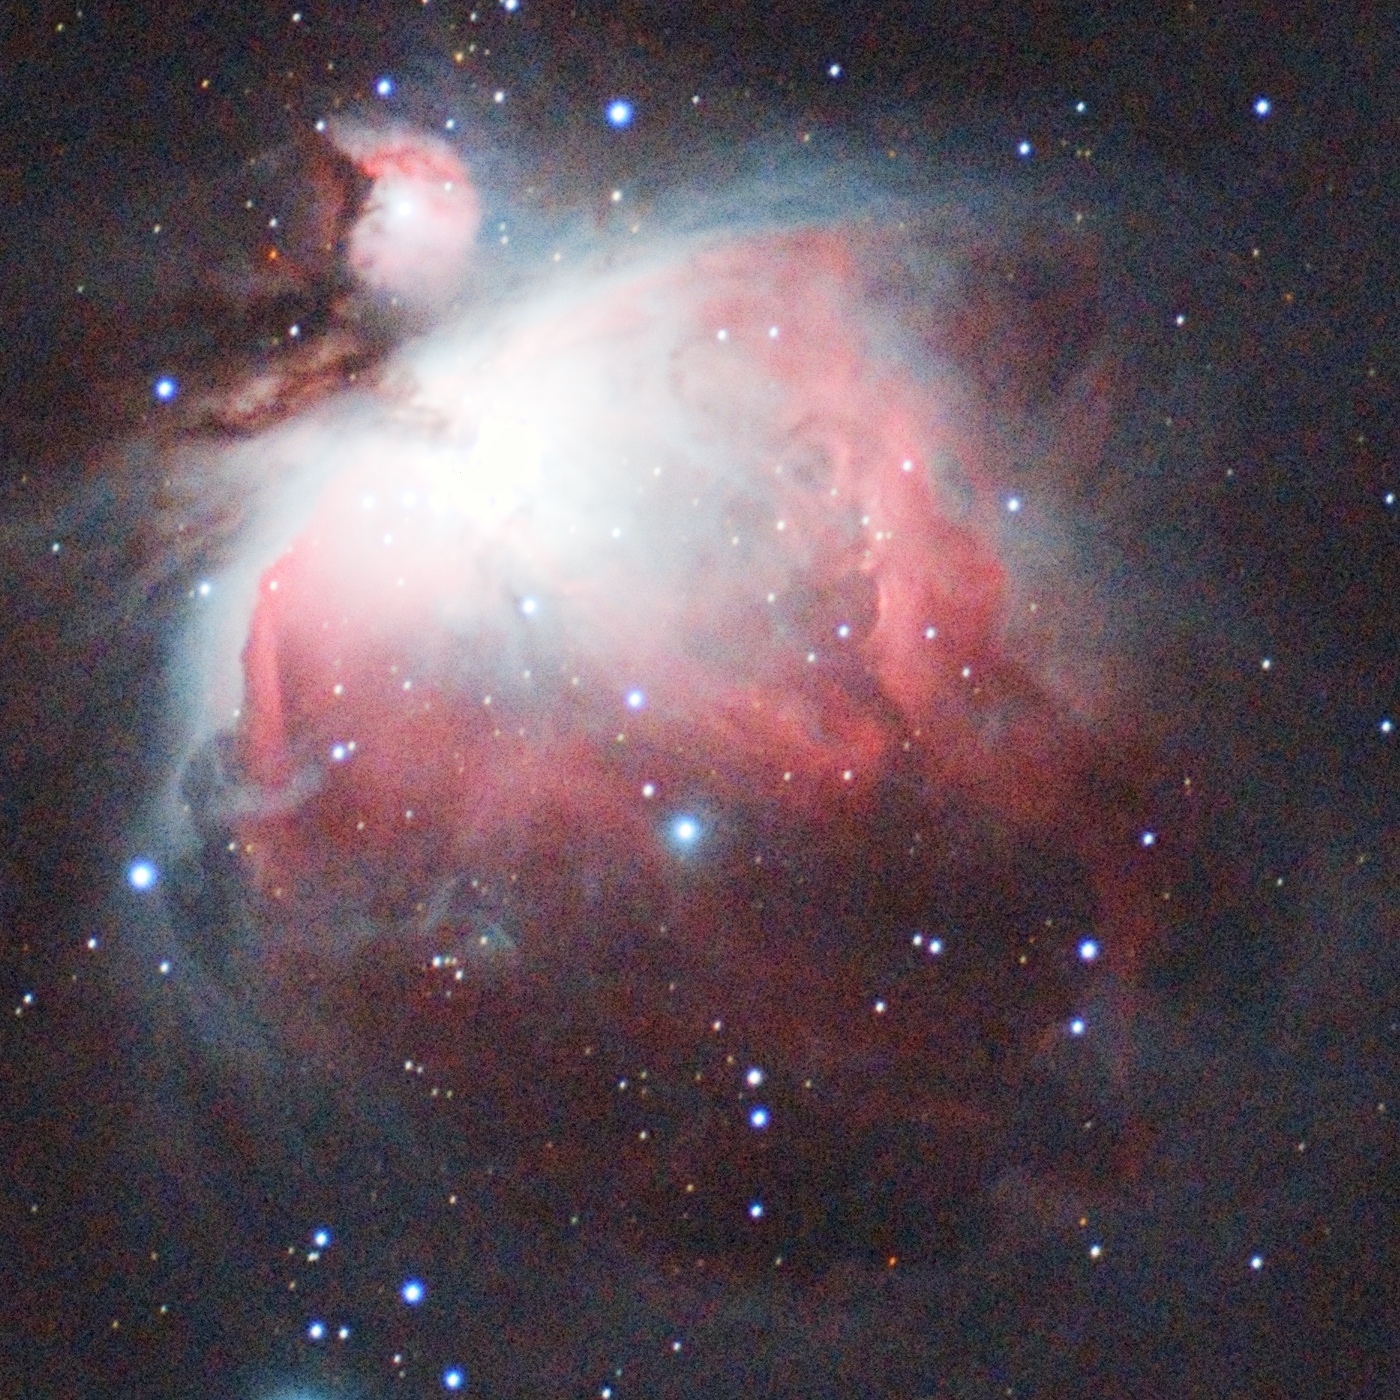
Orion Nebula is a diffuse nebula located in the Orion constellation. It's so bright that you can see it with your naked eyes (even without binoculars) looking onto the Orion constellation. It's the most famous nebula among astrophotographers, and you should start your deep-sky imaging from it. It's available in Winter, so prepare warm clothes when going out to capture it.
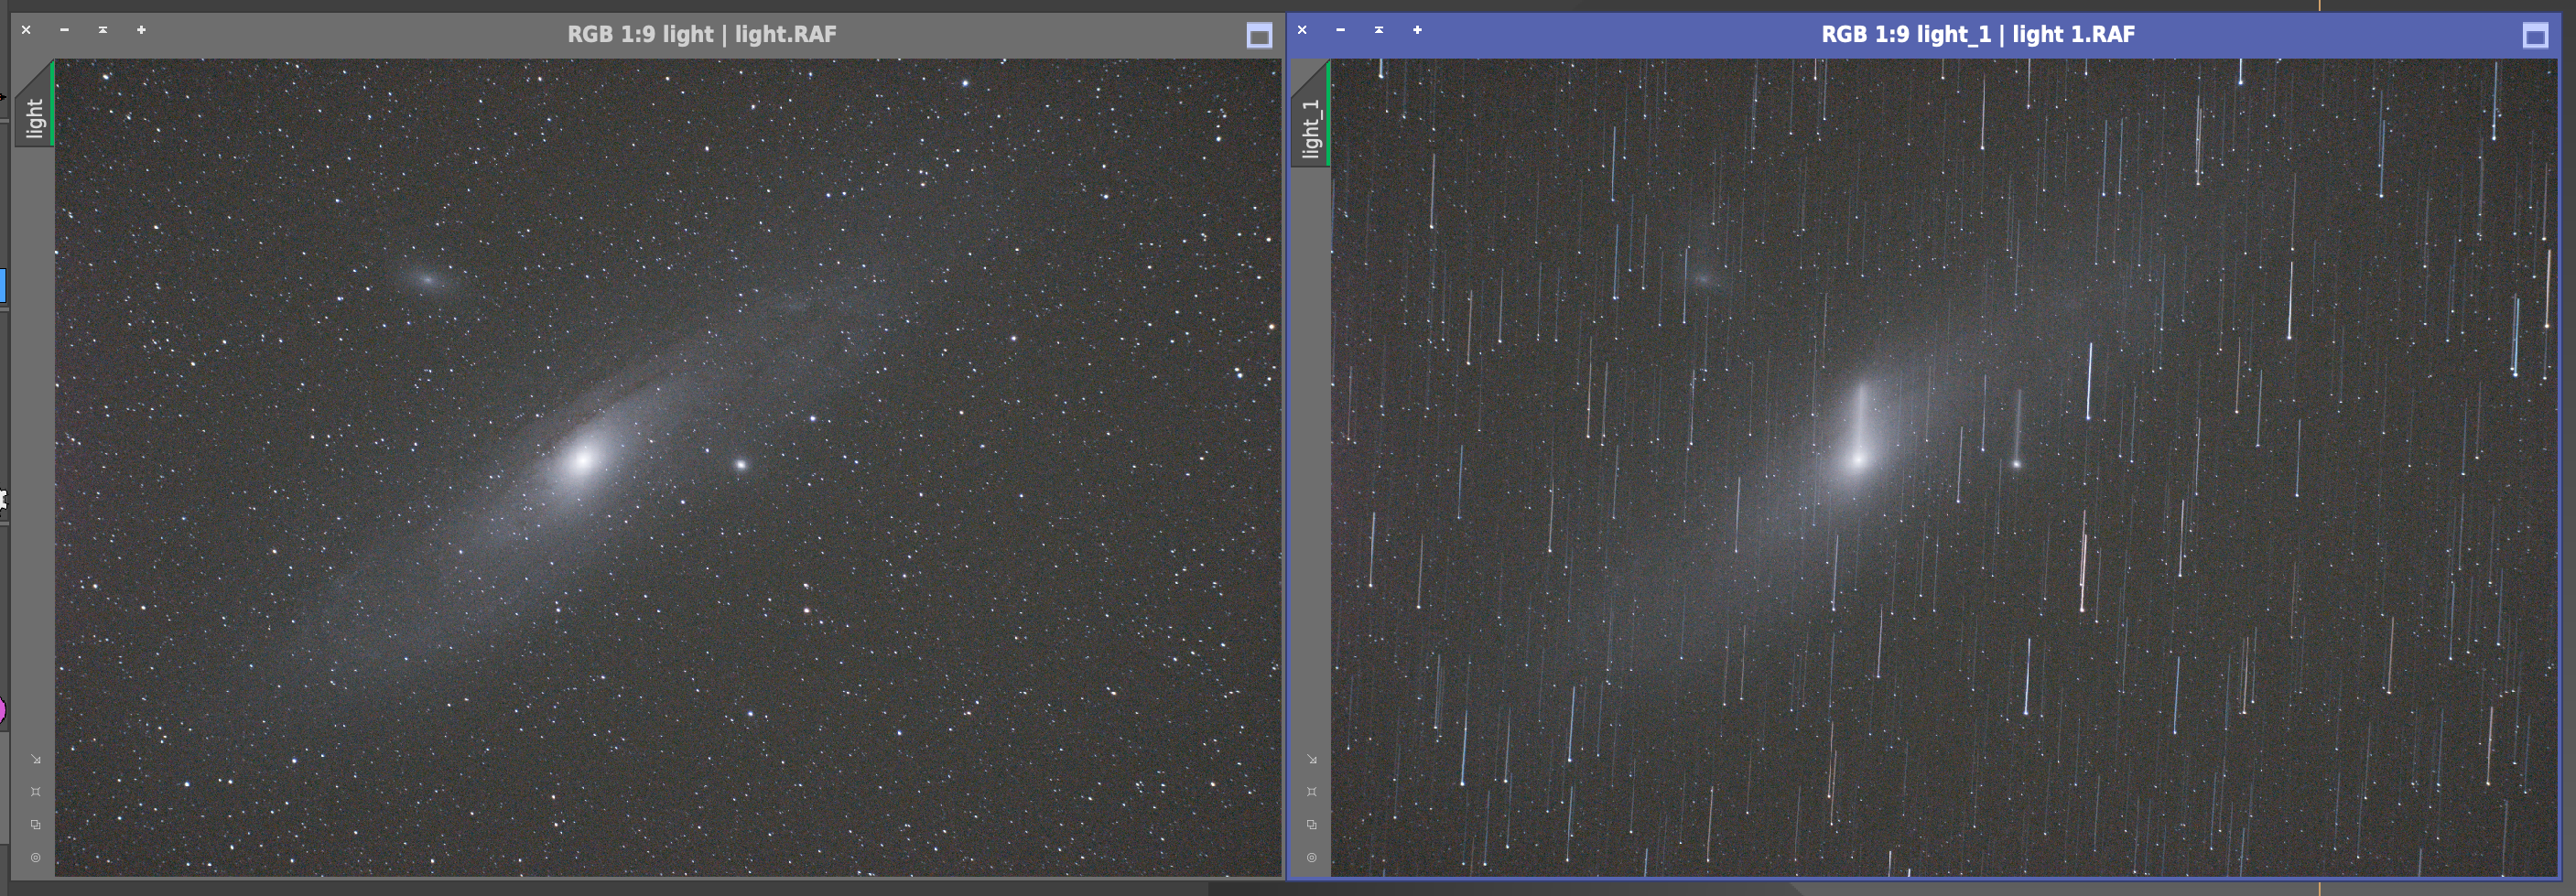
Andromeda Galaxy (M31)
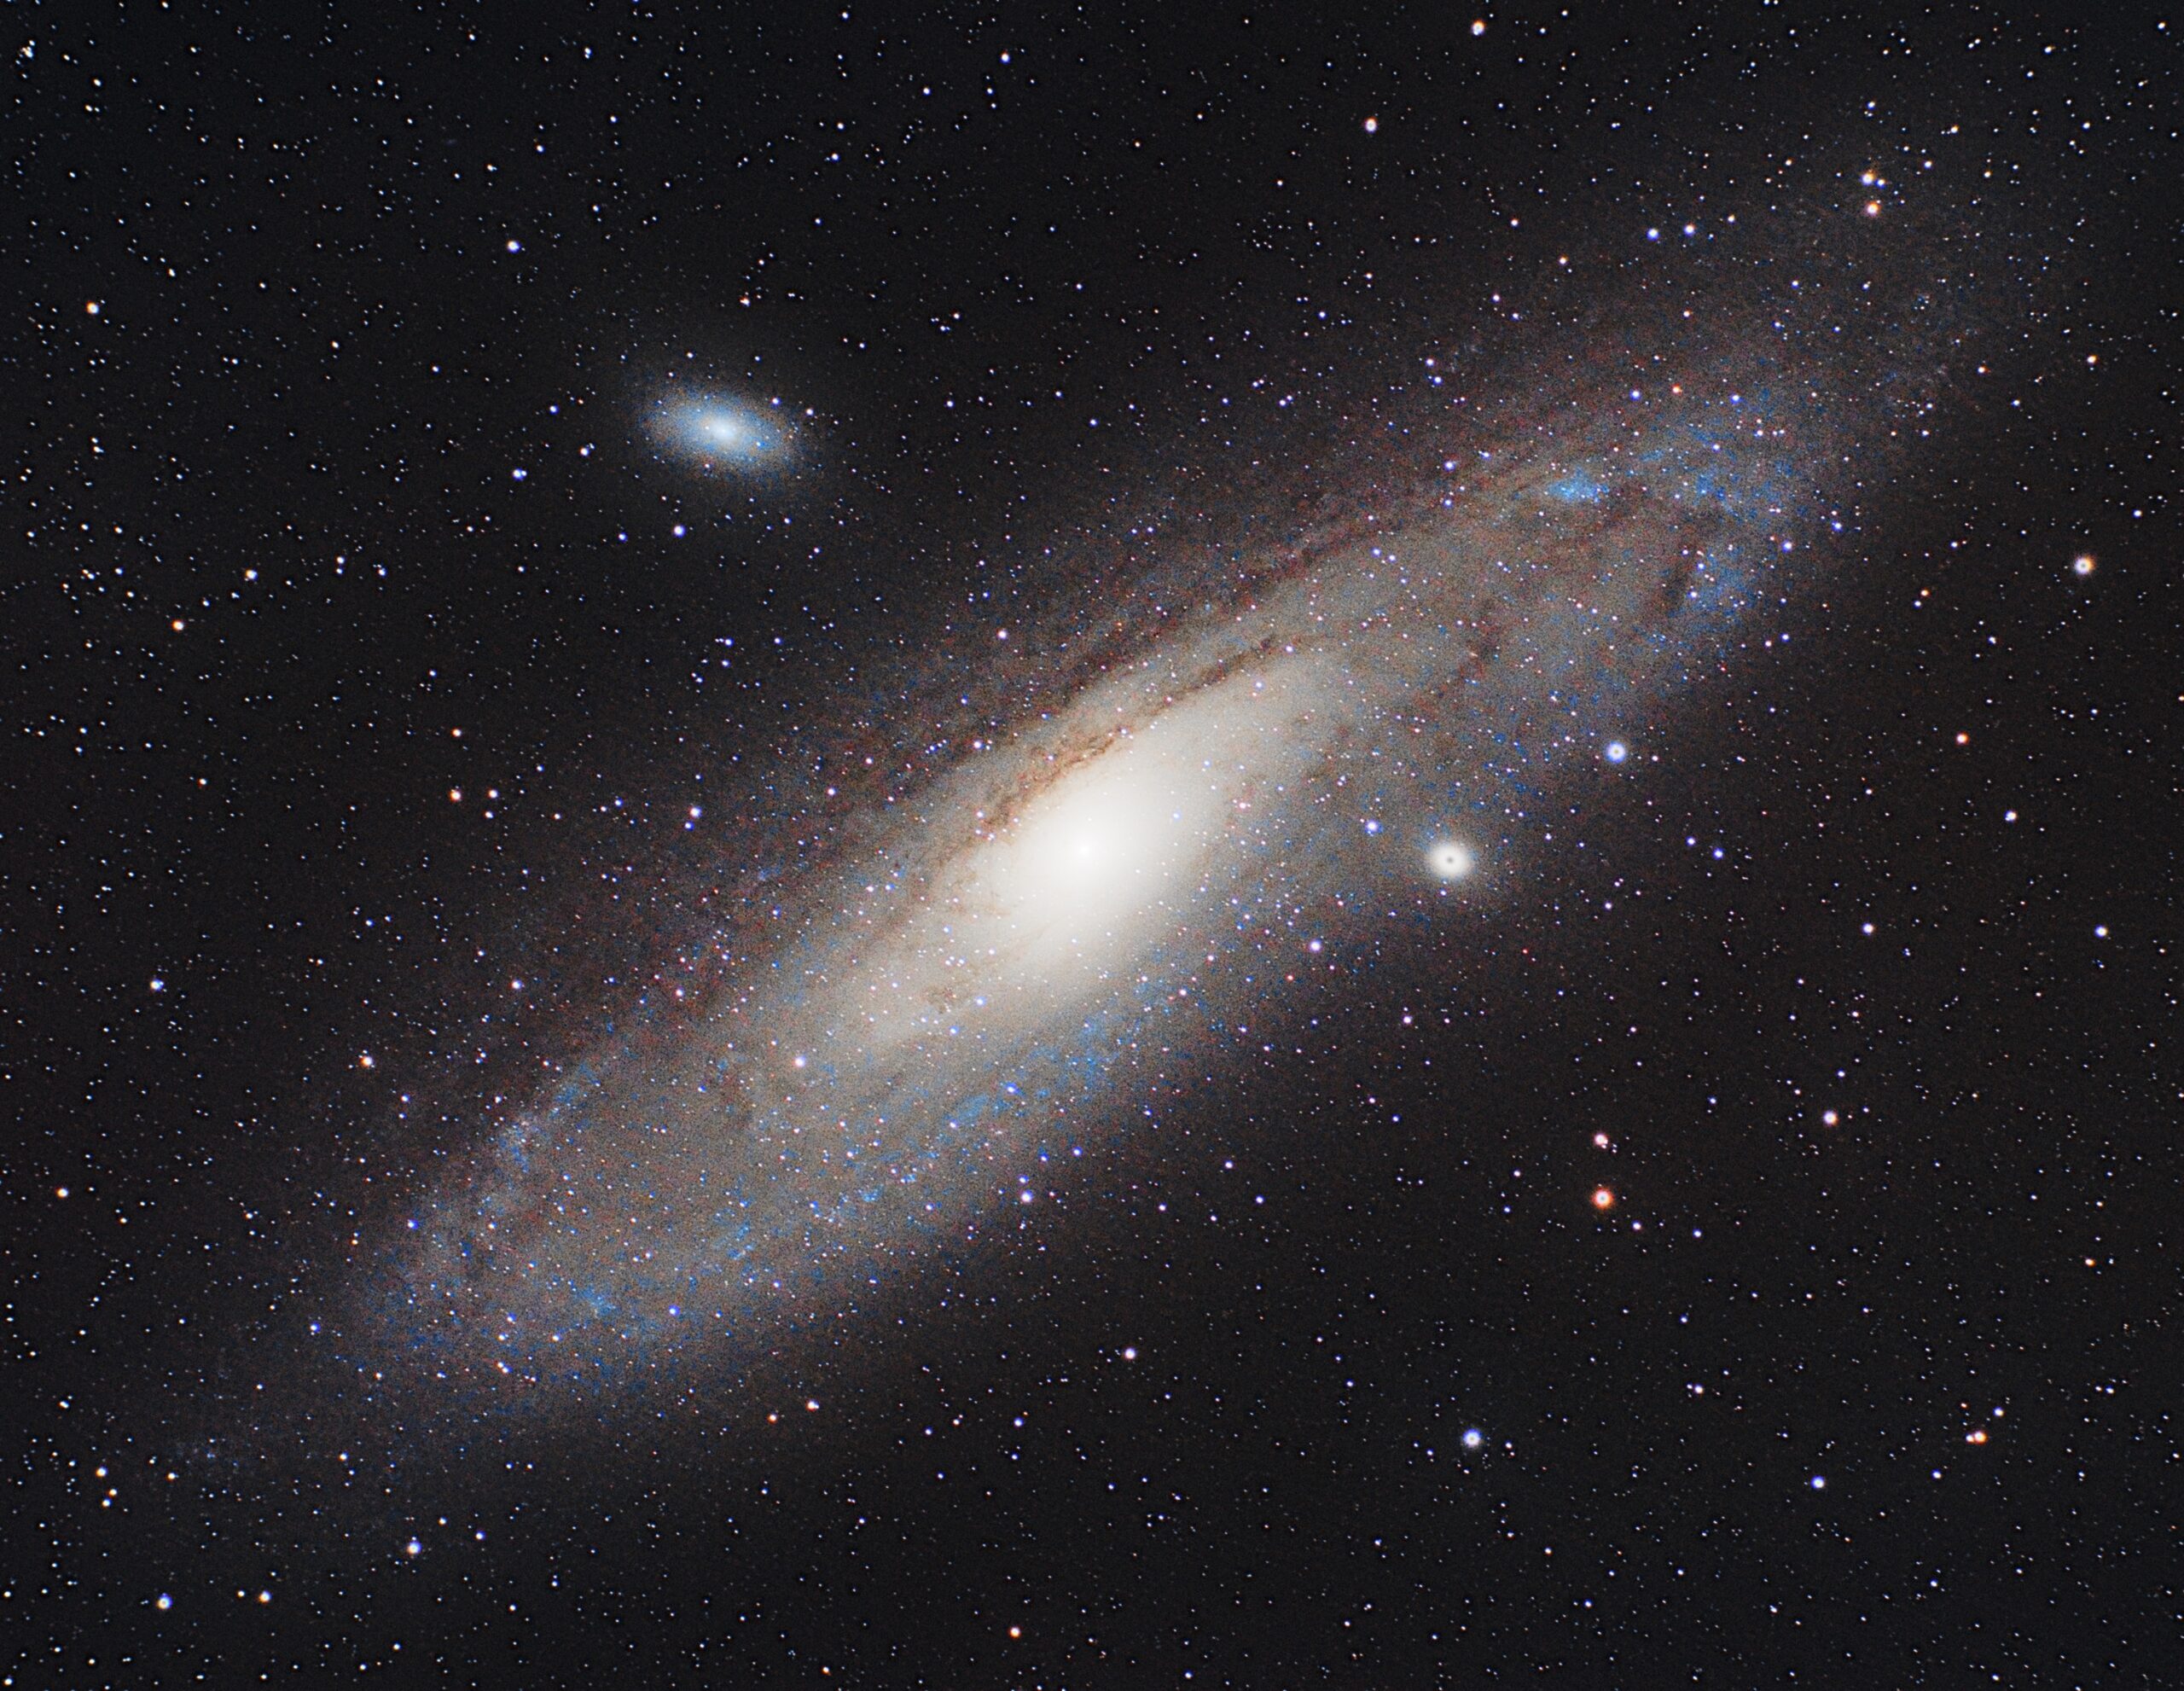
Andromeda Galaxy is the closest visible galaxy to our own, and it's the most photographed galaxy in the astrophotography community. One of the best targets for beginners because it's huge and bright.
Pleiades Star Cluster (M45)
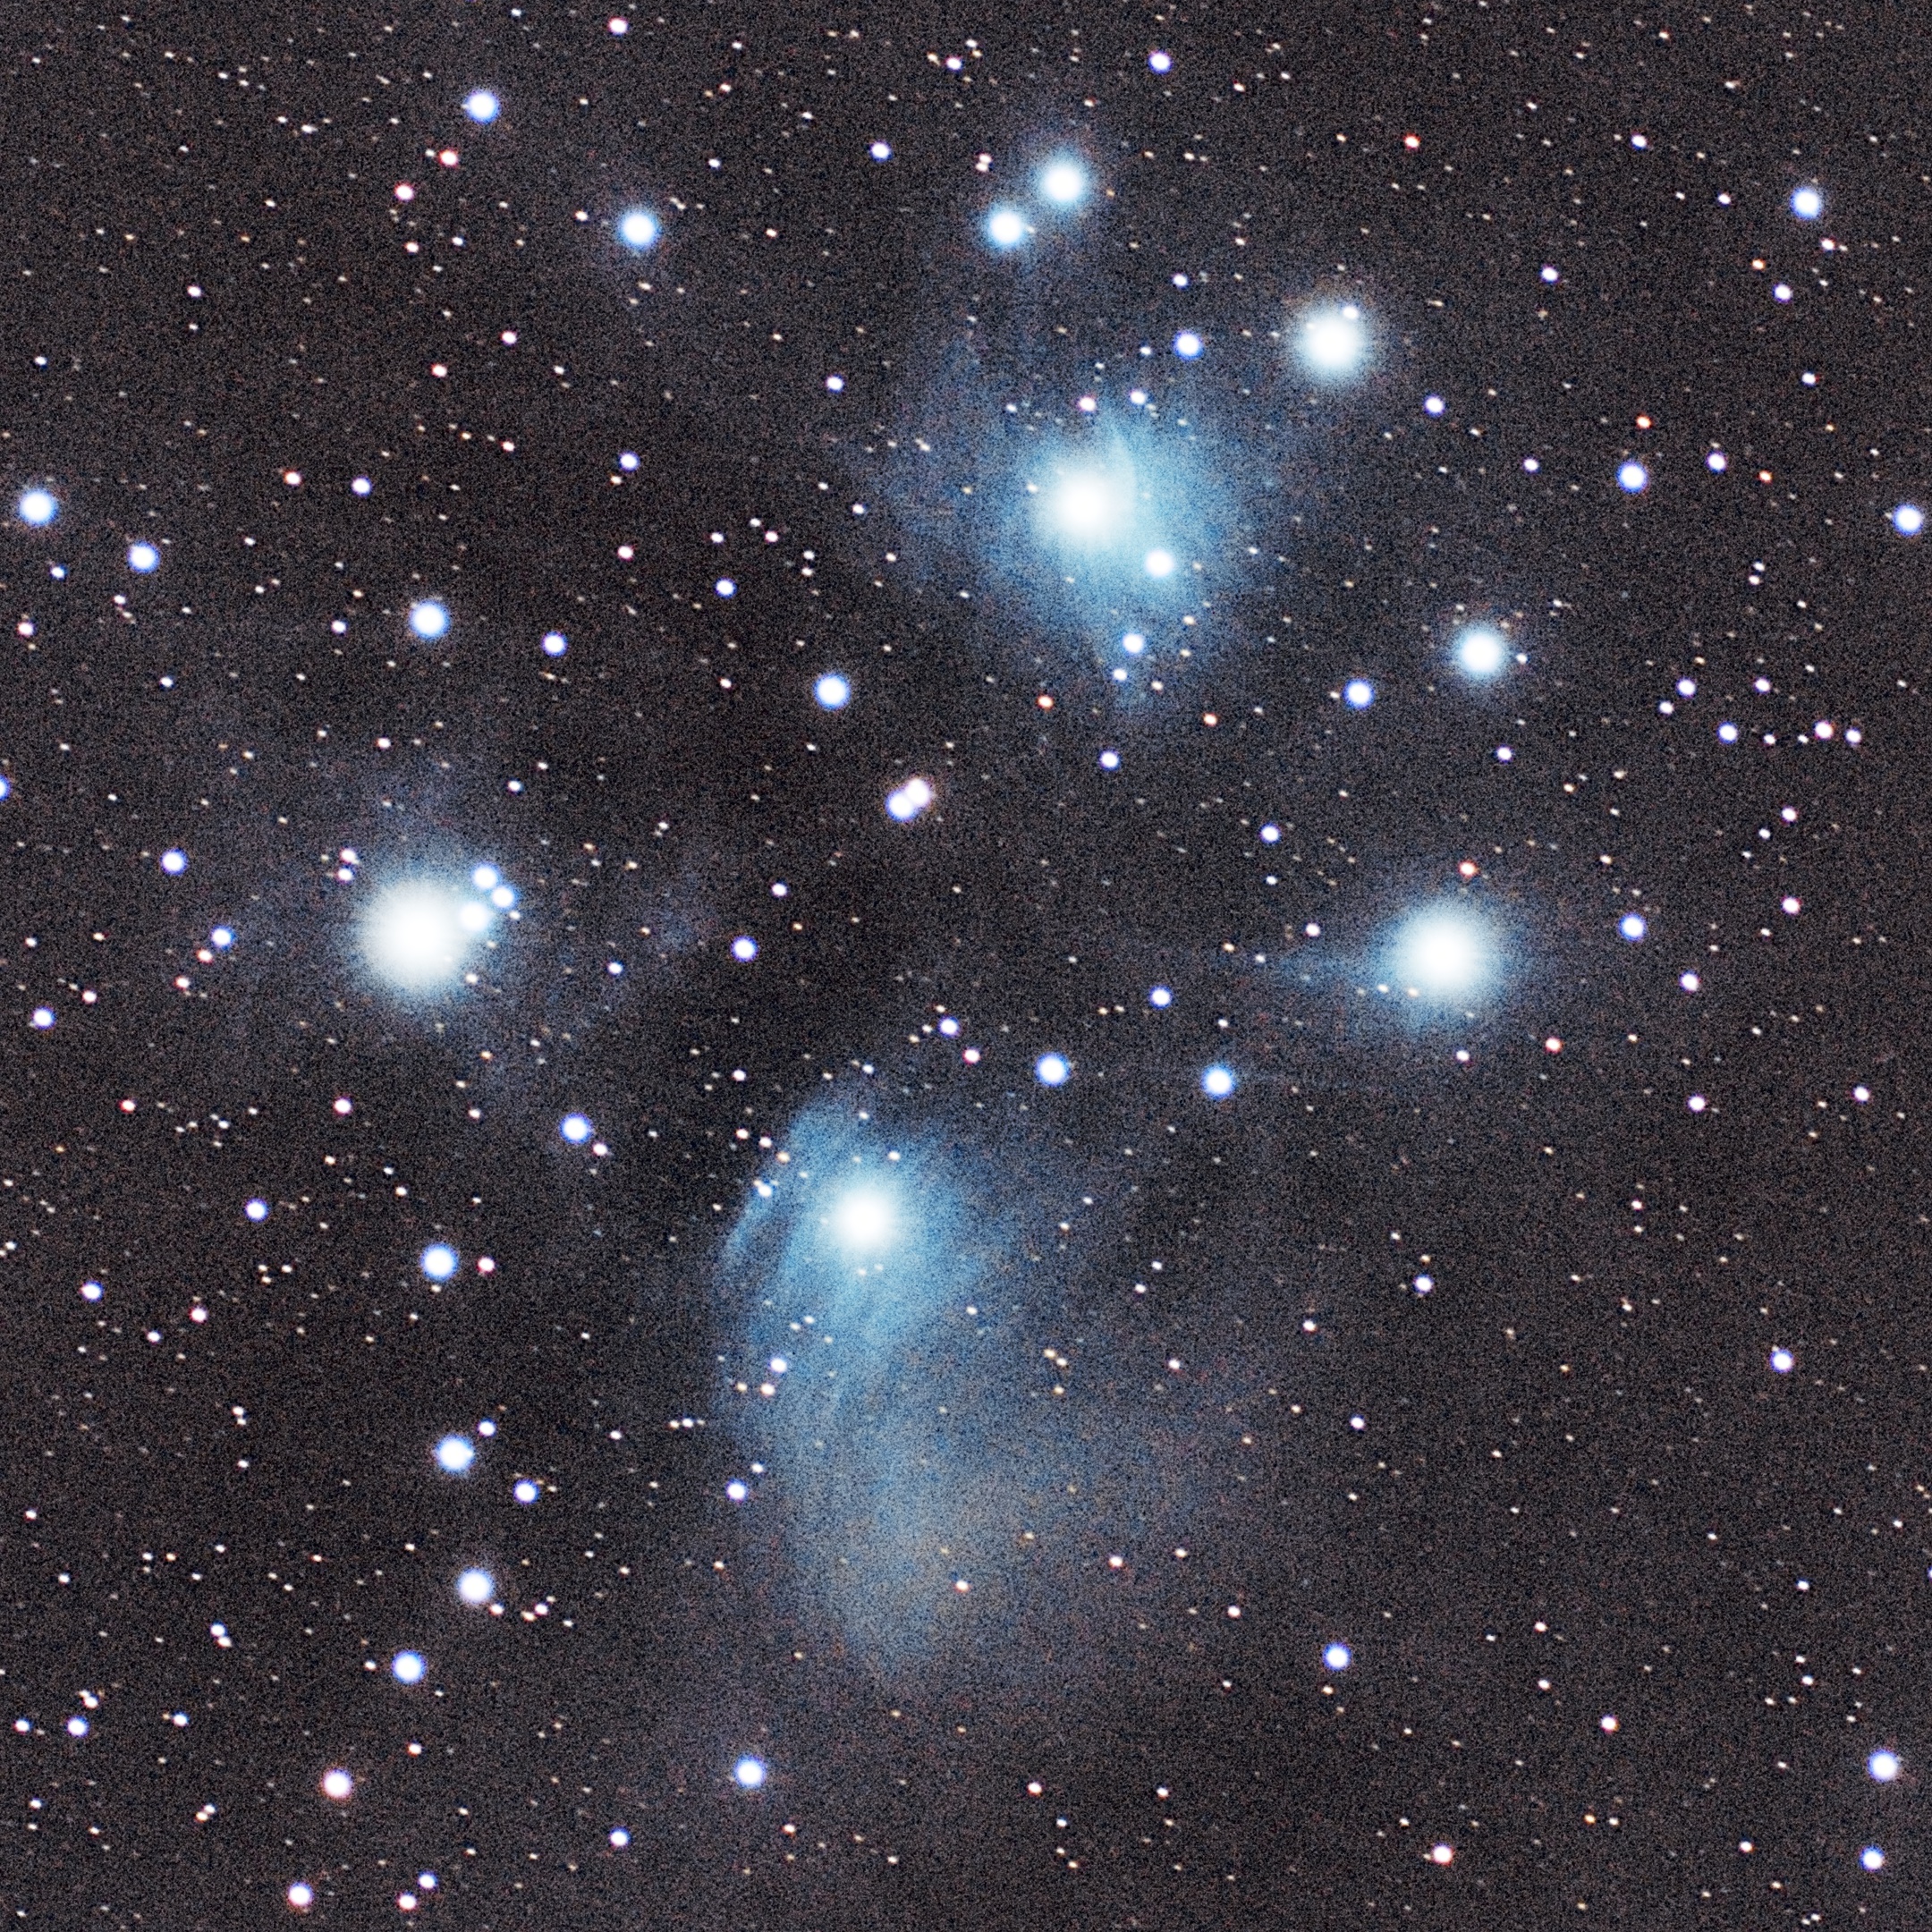
And last but not least, the most famous star cluster - the Seven Sister, also known as the Pleiades Star Cluster. Again, photographing this target should be one of your first astrophotography challenges. Pleiades are so bright that you can see them on your DSLR live screen (and with your eyes)!
I hope my "Astrophotography for Beginners" guide was helpful for you!
Geert
Thanks for this guide, and thanks for the evostar 72ED review.
I was in doubt, but after reading your article I will go for the evostar 72ED.
Greetings.
Paweł Białecki
Hi Geert! How's your imaging with the 72ED after these 9 months?